Lebaron Sedan L4-153 2.5L SOHC Turbo VIN J FI (1991)

Wiper Motor: Testing and Inspection
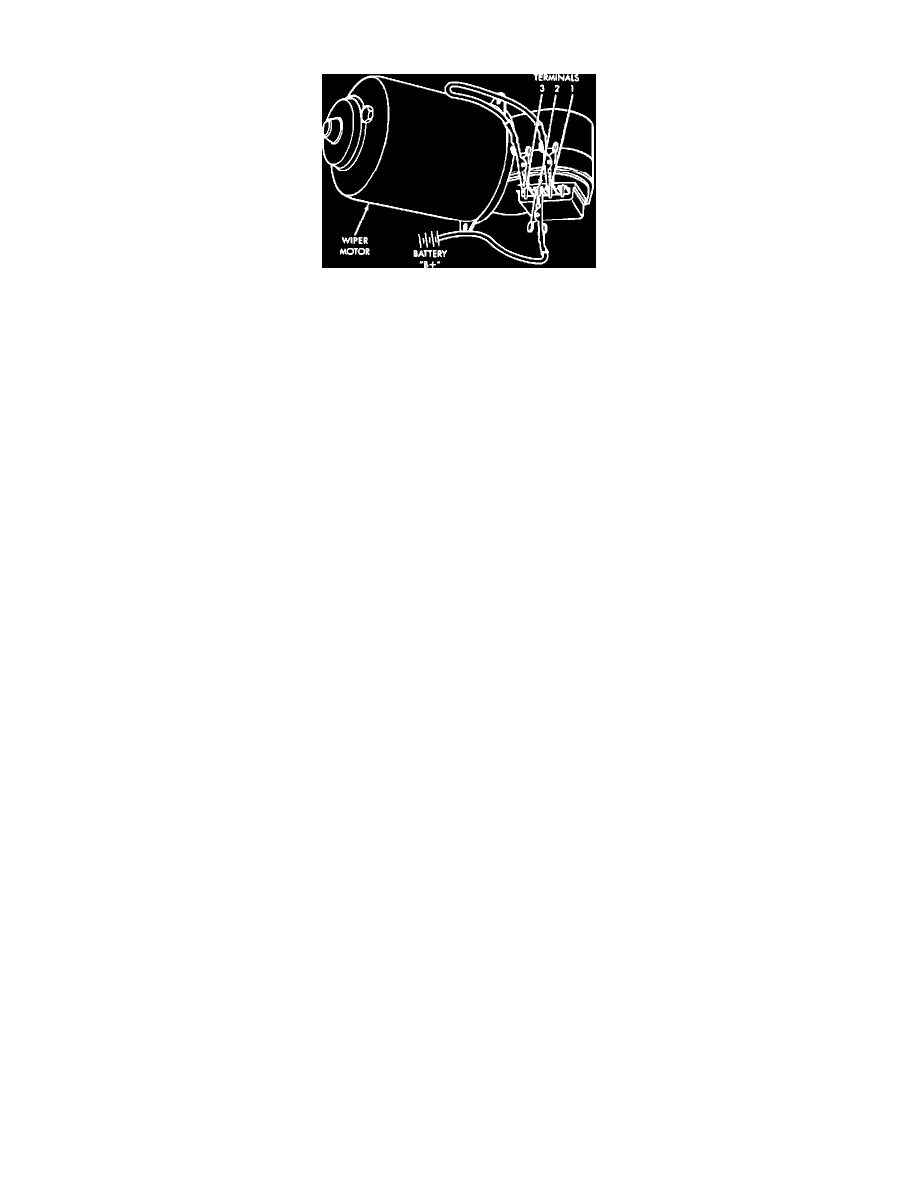
Fig. 20 Wiper Motor Terminal Location
NOTE: Whenever a wiper motor malfunction occurs, first ensure that wiper motor wire harness is properly connected before starting with normal
diagnosis and repair procedures.
MOTOR WILL NOT RUN IN ANY SWITCH POSITION
1. Check for blown fuse.
2. If fuse is not defective proceed to step 6.
3. If fuse is defective, replace and recheck motor operation in all switch positions.
4. If motor is still inoperative and fuse does not blow, proceed to step 6.
5. If replacement fuse blows, proceed to step 15.
6. Place switch in Low speed position.
7. Listen for motor operation sound. If motor sound is not heard, proceed to step 10.
8. If motor sound is heard, check motor output shaft.
9. If shaft is not turning, replace motor assembly. If motor shaft is turning, check for proper connection of drive link or linkage.
10.
Connect a voltmeter between motor terminal 3 and ground.
11.
If no or little voltage is present, move negative test lead to battery ground terminal.
12.
If an increase in voltage is noticed, problem is a bad ground circuit. Ensure motor mounting is free of paint and all attaching bolts are tight.
13.
If there is still no indication of voltage, problem is an open circuit in wiring harness or wiper switch.
14.
If no more than 3 volt increase in voltage is observed, problem is a faulty motor assembly.
15.
Disconnect motor wiring connector and replace fuse.
16.
If fuse does not blow, motor is defective.
17.
If fuse blows, switch or wiring is at fault.
MOTOR RUNS SLOWLY AT ALL SPEEDS
1. Disconnect wiring harness connector at motor.
2. Remove wiper arms and blades.
3. Connect an ohmmeter between battery positive terminal and terminal 3 on motor.
4. If motor runs and average ammeter reading is more than 6 amps, proceed to step 6.
5. If motor runs and average ammeter reading is less than 6 amps, proceed to step 9.
6. Check wiper linkage or pivots for binding. Disconnect drive link from motor.
7. If motor now runs and draws less than 3 amps, repair linkage system.
8. If motor continues to draw more than 3 amps, replace motor assembly.
9. Check motor wiring harness for shorting between high and low speed wires as follows:
a. Connect a voltmeter or test lamp to motor ground strap.
b. Set wiper switch on Low position.
c. Connect other lead to terminal 4 of wiring harness.
d. If voltage is present, there is a short in the wiring or wiper switch. If no voltage is present, proceed to step e.
e. Set switch to high position.
f.
Move voltmeter lead from terminal 4 to terminal 3.
g. If voltage is present, there is a short in the wiring or wiper switch.
MOTOR WILL NOT RUN AT HIGH SPEED, BUT NOT AT LOW SPEED; MOTOR WILL RUN AT LOW SPEED, BUT NOT AT HIGH
SPEED
1. If motor will not run at high speed, place switch in High position and connect a test lamp between motor terminal 4 and ground.
2. If motor will not run on low speed, place switch in Low position and connect a test lamp to motor terminal 3 and ground.
3. If test lamp does not light at motor terminal, there is an open in wiring or switch.
4. If test lamp lights, replace motor assembly.
