
Lebaron Town & Country L4-135 2.2L SOHC Turbo VIN E FI (1985)
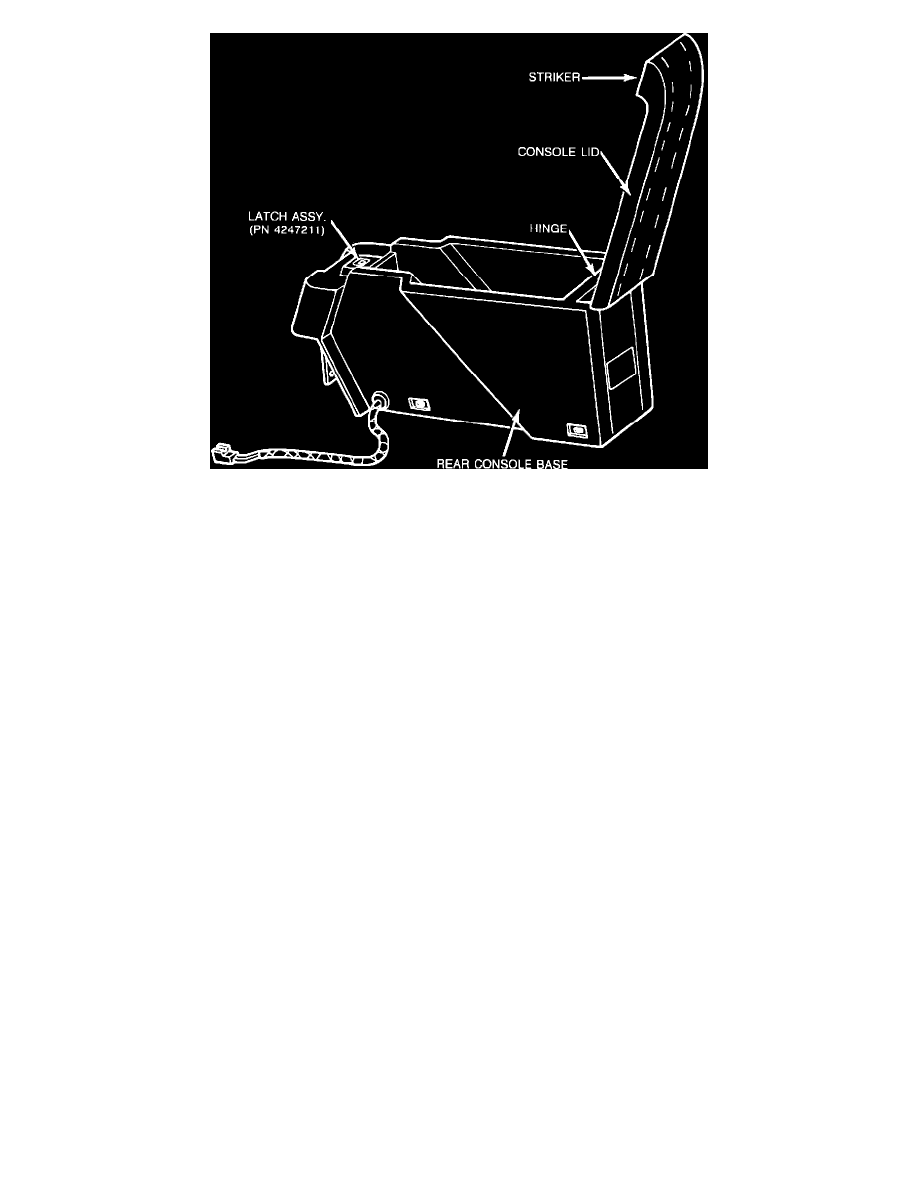
FIGURE 1 - Rear Console Armrest Assembly
1.
Remove broken latch assembly from rear console base (Figure 1).
2.
"Snap" new latch assembly into console base.
3.
Loosen three (3) screws that attach the console lid to hinge.
4.
Carefully place arm rest in down position and adjust lid from side to side until striker is in the center of the latch assembly.
5.
Open lid and tighten the three (3) screws.
6.
Check latch-to-striker alignment by slowly closing console lid.
Striker Replacement
1.
Remove console lid from car by removing the three (3) Phillips head screws.
2.
Place arm rest on protected surface with textured side down.
3.
Using a screwdriver, pry between the arm rest lid and the striker until you can grasp the rivet with a pair of pliers or side cutters.
4.
Pull the two (2) rivets out of the arm rest and remove the striker.
5.
Drill out the rivet holes in both the arm rest lid and the new striker using a 3/16" drill bit.
CAUTION:
USE EXTREME CARE NOT TO DRILL DEEPER THAN 1/4" INTO THE ARM REST.
6.
Fasten the new striker to the arm rest using the 3/16" pop rivets.
7.
Install the arm rest to the console with the three (3) Phillips screws. Do not tighten screws until striker is aligned to latch assembly.
8.
Carefully place arm rest in down position and adjust lid from side to side until striker is in the center of the latch assembly.
9.
Open lid and tighten the three (3) screws.
10.
Check latch-to-striker alignment by slowly closing console lid.
POLICY:
Reimbursable within the provisions of the warranty