
Lebaron Town & Country L4-135 2.2L SOHC VIN D TBI (1986)
b.
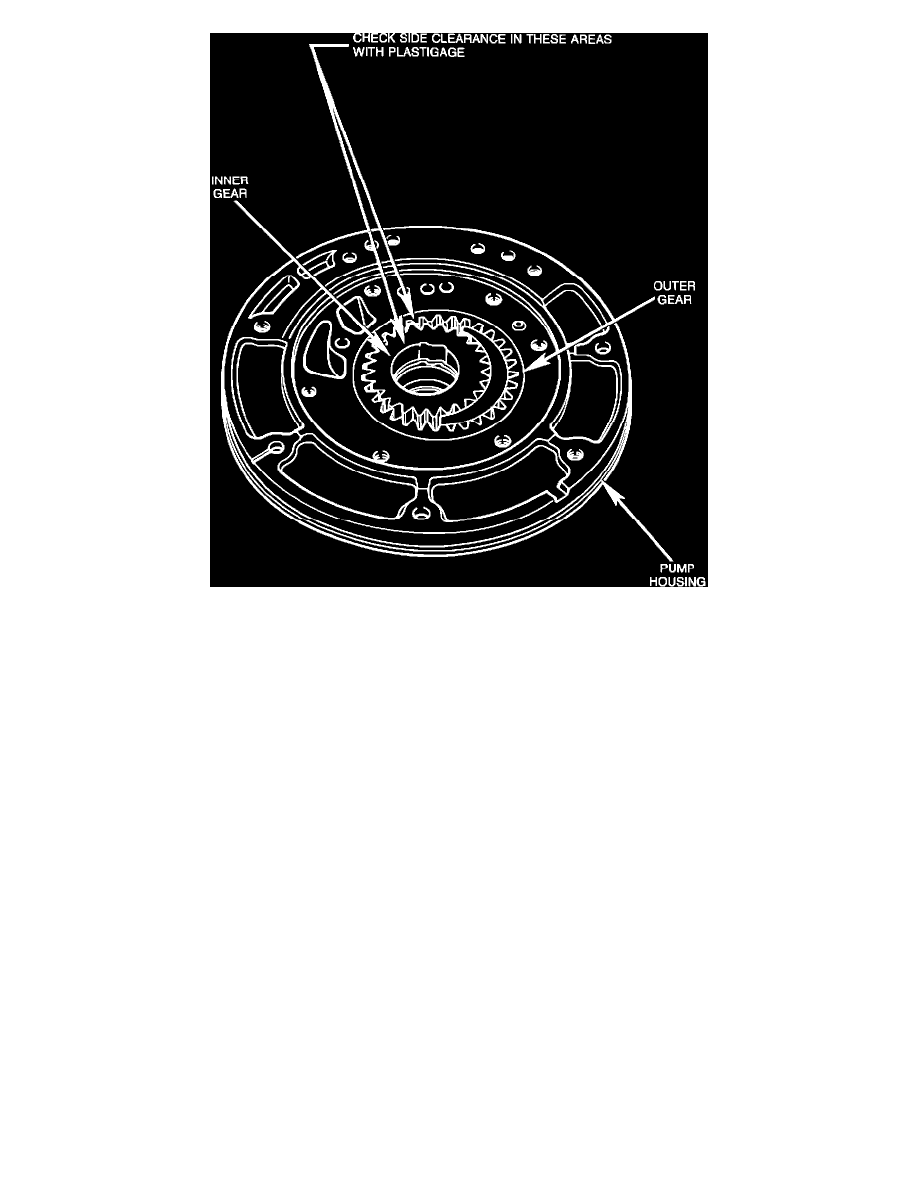
Clean all oil from the housing, reaction shaft support, and rotor. (Oil will cause the plasti-gauge to dissolve.) Place plasti-gauge on the inner and
outer rotor as shown in Figure 1.
c.
Reassemble the pump with at least three bolts, being careful not to twist the components and smear the plasti-gauge.
d.
Again, carefully remove the reaction shaft support.
e.
Using the scale on the plasti-gauge package, measure the clearance. The clearance should be .0008" to .0038".
Replace the pump assembly if the clearance is above these limits.
NOTE:
THE NEW PUMP MUST BE CHECKED FOR PROPER CLEARANCE PRIOR TO INSTALLATION. IF CLEARANCES
ARE ABOVE THE LIMITS, DON'T USE THE PUMP.
If plasti-gauge is not available, then the straight edge method as described in the service manual may be used to check the rotor clearance:
a.
Remove the reaction shaft from the pump assembly.
b.
Place a straight edge on the pump face.
Measure the rotor clearance on both rotors. The clearance, when measured by this method, is .0008" to .0018". If clearance is above these limits,
replace the pump assembly.
3.
Install a checked front pump assembly using new gaskets. Torque the bolts to 275 inch pounds.
4.
Reinstall transaxle and refill to proper level with Mopar-type 7176 Automatic Transmission Fluid, PN 4318007.
5.
Road test the vehicle and check transaxle operation.
POLICY:
Reimbursable within the provisions of the warranty
TIME ALLOWANCE:
Labor Operaton No.
21-60-05-90 - Omni, Horizon
3.8 Hrs.