Lebaron Town & Country L4-156 2.6L SOHC VIN G 2-bbl (1984)

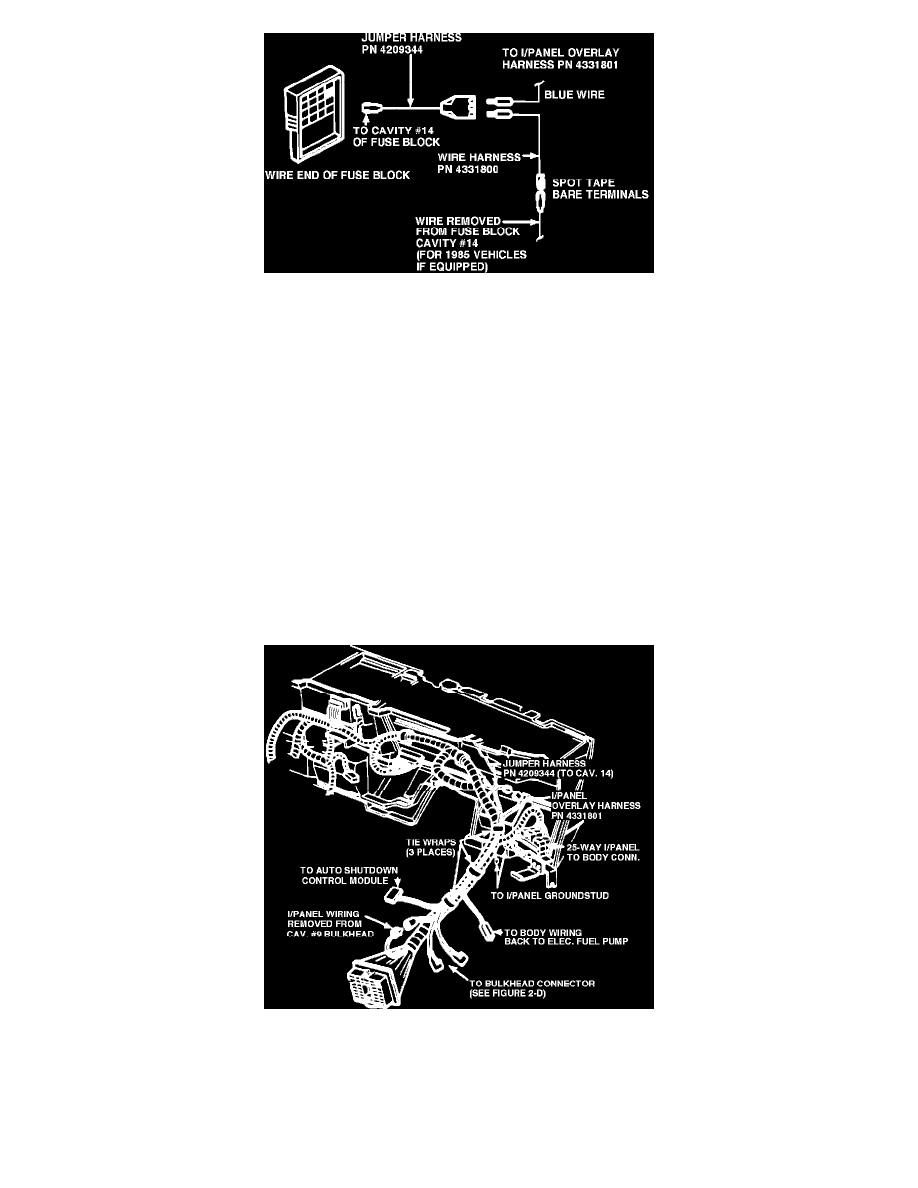
FIGURE 2-C - INSTRUMENT PANEL WIRING
7.
Insert the bare terminal (blue wire) from overlay harness, PN 4331801, into wiring jumper harness, PN 4209344. Install the bare terminal
from the jumper harness, PN 4209344, into cavity #14 of the fuse block (Figure 2-C).
NOTE:
SOME 1983-1984 VEHICLES MAY ALREADY BE EQUIPPED WITH JUMPER HARNESS, PN 4209344, IN CAVITY
#14 OF FUSE BLOCK. IF SO, DISCARD JUMPER HARNESS, PN 4209344, SUPPLIED IN KIT.
SOME 1985 VEHICLES HAVE A WIRE ALREADY IN CAVITY #14. IF SO, REMOVE WIRE FROM CAVITY #14
AND CONNECT TO ACCESSORY FEED HARNESS, PN 4331800, SUPPLIED WITH KIT (TAPE CONNECTION OF
BARE TERMINALS). INSTALL OPPOSITE END OF THE ACCESSORY FEED HARNESS, PN 4331800, INTO
JUMPER HARNESS, PN 4209344 (FIGURE 2-C).
8.
Install 10 amp fuse, PN 6101135, supplied in kit into cavity #14 of the fuse block.
NOTE:
CERTAIN 1983-1985 VEHICLES HAVE A 6-AMP CIRCUIT BREAKER IN CAVITY #14 OF THE FUSE BLOCK.
LEAVE THE CIRCUIT BREAKER IN CAVITY #14 AND DO NOT USE THE SUPPLIED 10 AMP FUSE.
9.
Reinstall passenger side of bulkhead connector back into dash opening. Be sure it snaps in place.
10.
Install the fuse block onto the mounting bracket.
FIGURE 2-A - INSTRUMENT PANEL WIRING
11.
Allow the black 2-way connector of harness PN 4331801 to hang down along the left side cowl for mating with the body overlay harness
(Figure 2-A).
12.
Connect the overlay harness, PN 4311801, ground terminal to the instrument panel ground stud (located behind the fuse block) and secure
with the supplied nut, PN 6023201 (Figure 2-A).
