
LHS V6-3.5L VIN G (1998)
Radiator Cap: Testing and Inspection
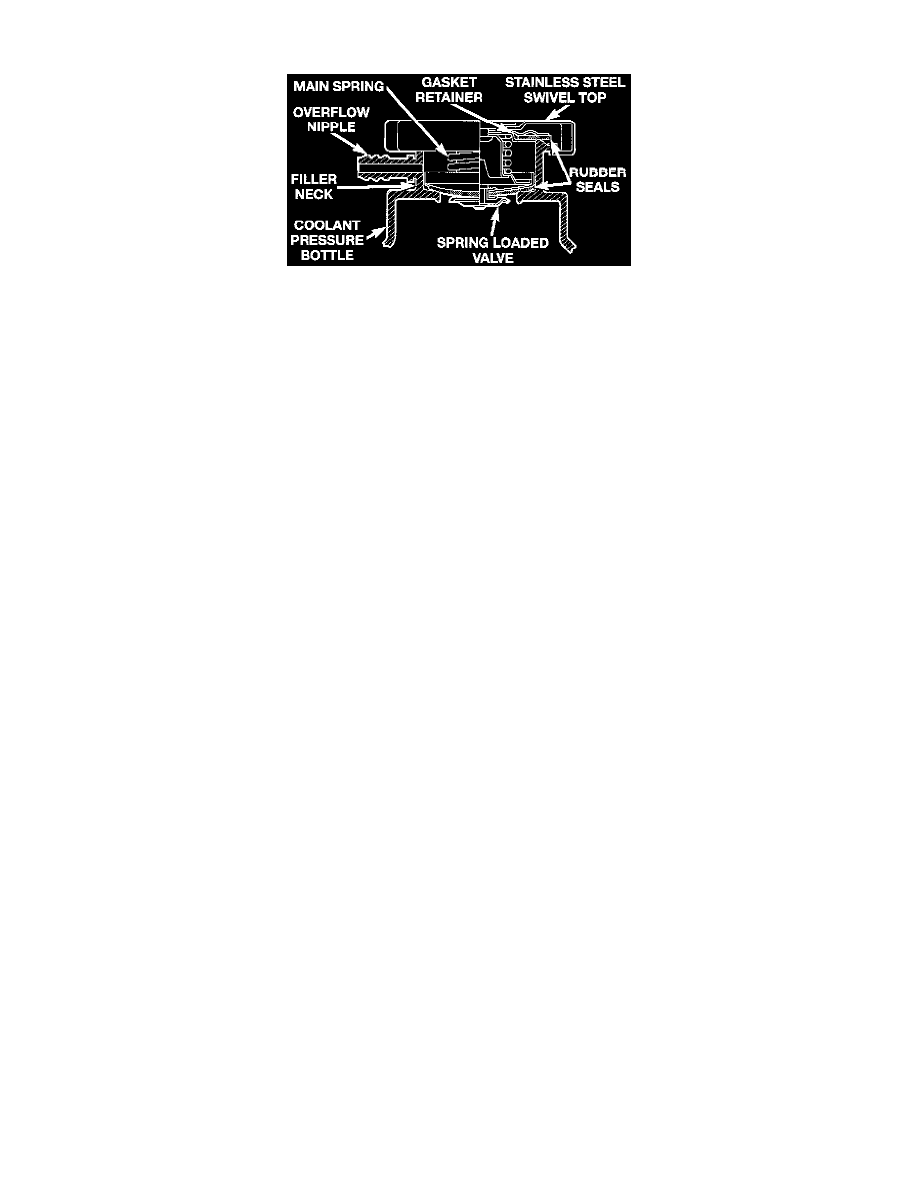
Figure 36-Pressure Cap
The pressure cap upper gasket (seal) pressure relief can be checked by removing cap. Attach the Radiator Pressure Tool to the cap and pump air into the
cap. Pressure cap upper gasket should relieve at 124 kPa (18 psi) and hold pressure at 110 kPa (16 psi) minimum.
Remove the pressure tester hold the cap in hand, right side up. The vent valve at the bottom of the cap should not open. If the rubber gasket has swollen
and prevents the valve from closing, replace the cap.
Hold the cleaned cap in hand upside down. If any light can be seen between vent valve and rubber gasket, replace cap.
WARNING: The warning words do not open hot on the coolant bottle pressure cap is a safety precaution. when hot, pressure builds up in
cooling system. To prevent scalding or injury, the coolant bottle pressure cap should not be removed while the system is hot and/or under
pressure.
There is no need to remove the pressure cap at any time except for the following purposes:
-
Checking and adjust antifreeze freeze point.
-
Refilling system with new coolant.
-
Conducting service procedures.
-
Checking for vacuum leaks.
WARNING: If vehicle has been run recently, wait 15 minutes before removing cap. then place a shop towel over the cap and without pushing
down rotate it counterclockwise to the first stop. Allow fluids to escape through the overflow tube and when the system stops pushing out coolant
and steam and pressure drops, remove the cap completely. Squeezing the radiator inlet hose with a shop towel (to check pressure) before and after
turning to the first stop is recommended.