LHS V6-3.5L VIN G (1998)

Housing Assembly HVAC: Service and Repair
Heater-A/C Housing Removal and Installation
REMOVAL
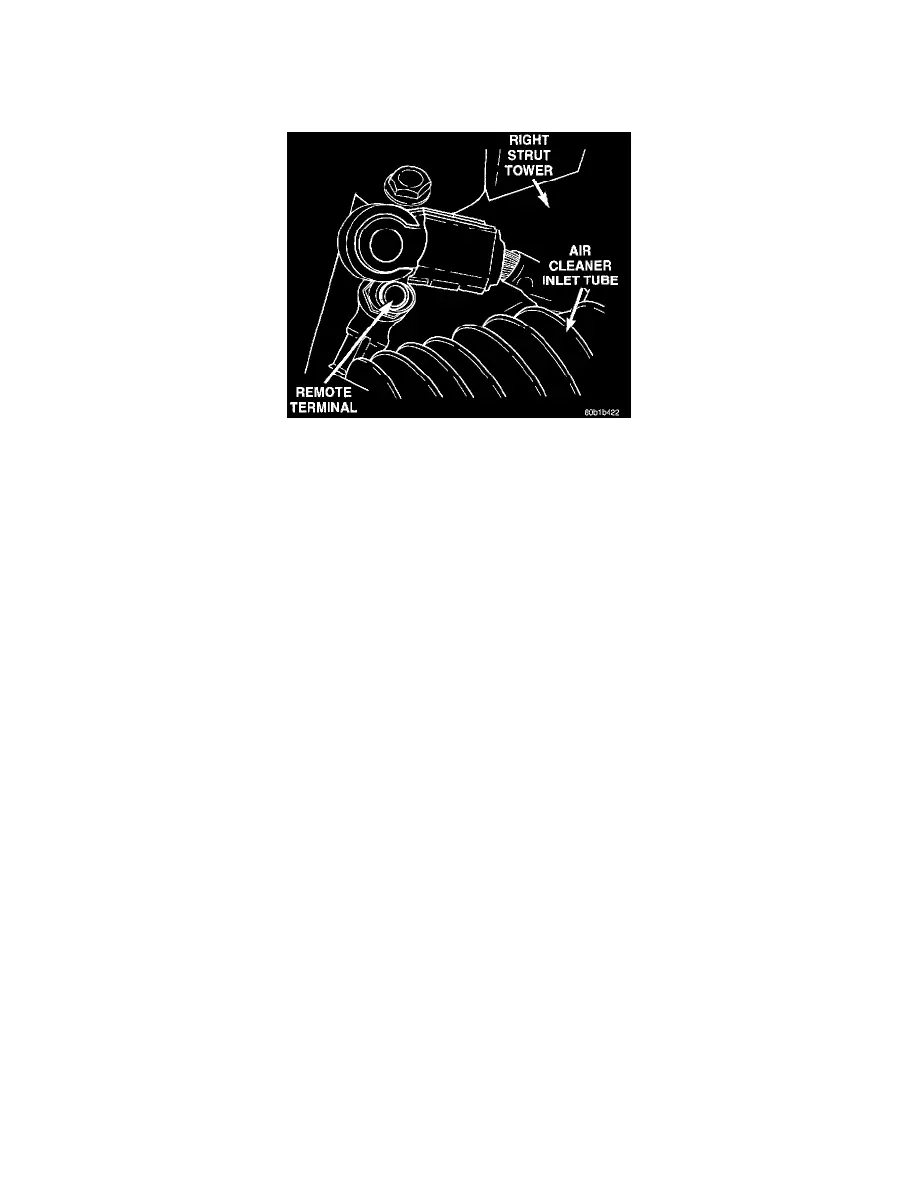
Negative Battery Cable Remote Terminal
1. Open hood and disconnect the negative battery cable remote terminal from the remote battery post. This must be done to prevent accidental air bag
deployment.
Remove instrument panel from vehicle. Refer to: Body and Frame, Interior Trim Dashboard/Instrument Panel, Service and Repair,
Instrument Panel Assembly Replacement, See: Body and Frame/Interior Moulding / Trim/Dashboard / Instrument Panel/Service and
Repair/Instrument Panel Assembly Replacement
2. Using an A/C recovery unit, remove all R-134a refrigerant from the A/C system. Refer to: Heating and Air Conditioning, Service and Repair,
Refrigerant System Evacuate, See: Service and Repair/Refrigerant System Evacuate
3. Drain the engine cooling system.
4. Remove air cleaner hose and air distribution duct from the engine.
5. Remove spring type fasteners to heater hoses at the dash panel and remove hoses from heater core. Plug the heater core inlet and outlet tubes to
prevent anti-freeze from spilling on the vehicle interior during removal. If an appropriate plug cannot be found pull back carpet and use caution
when removing unit. Keep the heater tubes elevated to prevent spillage of coolant.
6. Remove one nut at expansion valve retaining both A/C lines to expansion valve. After removing lines cap the expansion valve openings and the
A/C hose openings. This will prevent any dirt or moisture from entering the refrigerant system during servicing.
CAUTION: The lubricant used in this air conditioning system absorbs moisture readily (similar to brake fluid). Do not leave any portion of the
system open for extended periods of time.
7. Remove the three retaining nuts from the studs. These studs project through the dash panel into the engine compartment.
8. Remove two screws to defrost duct and remove.
9. Remove two nuts, two screws attaching HVAC housing to dash panel.
10. Remove four nuts retaining rear seat heat duct and remove.
11. Remove rear seat heat duct elbow push pin fastener.
12. Disconnect HVAC harness connector.
13. Gently pull HVAC unit housing rearward from dash panel, being careful not to spill any coolant into passenger compartment.
INSTALLATION
-
For installation, reverse the above procedures.
