
LHS V6-3.5L VIN G (1998)
Compass: Service and Repair
Service Procedures
Compass Calibration
Do not attempt to calibrate the compass near large metal objects such as other vehicles, large buildings or bridges. Remove all magnetic devices from
roof panel. This compass is equipped with an auto-calibration feature which eliminates the need to manually set compass calibration. For a short time
when the vehicle is new, the compass may appear erratic and the CAL symbol will be lit. After completing 3 complete 360 degree turns at 5 mph, in
an area free of metal objects and on level ground, the CAL symbol will turn off and the compass will perform normally.
If at any time the compass should become inaccurate it can be put in auto-calibration mode by using the following procedure.
1. Turn key to the ON position.
2. Press C/T button to select the Compass/Temperature display.
3. Press and hold RESET button for 5 seconds. The VAR symbol will light. While continuing to hold the RESET button for about 10 seconds, the
CAL symbol will light.
4. Drive the vehicle through 3 complete 360 degree turns, in an area free of metal objects and in no less than 48 seconds, the compass will be
calibrated.
5. The OTIS will extinguish the CAL label.
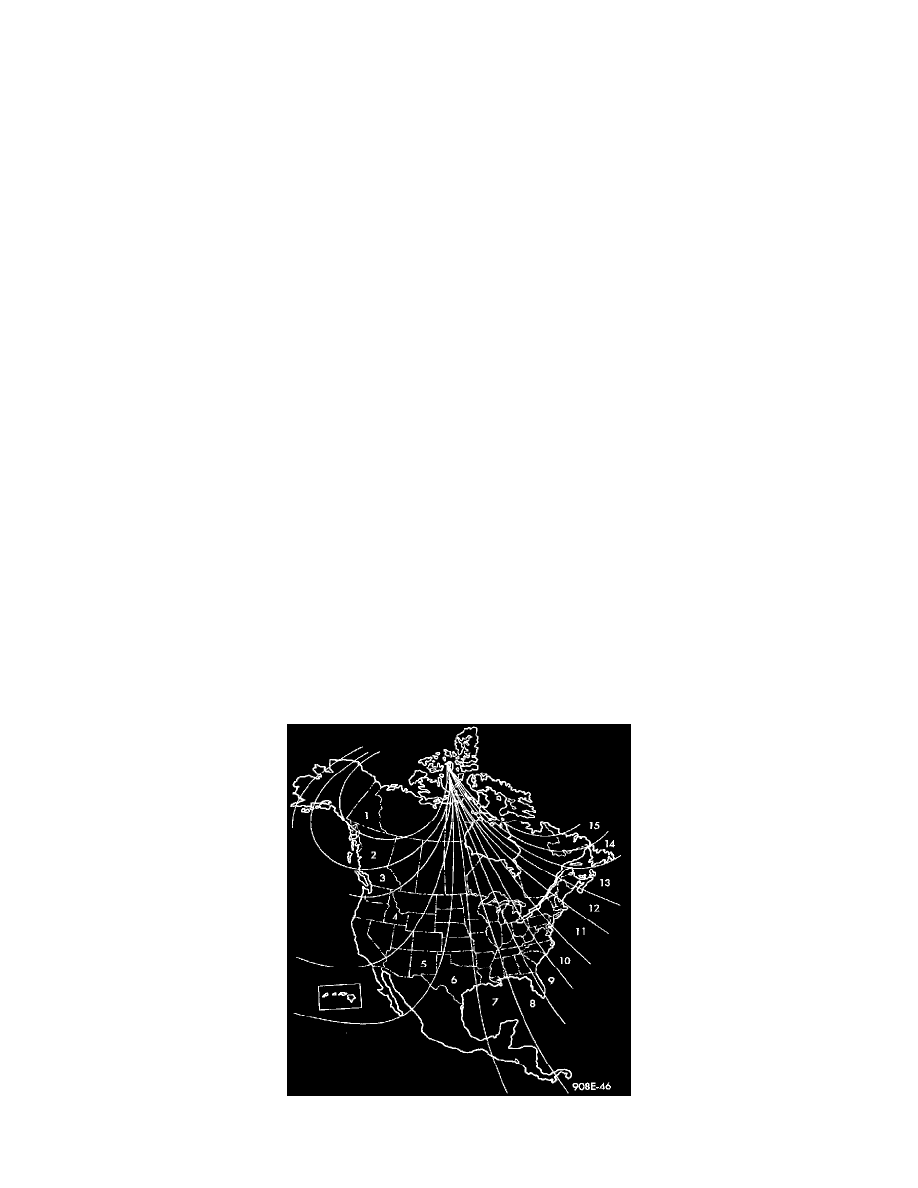
6. Reset compass variance. The calibration procedure automatically sets the variance to 8. If you are in an area with a variance number other than 8
you must reset the variance.
Demagnetizing Procedure
Do not attach magnetic devices such as magnetic CB antennas to the vehicle roof. They can cause the compass to give false readings.
Every vehicle has its own magnetic field. This magnetic field is created by the various processes a steel roof goes through when the vehicle is
built. A magnetic field can also be created if the roof is subjected to a magnet, example magnetic CB antenna, magnetic tipped screwdriver, etc. If
the roof becomes magnetized use a demagnetizing Tool 6029 to demagnetize the roof.
In this demagnetizing procedure you will use the demagnetizing tool to demagnetize the roof. It is important that you follow the instructions below
exactly
1. Be sure the ignition switch is in the OFF position before you begin the demagnetizing procedure.
2. Place an 8 1/2 in. X 11 in. piece of paper lengthwise on the roof of vehicle directly above compass. The purpose of the paper is to protect the
roof panel from scratches and define the area to be demagnetized.
3. Plug in the demagnetizing tool, keeping it at least two feet away from the OTIS.
4. Slowly approach the center of the roof panel at the windshield with the demagnetizing tool plugged in.
-
Contact the roof panel with the tip of the tool.
-
Use slow sweeping motions of 1/2 inch between sweeps.
-
Move the tool about four inches either side of the centerline, and at least 11 inches back from the windshield.
5. With the demagnetizing tool still energized, slowly back away from the roof panel until the tip is at least two feet from the roof before
unplugging the tool.
6. Recalibrate compass and set variance.
Variance Zone Map