
New Yorker V6-181 2972cc 3.0L SOHC VIN 3 FI (1989)
Brake Fluid Accumulator: Service and Repair
Accumulator Replacement
REMOVAL
1.
With the ignition in the OFF position, disconnect the negative battery cable.
2.
Depressurize hydraulic accumulator as outlined under MAINTENANCE PROCEDURES.
WARNING: Failure to depressurize hydraulic accumulator, prior to performing this operation, may result in personal injury and/or
damage to painted surfaces.
3.
Remove the hydraulic assembly from the vehicle (see HYDRAULIC ASSEMBLY in this section).
4.
Using a # 30 TORX bit in good condition, carefully remove the accumulator from the hydraulic assembly by removing the two (2) TORX screws
underneath the base of the accumulator.
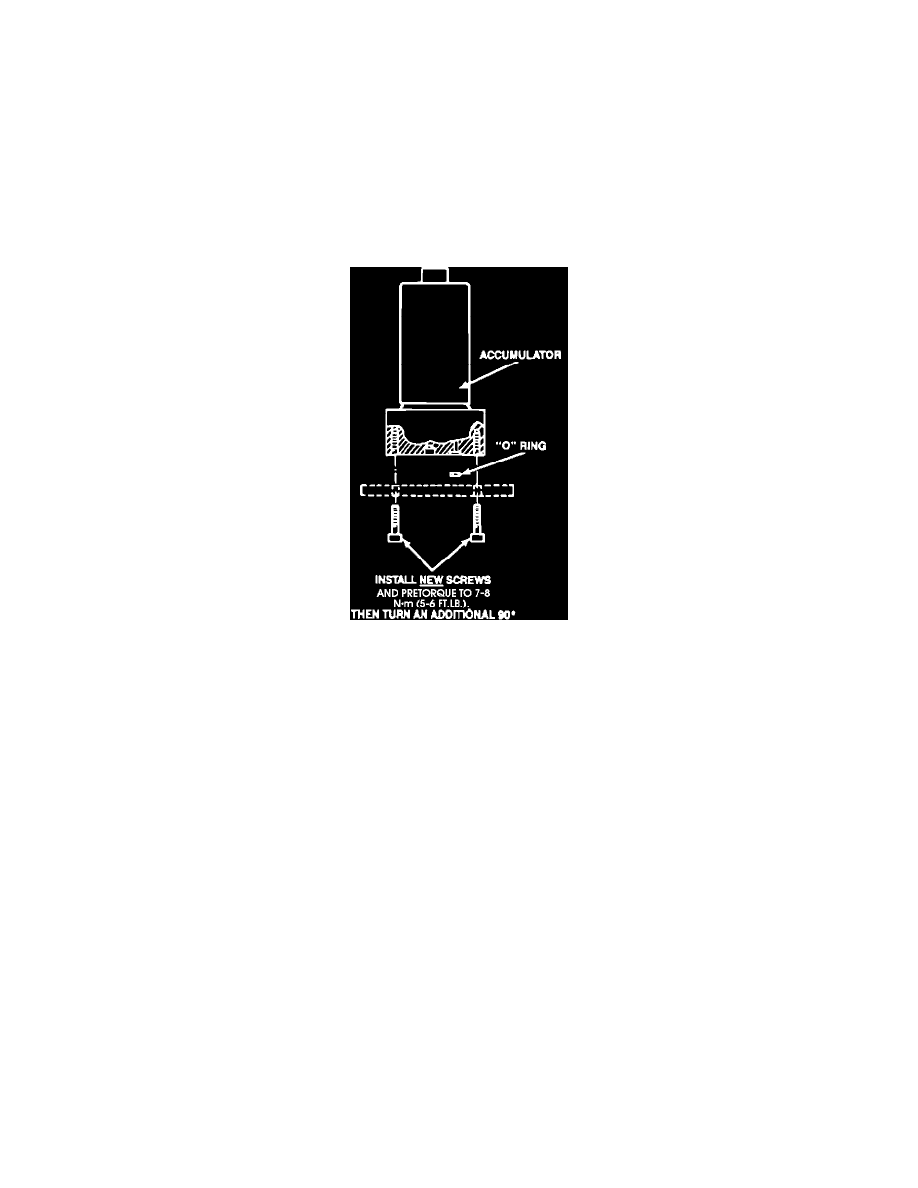
Hydraulic Accumulator Replacement
INSTALLATION
1.
Clean the hydraulic assembly in the area of the base of the accumulator, being careful not to get dirt or cleaning fluid in the fluid port.
2.
Lubricate O-ring with clean brake fluid and install on base of accumulator.
3.
Install accumulator to hydraulic assembly using new M6 screws provided in the package and torque to 5-6 ft.lbs. (7-8 Nm).
4.
After torquing, turn both screws an additional 90 ° (1/4) turn.
5.
Reinstall the hydraulic assembly in the vehicle per the service manual instructions.
6.
Bleed the brake system using fresh, clean brake fluid.
7.
Install the negative battery cable.
8.
Restore brake fluid to proper level.
9.
Inspect for leaks and verify proper operation.