
New Yorker V6-181 2972cc 3.0L SOHC VIN 3 FI (1989)
1.
Disconnect the negative battery cable.
2.
Discharge the Hydraulic Accumulator assembly by pumping the brake pedal AT LEAST 25 times.
3.
Referring to the Brake Section of the appropriate service manual, remove the Hydraulic Assembly from the vehicle.
4.
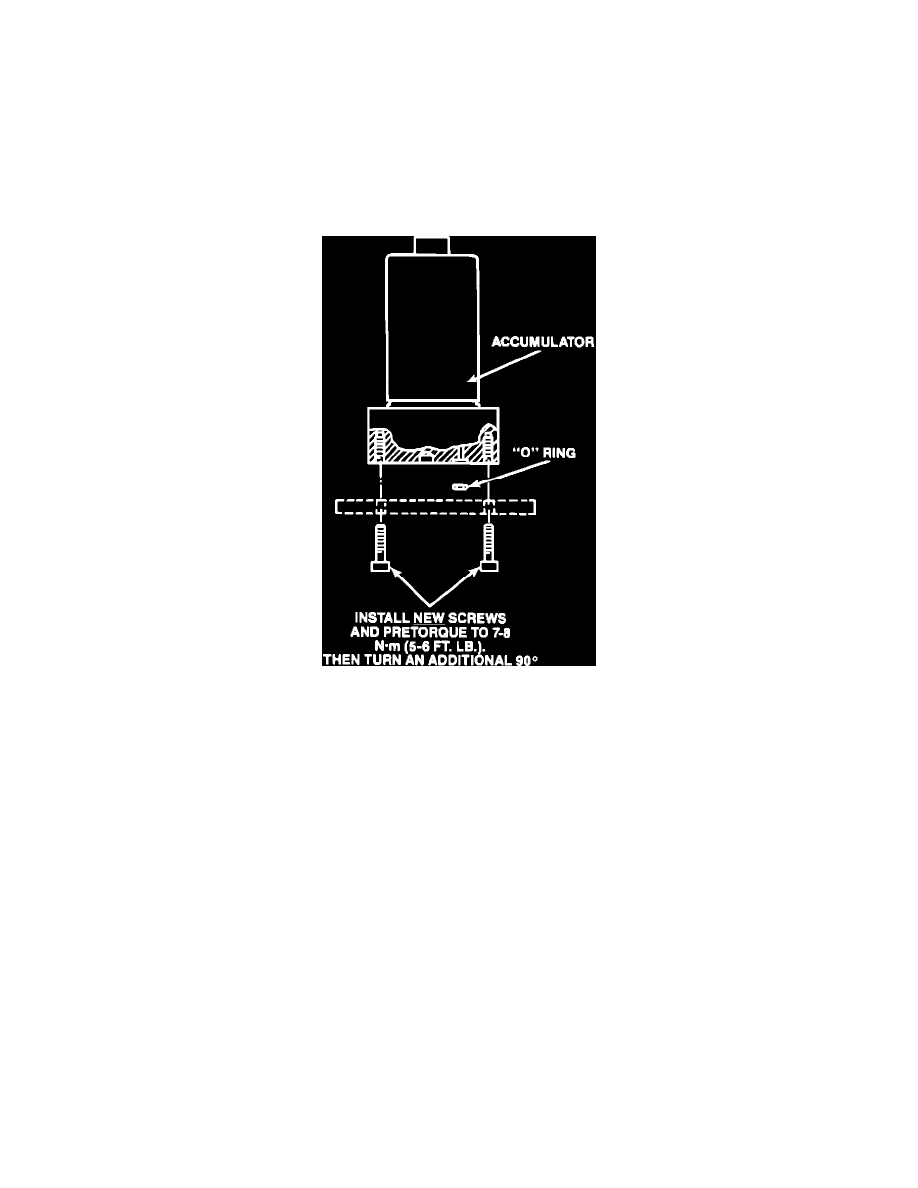
Using a # 30 TORX bit in good condition, carefully remove the Accumulator from the Hydraulic Assembly by removing the two TORX screws
underneath the base of the Accumulator.
5.
Clean the Hydraulic Assembly in the area of the base of the Accumulator, being careful not to get dirt or cleaning fluid in the fluid port.
Figure 1
6.
Lubricate O-Ring with clean brake fluid and install on base of accumulator, see Figure 1.
7.
Install Accumulator to Hydraulic Assembly using new M6 screws provided in the kit and pretorque to 7-8 N-m (5-6 ft.lbs.).
8.
After pretorquing, turn both screws an additional 90~ (1/4 turn).
9.
Reinstall Hydraulic Assembly in vehicle per service manual instructions.
10.
Bleed the brake system using fresh, clean brake fluid.
11.
Reinstall negative battery cable.
12.
Inspect for leaks and verify proper operation.
13.
Restore brake fluid to proper level.
POLICY:
Reimbursable within the provisions of the warranty.
TIME ALLOWANCE:
Labor Operation No. 05-60-02-90
. . . . . . . . . . . .
2.4 Hrs.
FAILURE CODE:
58 - Internal Defect