
New Yorker V6-3.5L VIN F (1994)
Wiper Motor: Symptom Related Diagnostic Procedures
Important Information - Read First
Whenever a wiper motor malfunction occurs, first ensure wiper motor wire harness is properly connected before starting with normal diagnosis and
repair procedures.
Motor Runs After Wiper Switch Is Turned "Off"
1. Check wiper motor wiring harness for shorts between low speed motor feed terminal three or high speed motor feed terminal two and battery or
ignition.
2. Check for faulty wiper intermittent or HI-LO relays, then check circuit from intermittent relay cavity B to HI-LO relay cavity B for short to battery
or ignition.
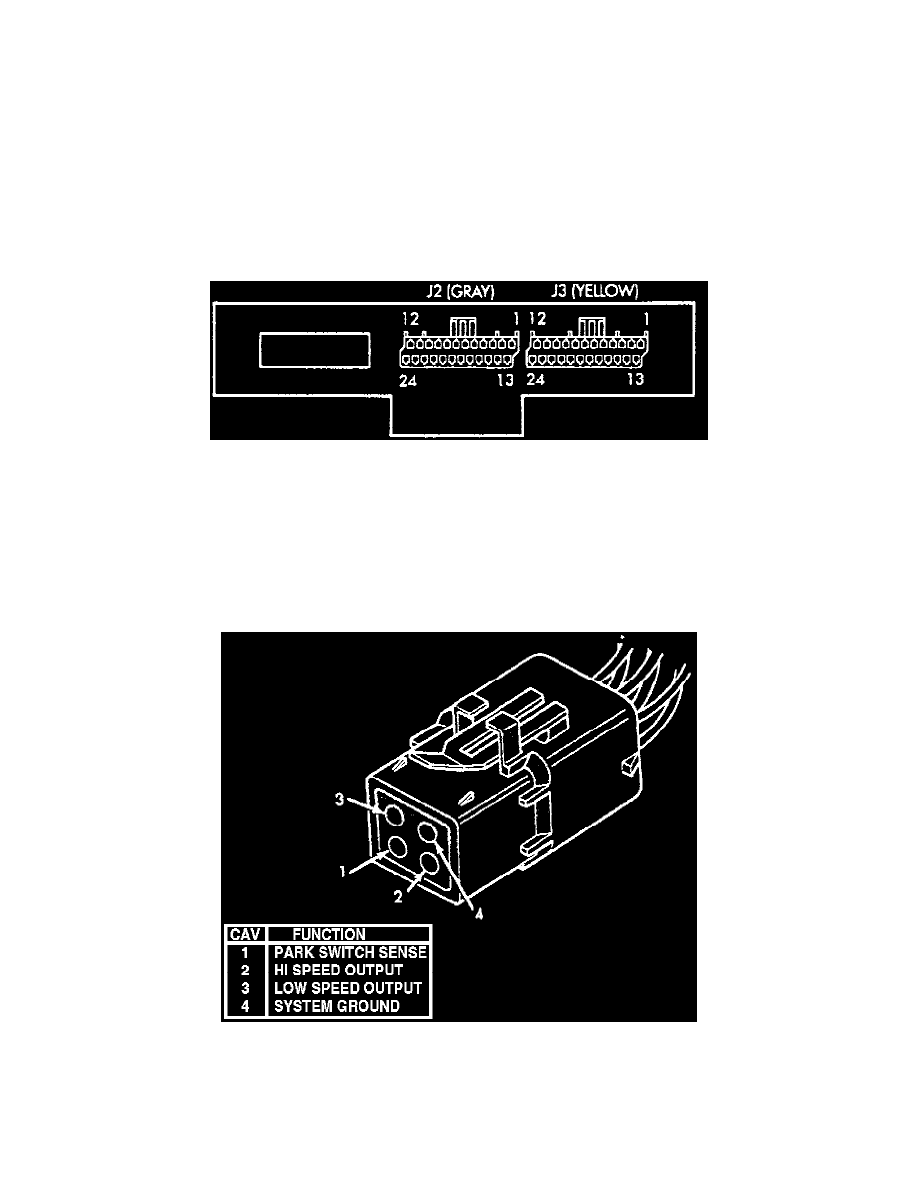
Fig.4 Body Controller J3, 24-Way Connector
3. Disconnect body controller 3 connector. Check circuit from terminal 1 of J3 24-way connector, to terminal "C" of intermittent wiper relay for short
to ground.
4. Using a suitable voltmeter connect positive lead to terminal 16 of body controller. Connect negative lead to ground.
5. If voltmeter reads greater than zero volts, check wiper switch and wiring.
6. Connect voltmeter positive lead to terminal 10 of body controller connector, of voltmeter read 10 to 15 volts, check circuit for short to battery or
ignition. If voltmeter read zero volts, replace body controller.
Motor Runs In High Speed/Not Low
Fig.6 Wiper Motor Connector Identification
1. Disconnect motor connector. If motor will not run on low speed, connect a jumper wire between battery positive and terminal three of motor
connector. Connect a second jumper between battery ground and terminal four of motor connector.
2. If motor does not run, replace motor. If motor runs proceed to step 3.
3. If wipers will not run at low speed use a suitable ohmmeter, check for open circuit. Check between terminal E of HI-LO wiper relay to terminal