
Prowler V6-3.5L VIN G (2002)
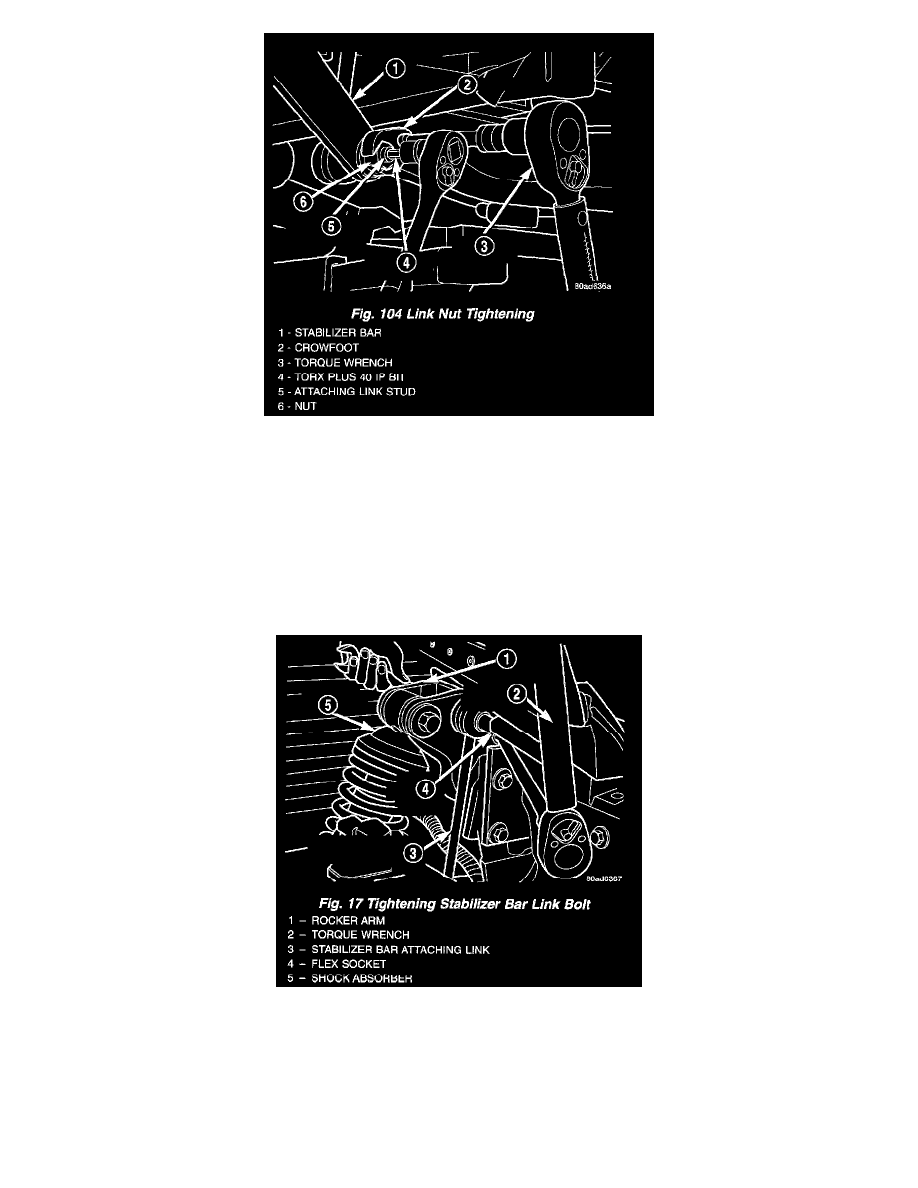
a. Place the link on the stabilizer bar so the link stud is pointing toward the outside of the vehicle (outboard side of the stabilizer bar).
b. Install the nut on the attaching link stud.
c. Hold the link stud using a Torx Plus 40 IP Bit placed in the end of the stud, to keep it from rotating during nut installation.
d. Tighten the stabilizer bar link nut to a torque of 122 Nm (90 ft. lbs.) with the aid of a crowfoot wrench.
2. Push upward on the arms of the stabilizer bar to position the stabilizer bar links as close as possible to the their mounting holes in the rocker arms.
3. Lower the vehicle until the front tires are supporting the weight of the vehicle.
NOTE: When installing the stabilizer bar link to rocker arm bolts it may be necessary to raise or lower the vehicle slightly. This will help align the bolts
with the holes in the rocker arms making it easier to install the bolts in the rocker arms.
4. Install the stabilizer bar link bolts in the rocker arms.
5. Install the nuts on the stabilizer bar link bolts. Tighten the stabilizer bar link bolts using a flex socket and extension to a torque of 60 Nm (45 ft.
lbs.).
6. Install the grille. Install and securely tighten the 4 screws mounting the grille to the front structure.