PT Cruiser L4-2.4L (2008)

hub as shown.
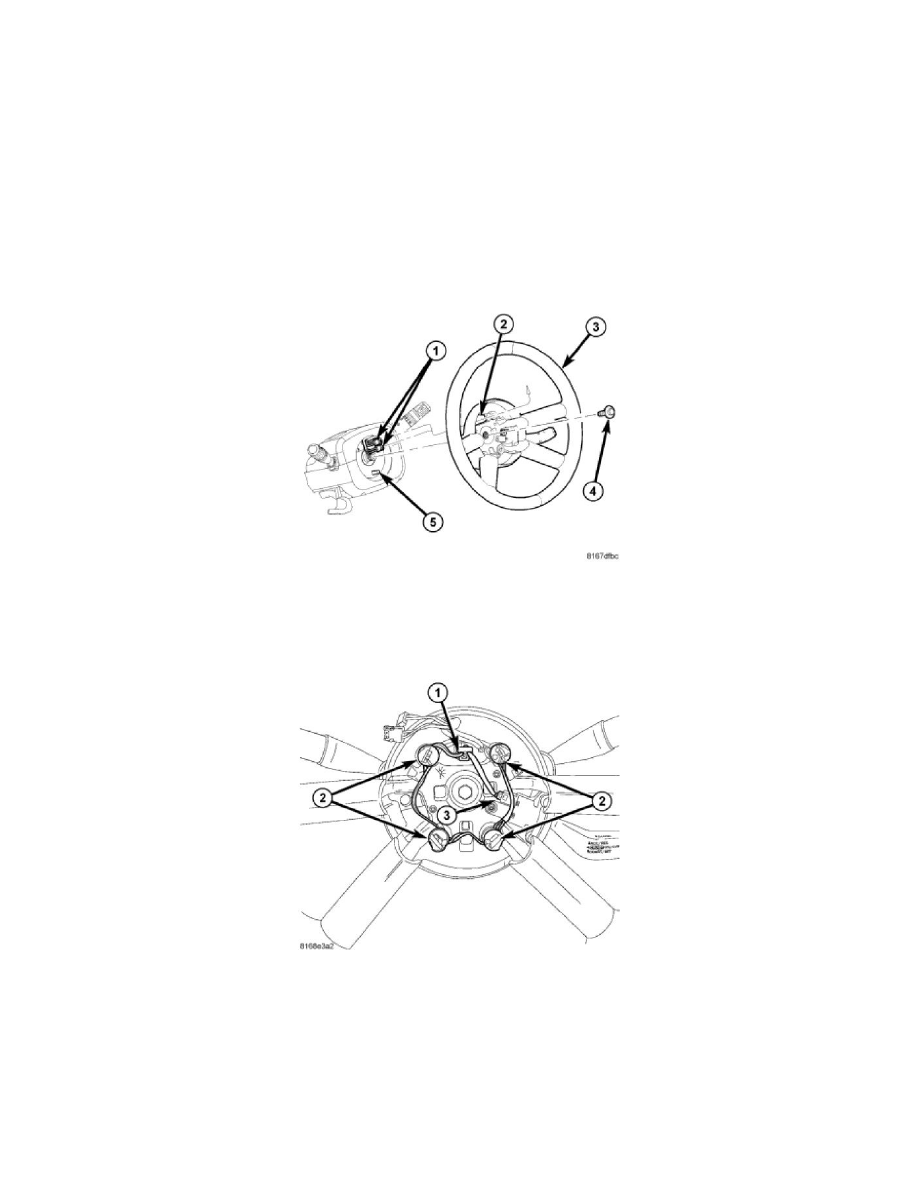
b. Push each horn contact into its mounting hole. When routed correctly, the white contacts are on the left side of the wheel and the black
contacts are on the right side.
c. Make sure the wiring is routed that it does not interfere with any wheel mounted components.
6. If equipped with speed control, connect the speed control wiring connector (3).
7. Confirm that:
a. The front wheels are in the STRAIGHT-AHEAD position.
b. The turn signal stalk is in the neutral position.
CAUTION: When installing the steering wheel, the clockspring must be centered in its travel to avoid overextending the clockspring
inner parts, causing the clockspring to become inoperative. If removed and handled properly using the correct procedures, it should be in
the "centered" position. If there is any question as to whether the clockspring is in the "centered" position of travel, perform the
clockspring centering procedure before proceeding. See: Restraint Systems/Air Bag Systems/Clockspring Assembly / Spiral Cable/Service and
Repair
8. Feed the airbag wiring leads (1) through the upper hole (2) in the steering wheel (3). Align the steering wheel's wide mounting spline with the
steering column shaft missing spline area and push the wheel onto the shaft. Make sure the clockspring lines up with the back of the wheel and
does not bind.
9. Install the steering wheel retaining bolt and tighten it until the steering wheel is fully installed on shaft. Tighten the steering wheel retaining bolt to
50 Nm (37 ft. lbs.).
10. Connect the horn wiring connector to the clockspring (1).
