PT Cruiser L4-2.4L (2008)

10. If the right lower control arm is being serviced:
a. Remove the bolt (4) mounting the engine torque strut (2) to the engine (3).
b. Remove the bolt (5) mounting the engine torque strut (2) to the crossmember (1).
c. Remove the engine torque strut (2).
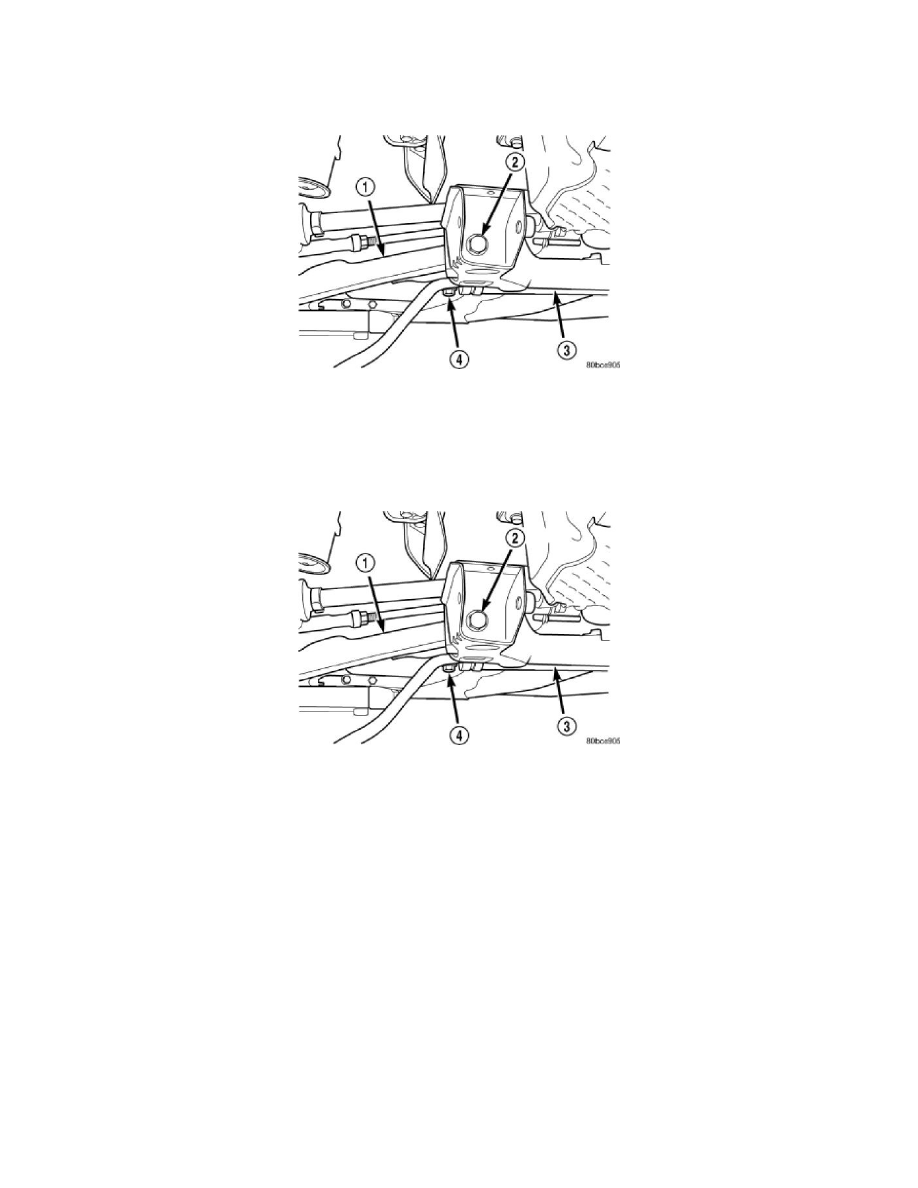
11. Remove the front bolt (2) attaching the lower control arm (1) to the front suspension crossmember (3).
12. Remove the rear bolt (4) attaching the lower control arm (1) to the front suspension crossmember (3) and frame rail.
13. Remove the lower control arm from the crossmember.
Installation
INSTALLATION
1. Place the lower control arm (1) into the front suspension crossmember (3).
2. Install, but do not fully tighten, the rear bolt (4) attaching the lower control arm to the crossmember and frame rail.
3. Install, but do not fully tighten, the front bolt (2) attaching the lower control arm to the crossmember.
4. With no weight on the lower control arm, tighten the lower control arm rear (and suspension crossmember) bolt (4) to 250 Nm (185 ft. lbs.).
5. With no weight on the lower control arm, tighten the lower control arm front bolt (2) to 170 Nm (125 ft. lbs.).
