
PT Cruiser L4-2.4L Turbo (2009)
Precautions/Warning and See: Service Precautions/Caution . Failure to follow the warnings and cautions could result in possible
serious or fatal injury.
NOTE: The HVAC housing must be removed from the vehicle and disassembled for service of the heater core, A/C evaporator, air intake
housing and the mode-air and blend-air doors.
NOTE: LHD model shown in illustrations. RHD model similar.
1. Disconnect and isolate the negative battery cable.
2. If equipped, remove the engine cover.
3. Recover the refrigerant from the refrigerant system See: Service and Repair/Refrigerant System Recovery.
4. Partially drain the engine cooling system.
5. If equipped with diesel engine, remove the fuel filter . See: Engine, Cooling and Exhaust/Engine/Tune-up and Engine Performance Checks/Fuel
Filter/Service and Repair
6. If equipped with diesel engine, remove the oil separator from the top of the valve cover. Disconnect hose and remove five screws.
7. Remove the coolant recovery container.
8. Remove the air intake tube and air filter housing cover See: Engine, Cooling and Exhaust/Engine/Tune-up and Engine Performance Checks/Air
Cleaner Housing/Service and Repair/Air Cleaner Body - Removal.
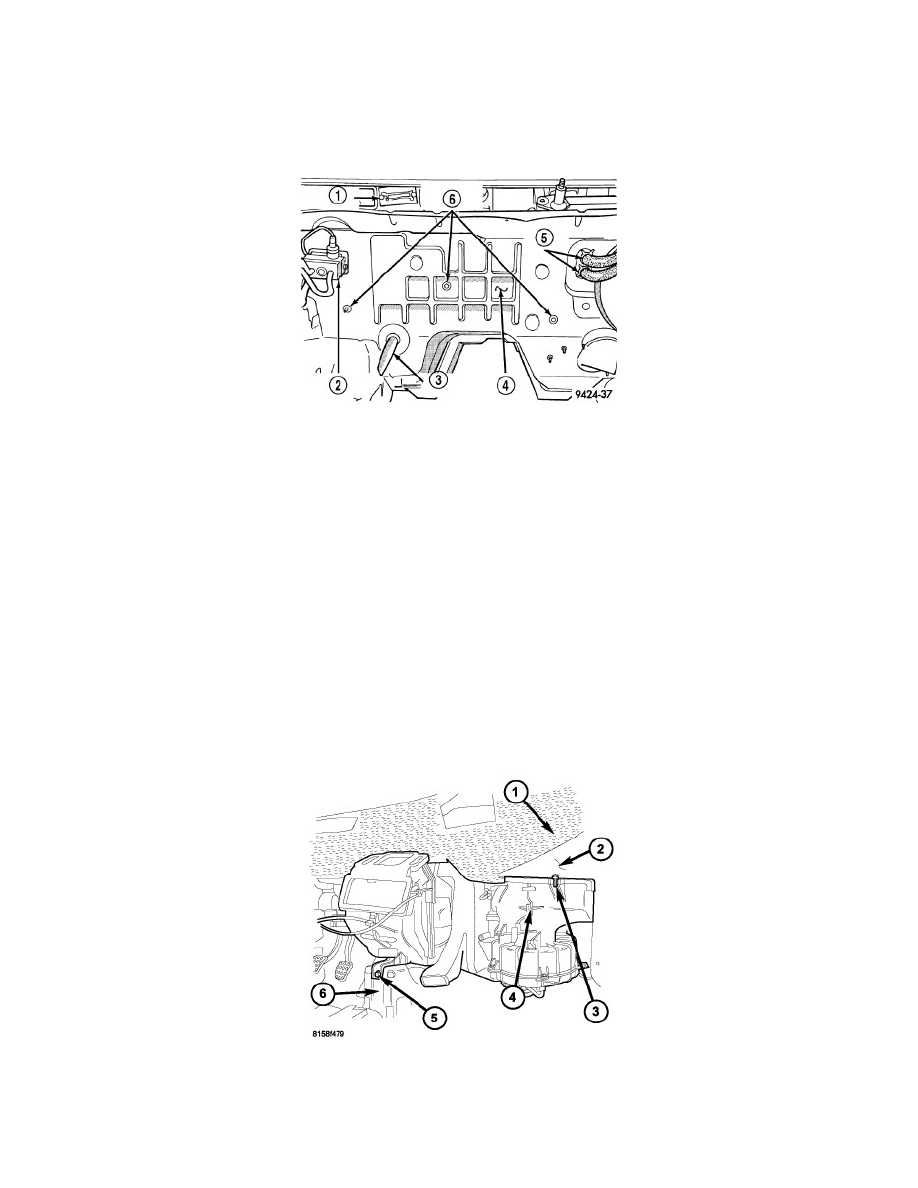
9. Remove the two bolts that secure the accumulator tubes to the evaporator tube tapping block and disconnect the accumulator tubes from the
tapping block See: Accumulator HVAC/Service and Repair/Accumulator - Removal.
10. Disengage the accumulator mounting bracket from the rubber grommet located on the right frame and position the A/C accumulator out of the way
See: Accumulator HVAC/Service and Repair/Accumulator - Removal.
11. Remove and discard the O-ring seals and install plugs in, or tape over all of the opened refrigerant line fittings and the evaporator ports.
12. Remove the condensation drain tube (3) See: Evaporator Drain Tube/Service and Repair/Condensation Drain Tube - Removal.
13. Disconnect the heater hoses (5) from the heater core tubes. Install plugs in, or tape over the opened heater core tubes to prevent coolant spillage
during housing removal.
14. Remove three HVAC housing retaining nuts (6) located on the engine compartment side of the dash panel (4).
15. Remove the instrument panel See: Body and Frame/Interior Moulding / Trim/Dashboard / Instrument Panel/Service and Repair/Instrument Panel -
Removal.
16. Remove the right rear floor duct See: Air Duct/Service and Repair/Floor Distribution Duct - Removal.
17. Position the dash panel insulator (1) out of the way and remove the bolt (3) that secures the HVAC housing (4) to the passenger compartment side