
PT Cruiser L4-2.4L Turbo (2009)
Brake Light Switch: Service and Repair
Stop Lamp Switch - Installation
INSTALLATION
CAUTION: Do not reuse the original stop lamp switch. Anytime a switch has been removed or its position compromised, a new switch must be
installed and adjusted. Do not attempt to readjust the switch.
1. Obtain NEW brake lamp switch. The adjustment lever on the new switch should be at a 45° angle from the wiring connector. If the adjustment
lever is parallel with the wiring connector, the switch has been pre-set and must be scrapped. DO NOT ATTEMPT TO RESET (OR
RE-ADJUST) THE BRAKE LAMP SWITCH.
2. Connect the wiring harness to the connector on the switch.
3. Mount and adjust the NEW brake lamp switch using the following steps:
a. Install the switch in its bracket by aligning the index tab on the switch with the notch in the mounting bracket.
b. When the switch body is fully seated in its bracket, rotate the switch clockwise approximately 30° to lock the switch into place.
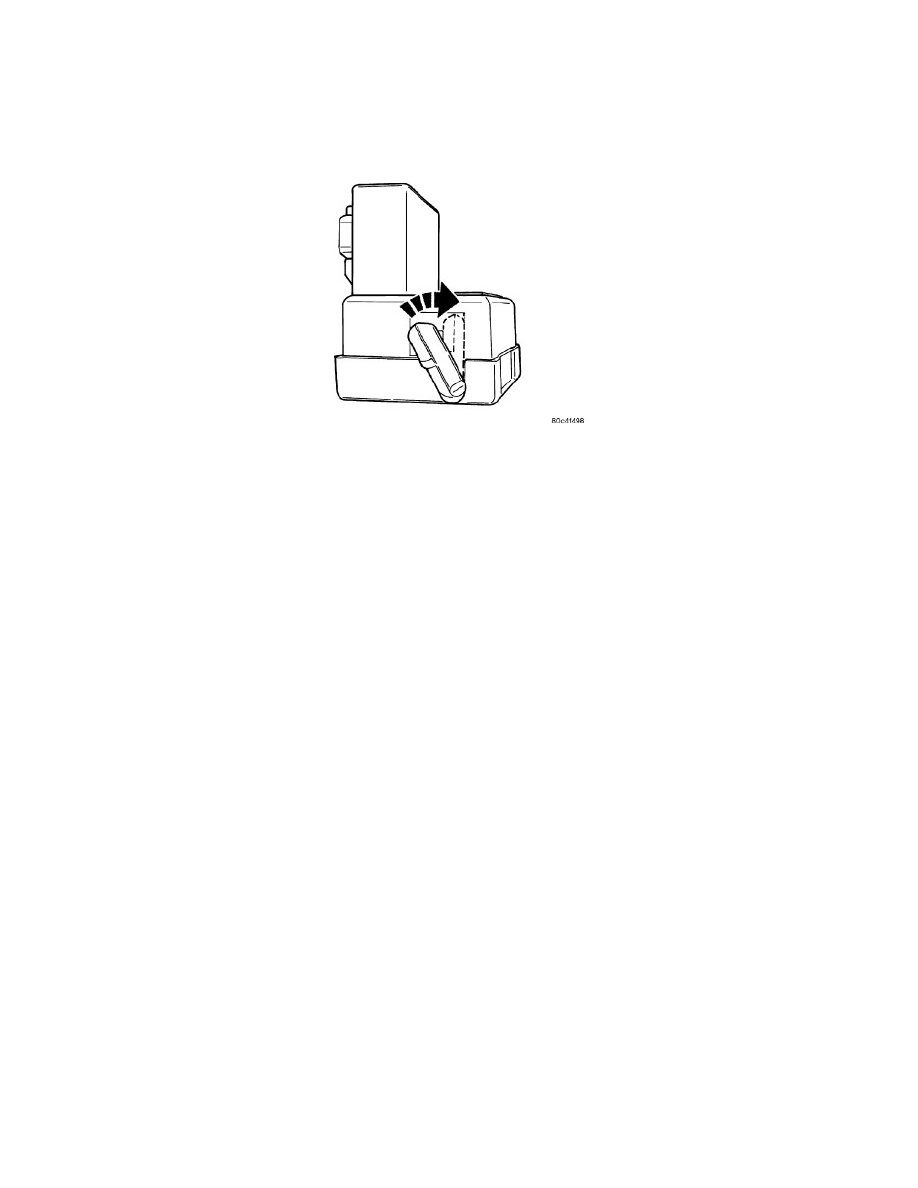
c. With the brake pedal in the fully released position, move the adjustment lever on the brake lamp switch from the 45° angled non-adjusted
position, clockwise as shown, until it is parallel with the wiring connector. The brake lamp switch is now properly adjusted to the vehicle.
4. Install the knee blocker.
5. Install the silencer pad below the knee blocker.
6. Reconnect the battery negative terminal.
7. Reinstall the air cleaner cover (two clips).
8. Check the stop lamps to verify they are operating properly and not staying on when the pedal is in the released position.
9. Road test the vehicle to ensure proper operation of the brakes (including ABS) and speed control (if equipped).