
PT Cruiser L4-2.4L Turbo (2009)
a special material for the R-134a system. Use only refrigerant oil of the type recommended for the A/C compressor in the vehicle.
9. Connect the A/C liquid line (2) to the A/C condenser (lower port) (1).
10. Install the nut that secures the A/C liquid line to the A/C condenser. Tighten the nut to 20 Nm (180 in. lbs.).
11. Install the right side frame rail splash shield See: Body and Frame/Fender/Front Fender/Front Fender Liner/Service and Repair/Splash Shield -
Installation.
12. Lower the vehicle.
13. Evacuate the refrigerant system See: Heating and Air Conditioning/Service and Repair/Refrigerant System Evacuate.
14. Adjust the refrigerant oil level See: Heating and Air Conditioning/Service and Repair/Refrigerant Oil Level.
15. Charge the A/C system See: Heating and Air Conditioning/Service and Repair/Refrigerant System Charge.
A/C Suction Line - Removal
REMOVAL
WARNING: Review safety precautions and warnings before performing this procedure See: Heating and Air Conditioning/Service
Precautions/Warning and See: Heating and Air Conditioning/Service Precautions/Caution . Failure to follow these instructions may
result in possible serious or fatal injury.
1. Recover the refrigerant from the refrigerant system See: Heating and Air Conditioning/Service and Repair/Refrigerant System Recovery.
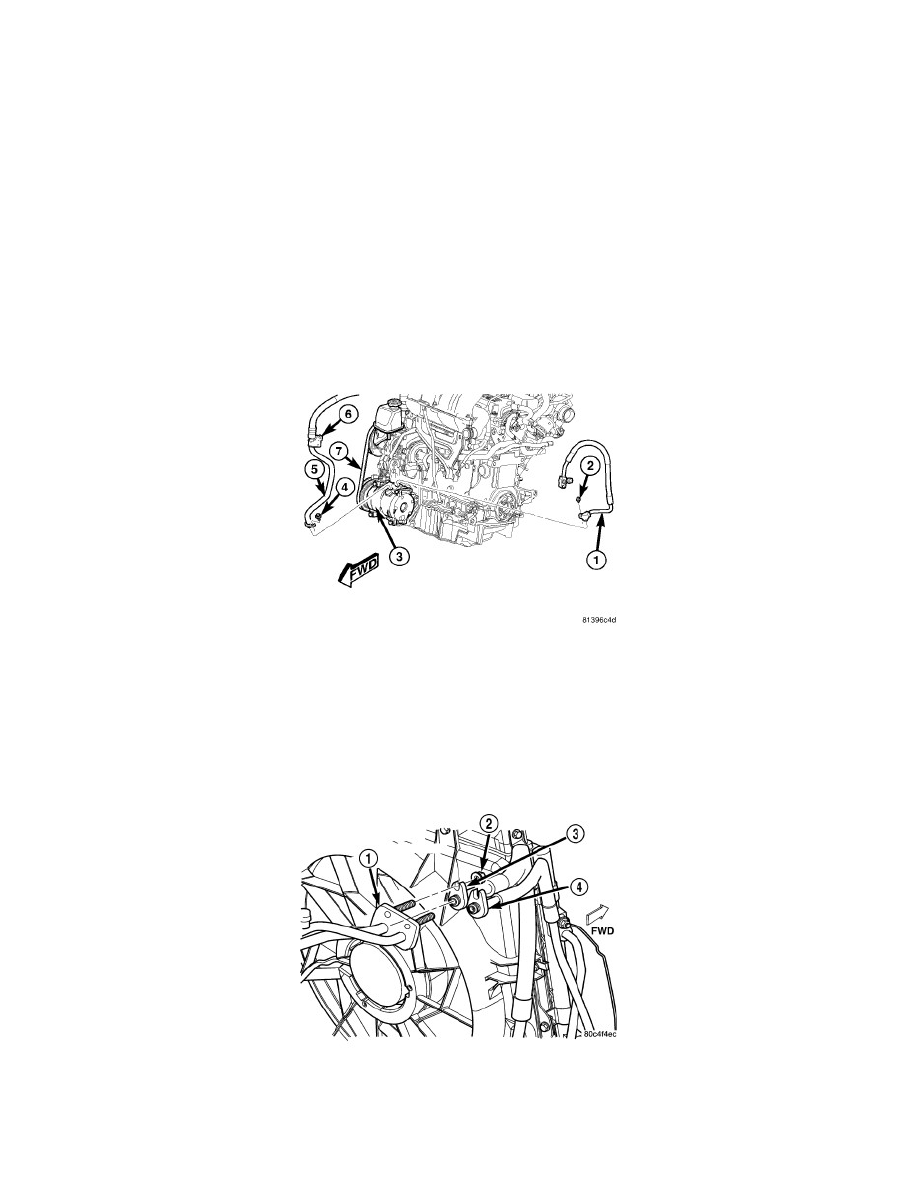
2. If equipped with the 2.4L Turbo engine, remove the accessory drive belt and the three bolts that secure the power steering pump and reservoir to
the engine and position the power steering pump and reservoir out of the way See: Steering and Suspension/Steering/Power Steering/Power
Steering Pump/Service and Repair/Removal and Replacement/Power Steering Pump - Removal.
3. If equipped with the 2.4L Turbo engine, remove the nut that secures the suction line retaining bracket (6) to the thermostat housing stud bolt.
4. Remove the bolt (4) that secures the A/C suction line (5) to the top of the A/C compressor (3).
5. Disconnect the A/C suction line from the A/C compressor and remove and discard the O-ring seal.
6. Install plugs in, or tape over the opened suction line fitting and the compressor port.
7. Remove the nut (2) that secures the A/C suction line (inboard fitting) (3) to the accumulator tube tapping block (1).
8. Disconnect the A/C suction line from the accumulator tube tapping block and remove and discard the O-ring seal.
9. Install plugs in, or tape over the opened suction line fitting and the accumulator tube tapping block port.
10. Remove the A/C suction line from the engine compartment.