
PT Cruiser L4-2.4L Turbo (2009)
NOTE: Before installing Socket (1), Special Tool 10087-5, be sure to clear any grease from inside the Socket.
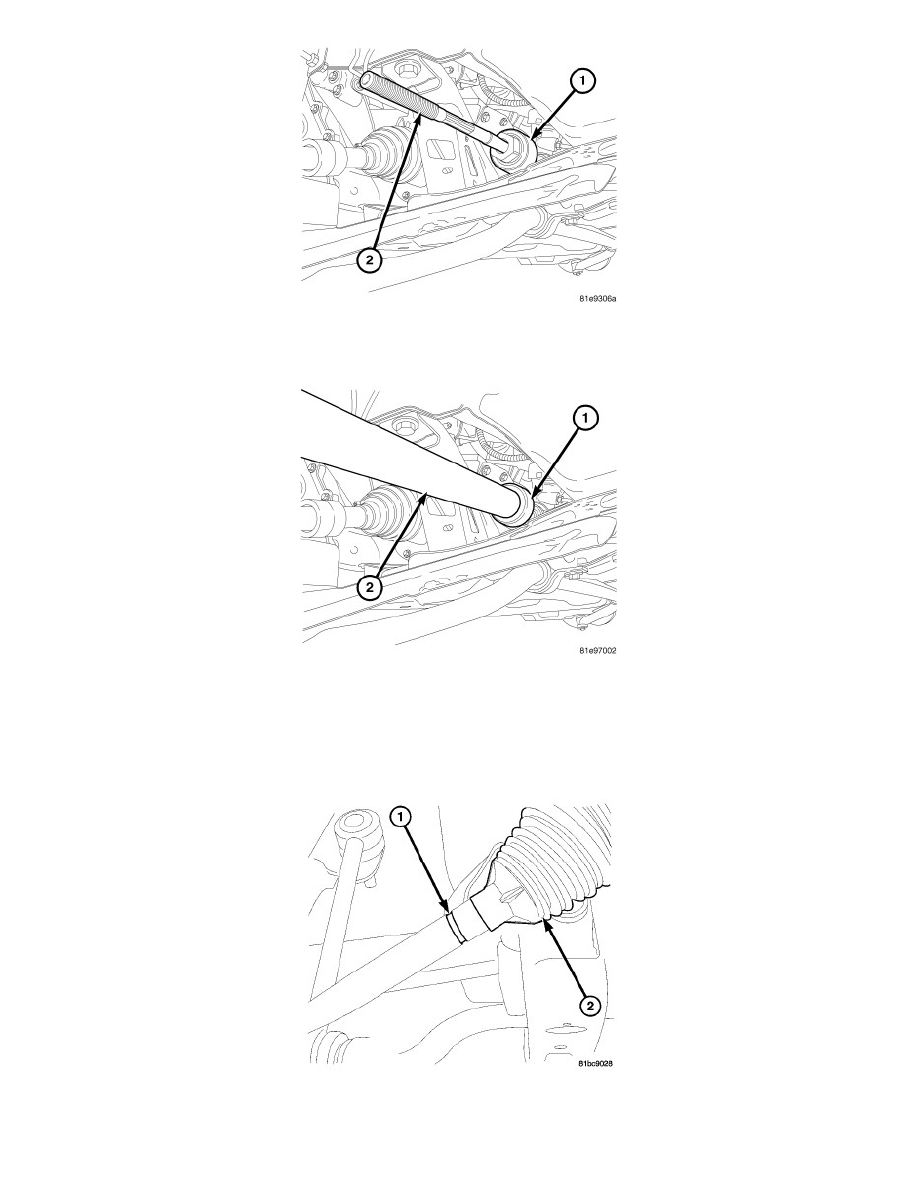
4. Slide Socket (1), Special Tool 10087-5, or equivalent inner tie rod tool, over the inner tie rod (2) and onto the inner tie rod ball and socket.
5. Install Wrench (2), Special Tool 10087-2, over the inner tie rod and onto Socket (1) 10087-5.
6. Utilizing the square drive on the rear of Wrench 10087-2, tighten the inner tie rod to 78 Nm, (58 ft. lbs.).
7. Place a NEW transfer tube clamp over the transfer tube past where bellows will mount.
8. Loosely place a NEW clamp over the large end of the NEW bellows.
9. Slide the NEW bellows with clamp over the end of the inner tie rod and onto the gear body and transfer tube.
10. Push the small end of the bellows (2) past the groove (1) machined into the inner tie rod.
11. Apply a small amount of Mopar(R) Lubriplate or equivalent uniformly to the groove (1) in the inner tie rod shaft. This allows for toe adjustment
without twisting the bellows.