
PT Cruiser L4-2.4L Turbo VIN G (2004)
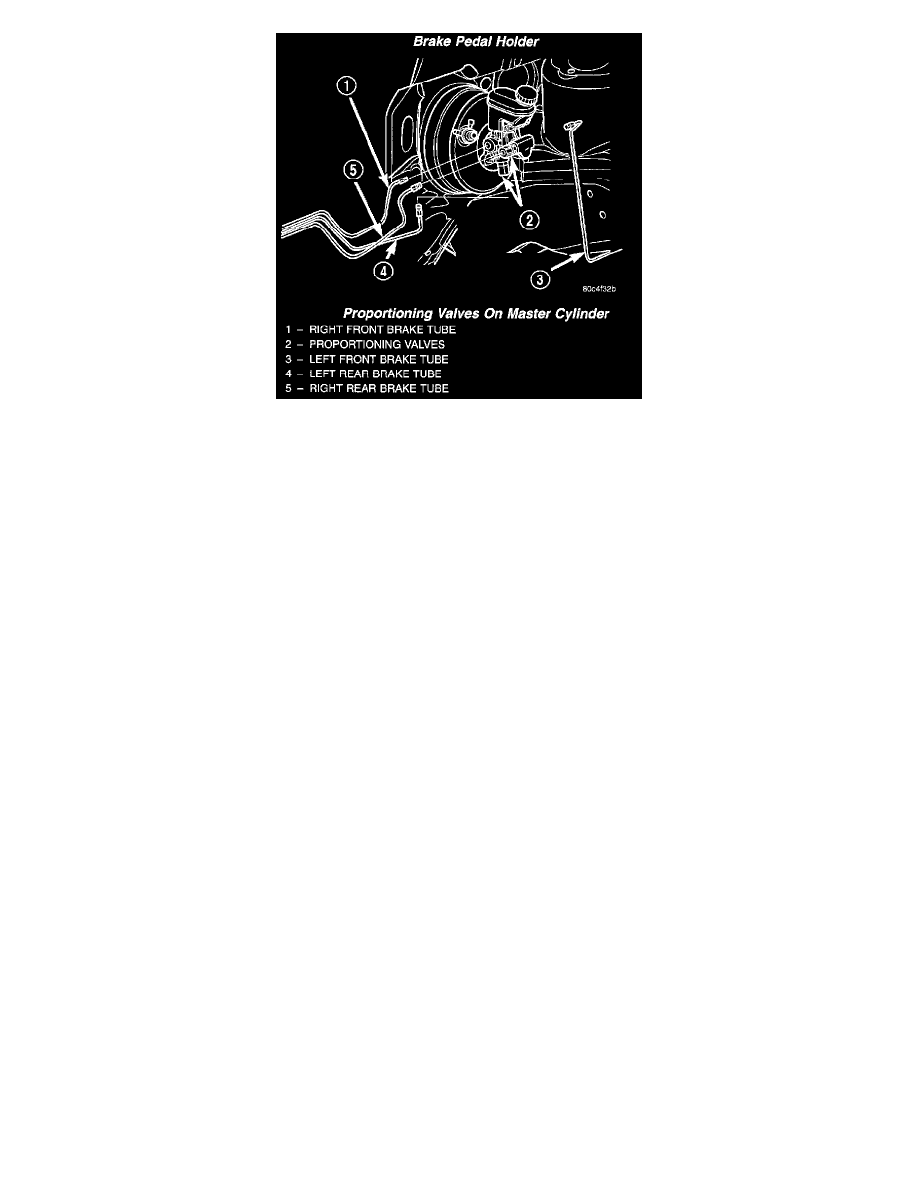
6. Connect the four brake tubes to the master cylinder and proportioning valve ports. Tighten all tube nuts to a torque of 17 Nm (145 in. lbs.).
7. Connect the brake fluid level switch wiring connector.
8. Install the power distribution center.
9. Connect the negative (ground) cable on the battery.
10. Install the air cleaner housing.
11. Reinstall the air cleaner cover (two clips).
12. Fill the master cylinder to the proper level.
WARNING: Be certain a firm brake pedal is achieved prior to attempting to operate the vehicle. If a firm brake pedal cannot be
achieved, bleed the brake hydraulic system and check for leaks.
13. Road test the vehicle to ensure proper operation of the brakes.
RHD
REMOVAL- RHD
NOTE: Before proceeding, Refer to Service Precautions.
CAUTION: The vacuum in the power brake booster must be pumped down before removing the master cylinder to prevent the booster from sucking
in any contamination. This can be done by pumping the brake pedal while the engine is not running until a firm brake pedal is achieved.
1. With the engine not running, pump the brake pedal 4-5 strokes until the pedal feel is firm.
2. Unclip the air cleaner cover (two clips) and move the cover aside.
3. Remove the air cleaner housing by pulling straight up.
4. Disconnect the negative (ground) cable from the battery and isolate the cable.
5. Remove the brake booster vacuum supply hose from the booster and position it out of the way.
6. Disconnect wiring harness connector from brake fluid level switch in the brake fluid reservoir.
7. Clean the area around where the master cylinder attaches to the power brake booster using a suitable brake cleaner such as Mopar Brake Parts
Cleaner or equivalent.
8. Remove the two nuts attaching the master cylinder to the power brake booster.
9. Slide the master cylinder straight out of the power brake booster.
INSTALLATION- RHD
NOTE: The master cylinder must be bled before installing it on the vehicle.
1. Bleed the master cylinder.
2. Wipe the face of the power brake booster clean where the master cylinder seal comes in contact when it's installed. Do not get any cleaner or
debris inside the booster.
3. Position the master cylinder on the studs of the power brake booster, aligning the push rod of the power brake booster with master cylinder piston
push rod. Carefully push the master cylinder onto the studs until it contacts the face of the booster.
4. Install the two master cylinder mounting nuts and tighten each to a torque of 18 Nm (160 in. lbs.).
5. Connect brake tubes to the master cylinder. Tighten all tube nuts to a torque of 17 Nm (145 in. lbs.).