
PT Cruiser L4-2.4L Turbo VIN G (2004)
Condenser HVAC: Service and Repair
REMOVAL
WARNING: REVIEW THE WARNINGS AND CAUTIONS IN THE FRONT BEFORE PERFORMING THE FOLLOWING OPERATION.
1. Disconnect and isolate the battery negative cable.
2. Recover the refrigerant from the refrigerant system.
3. Remove battery support strut.
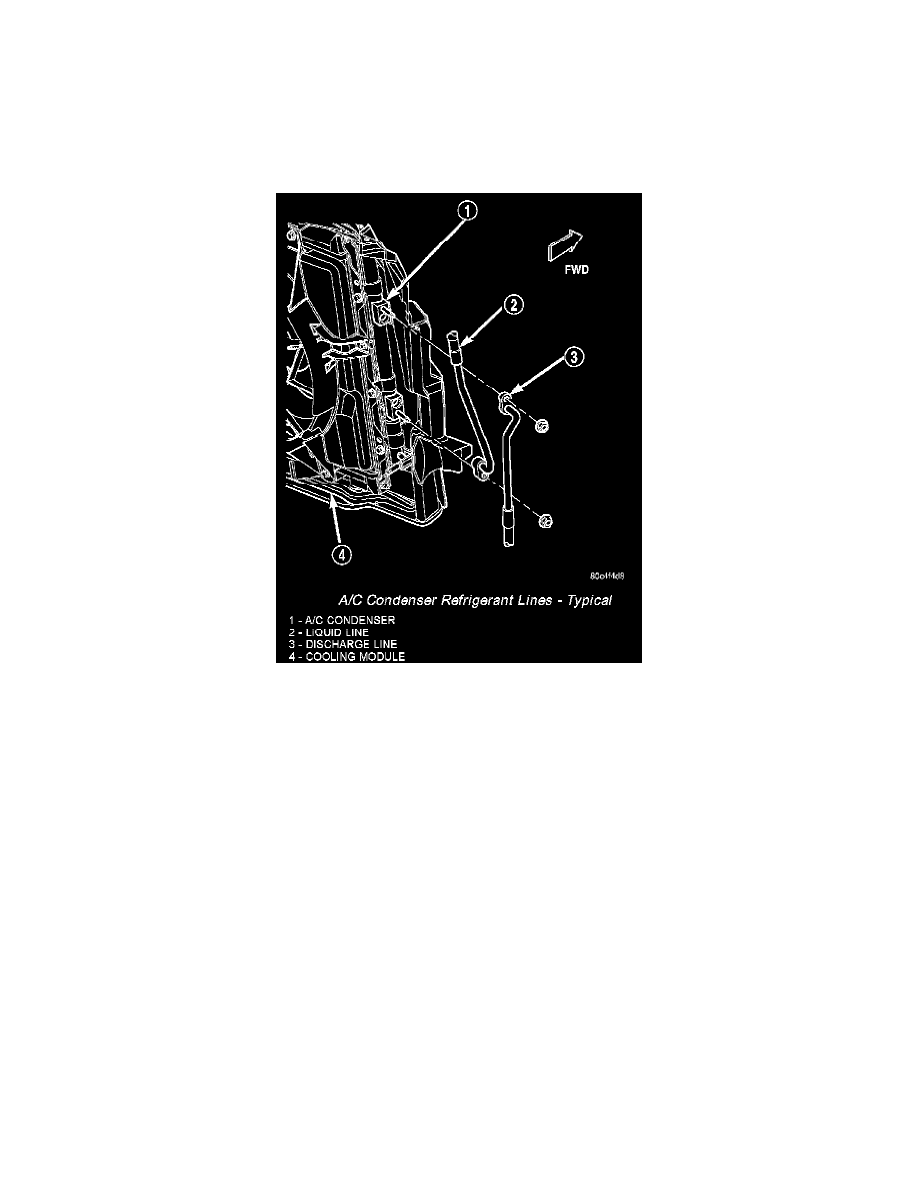
A/C Condenser Refrigerant Lines - Typical
4. Disconnect the liquid line fitting from the condenser outlet port.
5. Remove the seal from the liquid line fitting and discard.
6. Install plug in, or tape over the opened liquid line fitting and the condenser outlet port.
7. Disconnect the discharge line fitting from the condenser inlet port.
8. Remove the seal from the discharge line fitting and discard.
9. Install plug in, or tape over the opened discharge line fitting and the condenser inlet port.
10. Remove upper radiator mounts.
11. Remove the condenser retaining screws.
12. Tilt radiator back and carefully remove the condenser from the vehicle.
INSTALLATION
NOTE: If the condenser is being replaced, add 30 milliliters (1 fluid ounce) of refrigerant oil to the refrigerant system. Use only refrigerant oil of the
type recommended for the compressor in the vehicle.
1. Tilt the radiator back and position the condenser in the vehicle.
2. Install the condenser retaining screws. Tighten the screws to 2 Nm (17 in. lbs.).
3. Install the upper radiator mounts.
4. Remove the tape or plug from the condenser inlet port and the discharge line fitting.
5. Lubricate a new rubber O-ring seal with clean refrigerant oil and install it on the discharge line fitting.
6. Reconnect the discharge line fitting to the condenser inlet port.
7. Install and tighten the nut that secures the discharge line fitting to the condenser inlet port. Tighten the nut to 5 Nm (45 in. lbs.).
8. Remove the tape or plug from the condenser outlet port and the liquid line fitting.
9. Lubricate a new rubber O-ring seal with clean refrigerant oil and install it on the liquid line fitting.
10. Reconnect the liquid line fitting to the condenser outlet port.