PT Cruiser L4-2.4L Turbo VIN G (2004)

Control Arm Bushing: Service and Repair
DISASSEMBLY - LOWER CONTROL ARM (REAR ISOLATOR BUSHING)
NOTE: The removal and installation of the rear isolator bushing from the lower control arm is only to be done with the lower control arm removed
from the vehicle. The front isolator bushing is not serviceable.
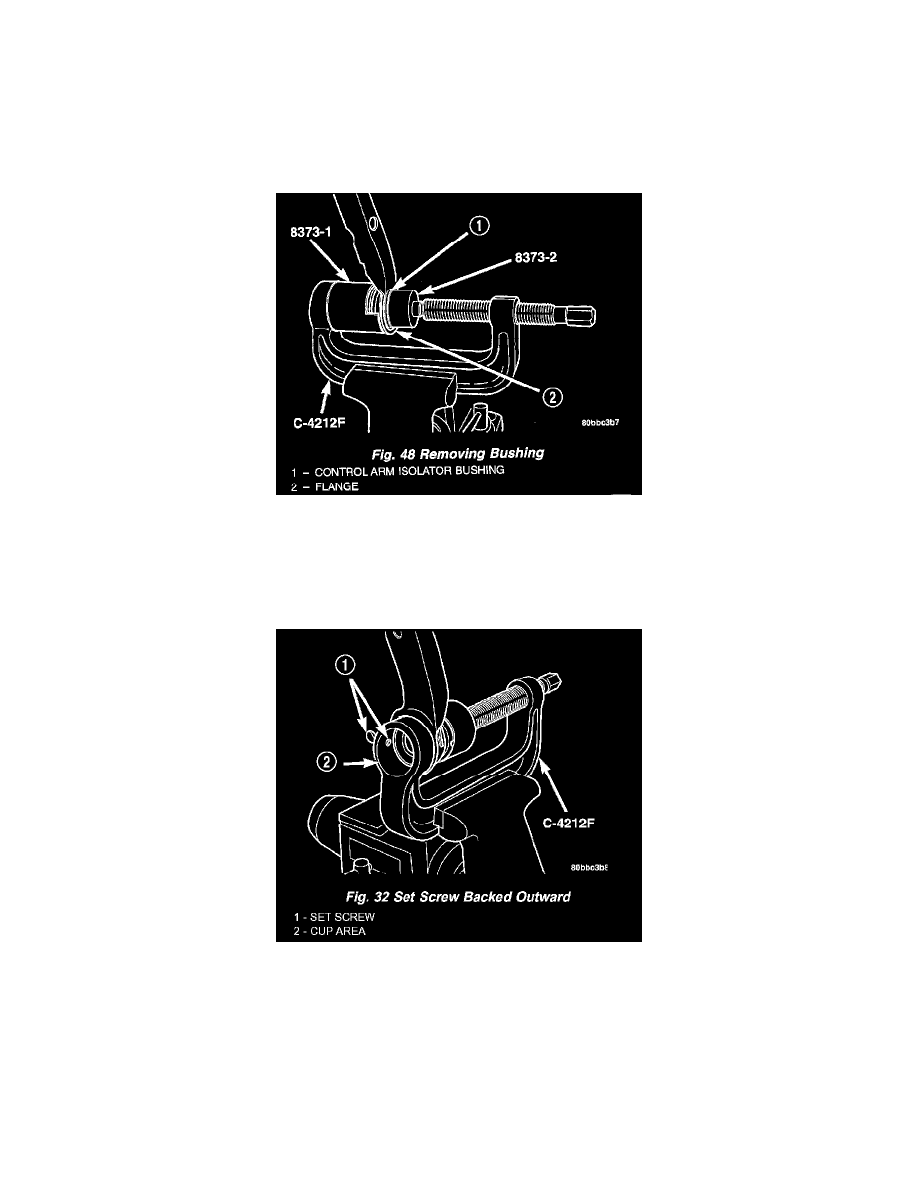
1. Install the Remover Receiver, Special Tool 8373-1, into the cup of the Ball Joint Press, Special Tool C-4212F, and tighten the set screw. Install
the Remover Driver, Special Tool 8373-2, on the tip of the Ball Joint Press screw-drive.
2. Place the lower control arm outer flange against the Receiver as shown. Tighten the screw-drive until the Driver contacts the outer circumference
of the bushing evenly. Continue to tighten the screw-drive until the bushing is pressed completely out of the lower control arm.
3. Back off the screw-drive and remove the lower control arm and isolator bushing from the Receiver.
4. Remove the driver 8373-2 and receiver 8373-1 from the ball joint press C-4212F.
ASSEMBLY - LOWER CONTROL ARM (REAR ISOLATOR BUSHING)
1. Back the ball joint press C-4212F set screw outward so it does not extend out into the cup area.
