
PT Cruiser L4-2.4L Turbo VIN G (2004)
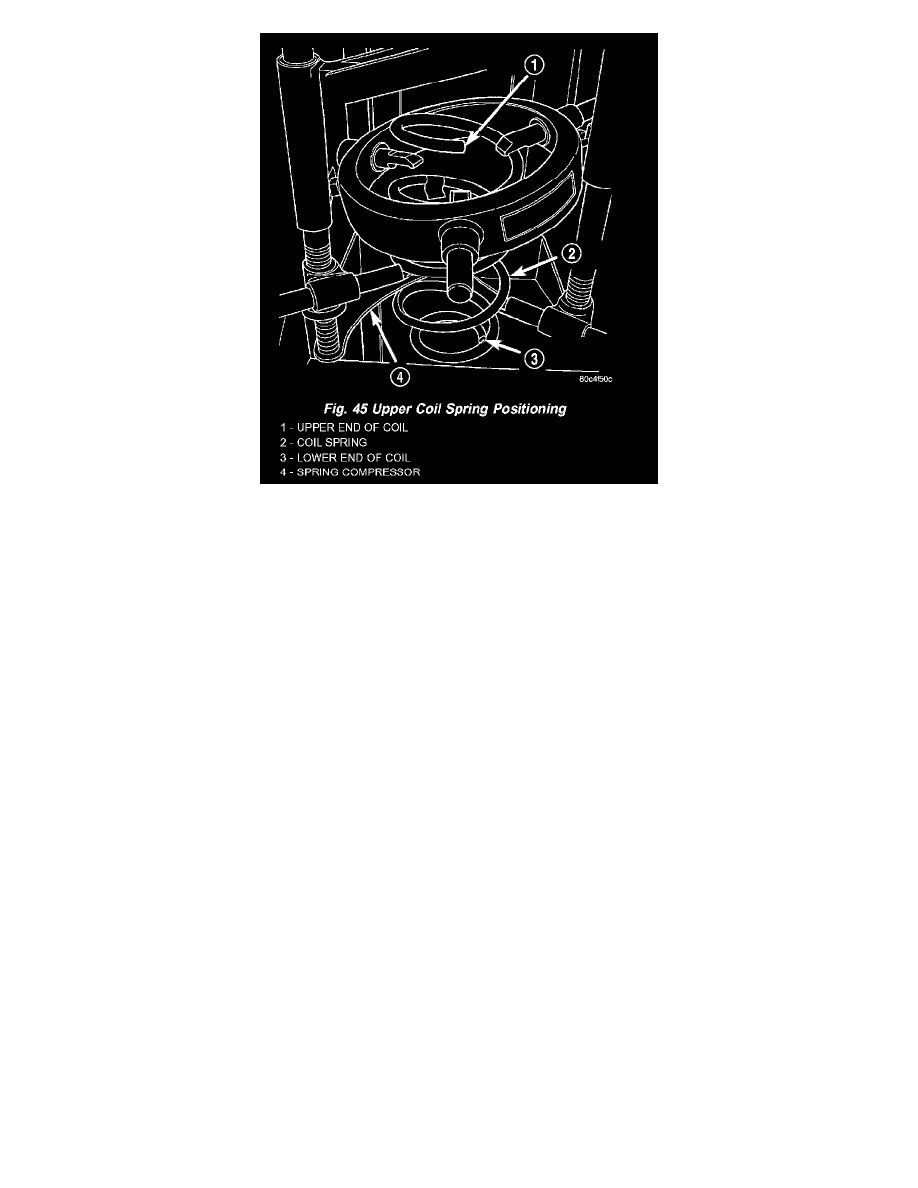
1. Place the coil spring in the compressor following the manufacturers instructions. Before compressing the spring, rotate the spring so the end of the
top coil is directly in the front as shown.
2. Slowly compress the coil spring until enough room is available for strut assembly reassembly.
3. Install the lower spring isolator on the lower spring seat of the strut.
4. Install the strut through the bottom of the coil spring until the lower spring seat contacts the lower end of the coil spring. Rotate the strut as
necessary until the clevis bracket is positioned straight outward away from the compressor. Install the clamp on the lower end of the coil spring
and strut, so the strut is held in place.
5. Install the jounce bumper on the strut shaft. The jounce bumper is to be installed with the smaller end pointing downward toward the lower seat.
6. Install the dust shield on the strut shaft. The bottom of the dust shield will snap to the retainer on top of the strut housing.
7. If disassembled, reinstall the upper spring isolator on the upper spring seat and bearing.
8. Install the upper spring seat and bearing on top of the coil spring. Position the notch formed into the edge of the upper seat straight out away from
the compressor. It should line up with the very end of the coil spring coil.
9. Install the strut upper mount over the strut shaft and onto the top of the upper spring seat and bearing. Position the mount so that the third
mounting stud on the mount top is inward toward the compressor, opposite the clevis bracket.
CAUTION: Never use impact or high speed tools to install the strut shaft nut. Damage to the strut internal bearings may occur.
10. Loosely install the retaining nut on the strut shaft. Install Strut Nut Socket (on the end of a torque wrench), Special Tool 6864, on the strut shaft
retaining nut. Next, install a socket on the hex on the end of the strut shaft. While holding the strut shaft from turning, tighten the strut shaft
retaining nut to a torque of 75 Nm (55 ft. lbs.).
11. Slowly release the tension from the coil spring by backing off the compressor drive completely. As the tension is relieved, make sure the upper
mount and seat and bearing align properly. Verify the upper mount does not bind.
12. Remove the clamp from the lower end of the coil spring and strut. Push back the spring compressor upper and lower hooks, then remove the strut
assembly from the spring compressor.
13. Install the strut assembly on the vehicle.
INSTALLATION