
PT Cruiser L4-2.4L Turbo VIN G (2004)
6. Remove the bolt securing the watts link bell crank to the center of the axle .
7. Position a transmission jack or equivalent under the center of the axle raising it just enough to support the axle.
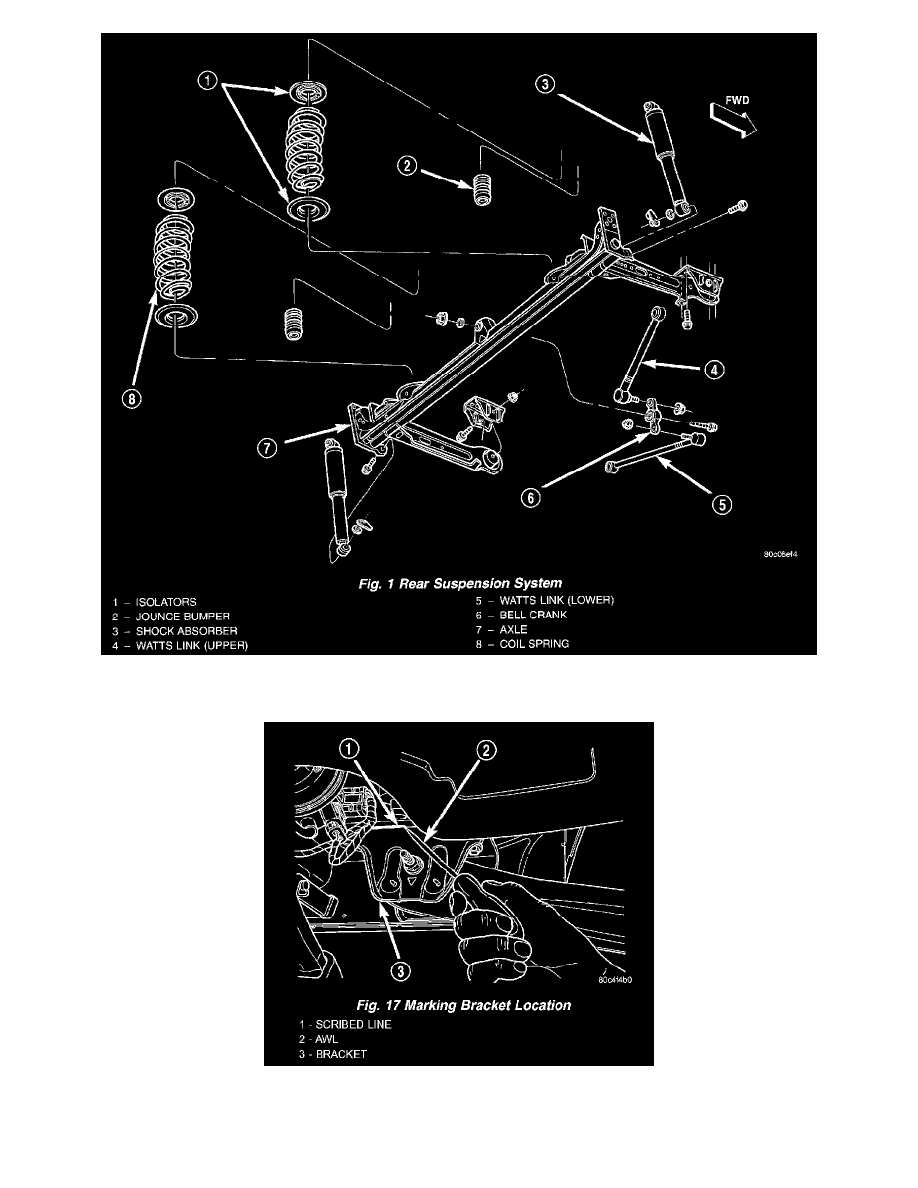
8. Using an awl, scribe a line marking the location of the axle trailing arm bracket, side-to-side and front-to-rear, on the body of the vehicle.
9. Remove the bolts securing the trailing arm forward brackets to the body of the vehicle.
10. Using the lower shock mounts as a pivot point, pry down on the forward end of the trailing arm and place a block of wood between the top of the
arm and the body of the vehicle just to the rear of the forward mounting bracket. Be careful not to pinch any hoses or cables.