Sebring L4-122 2.0L DOHC VIN Y MFI (1995)

2.
Remove the sunvisor switch plate (Figure 2).
3.
Cover the instrument panel with a large towel or other suitable material.
4.
Using a foam applicator, apply a urethane primer such as 3M 86O8** to the back side of the headliner. Cover a 1" wide strip along the entire front
edge of the headliner. **Use caution to prevent any primer from getting on the passenger side of the headliner.**
5.
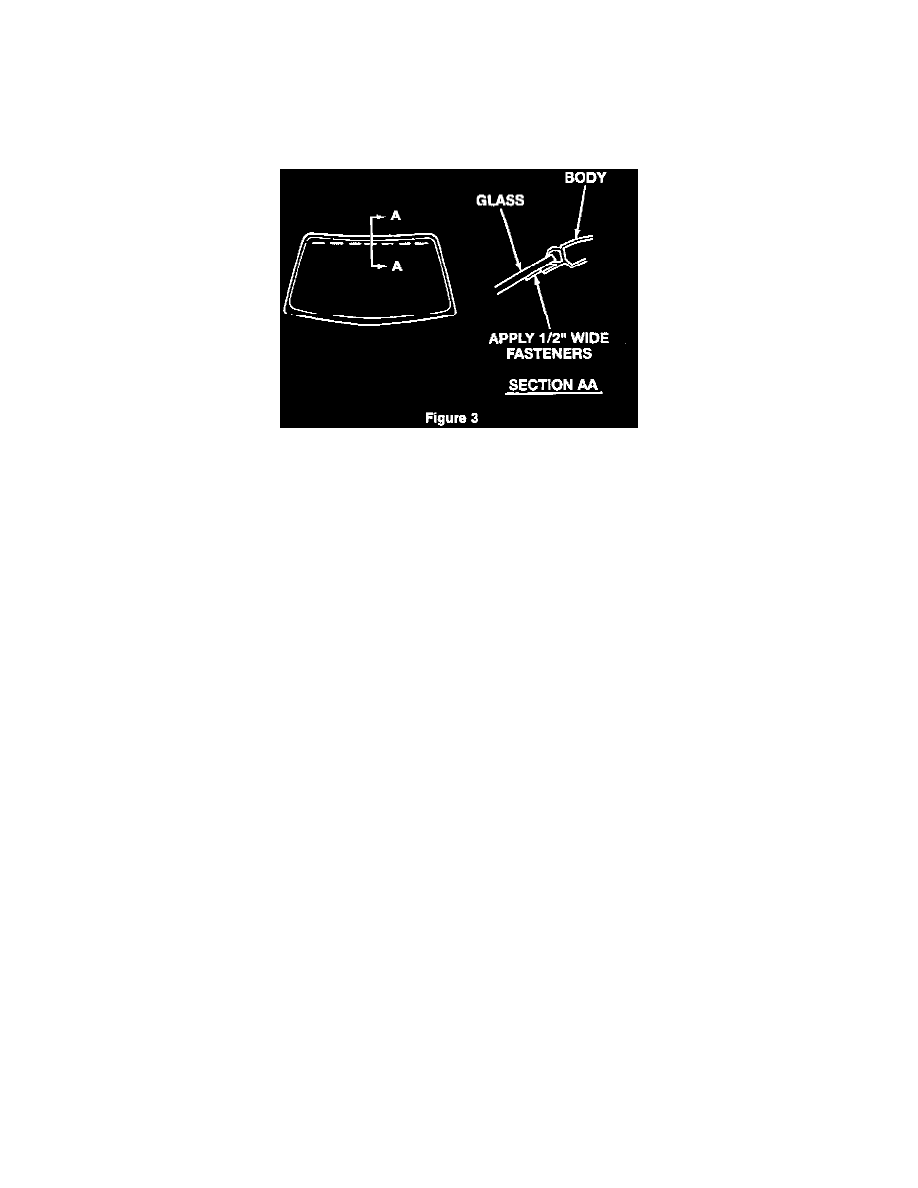
**Use the less dense strip (# 3552) from the "3M Dual Lock Kit 6484n, and cut seven 6" long strips, 1/2" wide. Apply these to the top edge of the
windshield. Butt the strips to the bottom of the sheet metal flange. The strips should not extend beyond the black out line of the windshield (Figure
3). **
6.
**Use the loop strip (# 3527) from the "3M Hook & Loop Kit 6481", and cut seven 6" long strips, 1" wide. Apply these to the back side of the
headliner. Make sure that the adhesive promoter has set up and is dry to the touch (approximately 10 minutes).**
7.
Install the sunvisor clips.
8.
Install the sunvisor switch plate.
9.
Attach the **Velcro Loop strip to the Dual Lock strip** by pushing up on the front edge of the headliner.
POLICY: Reimbursable within the provisions of the warranty.
TIME ALLOWANCE:
Labor Operation No:
23-20-45-97
Headliner (Secure with Velcro Strips)
0.4 Hrs.
FAILURE CODE: 01 - Adhesive Bond
