
Sebring Convertible V6-2.5L SOHC 24 Valve (1996)
7.
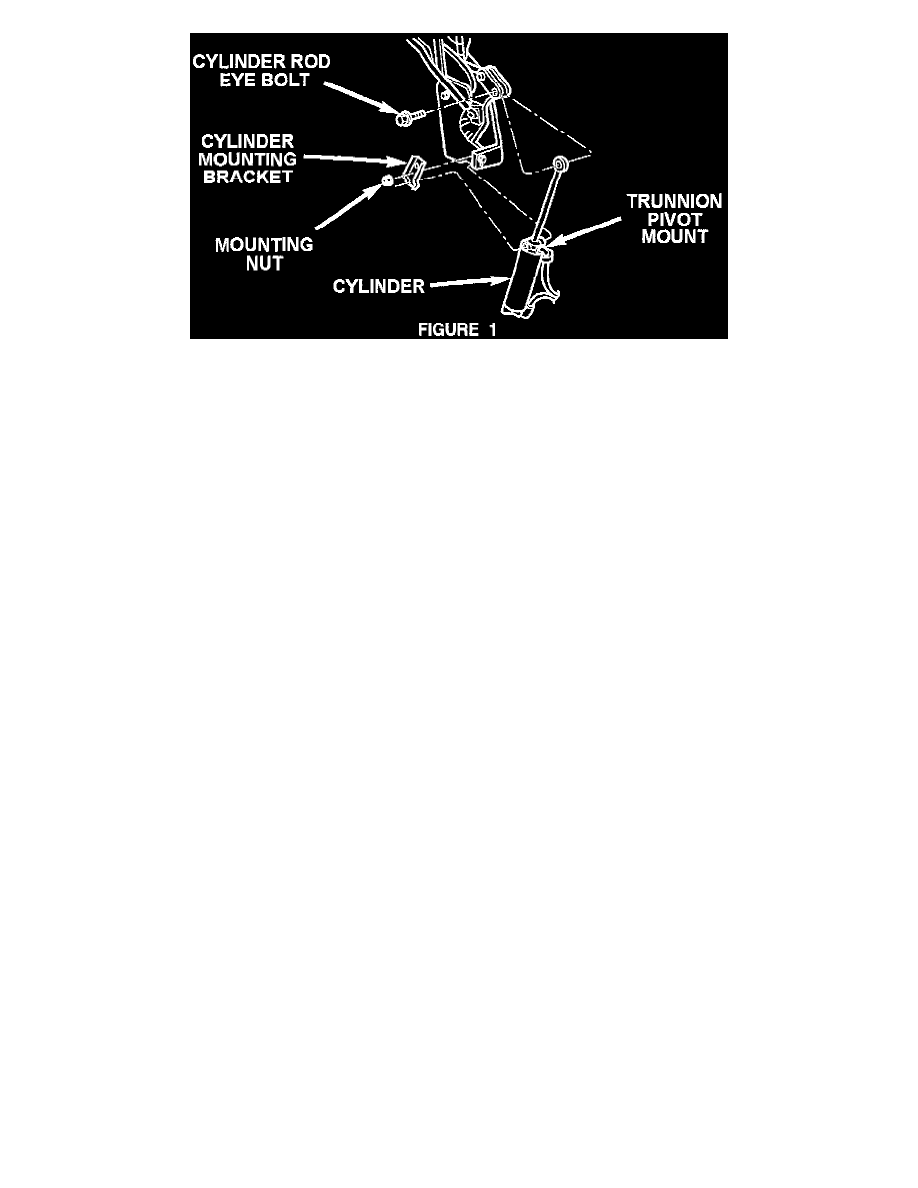
Remove the cylinder mounting nut bracket and separate the cylinder from the trunnion pivot mount (Figure 1). Repeat for the other side.
8.
Label the upper and lower hydraulic cylinders for comparison on reassembly. Disconnect the upper and lower hydraulic line from both the right
and left hydraulic cylinders.
9.
Disconnect the upper and lower hydraulic lines from the hydraulic pump.
10.
Separate the hydraulic lines from the vehicle. Remove the hydraulic cylinders from the vehicle.
11.
Install the new hydraulic cylinders, leaving the cylinder mounting nut and bracket off until later in the Repair Procedure.
12.
Install the new hydraulic lines to the cylinders and pump.
13.
Rotate the cylinders 180 degrees (the hose fittings will now face the front of the car).
14.
Connect the negative battery cable.
15.
Disconnect the motor wire connector retaining clip from the body.
16.
Rotate and raise the motor/pump assembly so the reservoir is in the up position. The rubber filler plug will be at the top.
17.
Raise the motor and pump fitting to at least 2" above the horizontal rear seat back reinforcement.
18.
Tilt the motor and pump assembly to approximately the 10 o'clock position, with the rubber filler plug still at the top.
CAUTION:
THE MOTOR AND PUMP ASSEMBLY MUST REMAIN IN THE CURRENT POSITION UNTIL THE RUBBER FILLER PLUG IS
REINSTALLED IN STEP 22.
19.
Remove the rubber fill plug from the reservoir.
20.
Fill the hydraulic system by adding Dexron 2 Automatic Transmission Fluid to the bottom of the fill hole.
CAUTION:
DO NOT OPERATE THE TOP SWITCH IN THE "UP" (CLOSING THE TOP) DIRECTION.
21.
With two people, activate the top switch in the "down" (opening the top) position to fully retract the cylinder rods and hold for approximately 5
seconds, until the motor and pump stalls. A percolating or gurgle sound/feeling is an indication that the procedure is working.
22.
Top off the pump with Dexron 2 and insert the filler plug.
23.
Install the motor/pump assembly into the vehicle mounting bracket.
24.
Rotate the cylinders back to the original position (hose fittings facing rearward).
25.
Install the motor lead and hydraulic line clips (the hydraulic line clips are to assist in the production process) to ensure that the seat back/seat
cushion do not pinch the lines. If the sticky side is no longer holding to the floor pan, the clips can be left off.