Sebring Convertible V6-2.5L SOHC 24 Valve (1996)

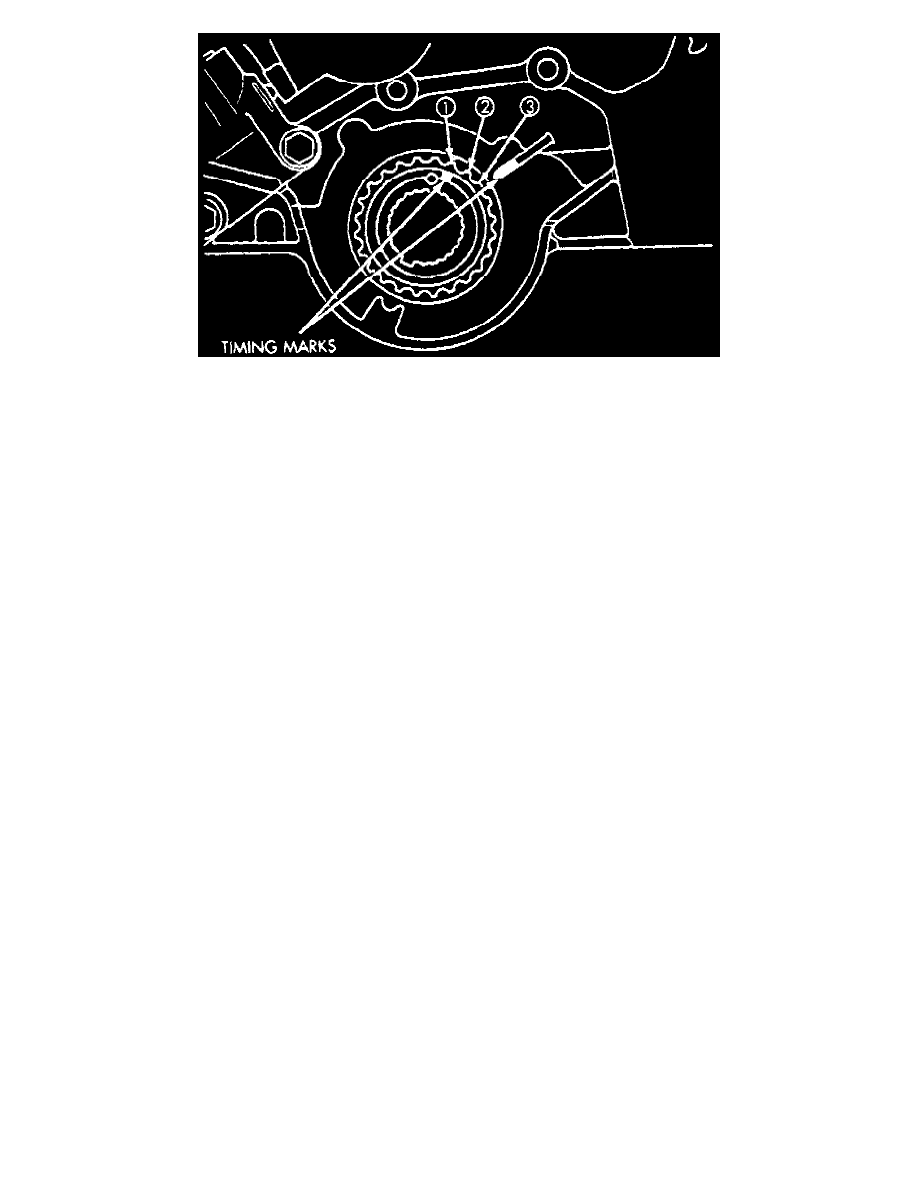
Fig. 27 Crankshaft Sprocket Teeth & Mark Location.
3. Align mark on crankshaft sprocket with arrow mark on oil pump housing, then back off to three sprocket teeth before Top Dead Center (TDC).
4. Align camshaft sprocket marks with marks on valve covers.
5. Install timing belt as follows:
a. Position timing belt over rear camshaft sprocket. Use a binder clip to secure timing belt to camshaft sprocket.
b. With timing belt held taut, install belt under water pump pulley, then over front camshaft sprocket. Use a binder clip to secure timing belt to
camshaft sprocket.
c. Align crankshaft sprocket TDC mark with mark on oil pump cover.
d. Install timing belt over idler pulley, crankshaft sprocket and tensioner pulley.
6. Apply rotating force in clockwise direction to crankshaft sprocket to remove timing belt slack. Ensure timing marks are aligned.
7. Using a suitable torque wrench and torque wrench tool No. MD998767, or equivalent, apply a force of 39 in-lbs to timing belt tensioner pulley,
then torque tensioner pulley bolt to 35 ft-lbs.
8. With force still upon tensioner pulley, install timing belt tensioner to tensioner pulley bracket. Torque attaching bolts to 23 ft-lbs.
9. Remove locking pin retaining tensioner plunger in body.
10. Rotate crankshaft two revolutions in clockwise direction, then check camshaft and crankshaft sprocket mark alignment and ensure locking pin
slides freely through tensioner body holes. If camshaft and crankshaft sprocket marks are not properly aligned and/or locking pin cannot slide
freely through tensioner holes, repeat procedure.
11. Install front cover as outlined under "Front Cover, Replace".
