
Sebring Convertible V6-2.5L VIN H (1997)
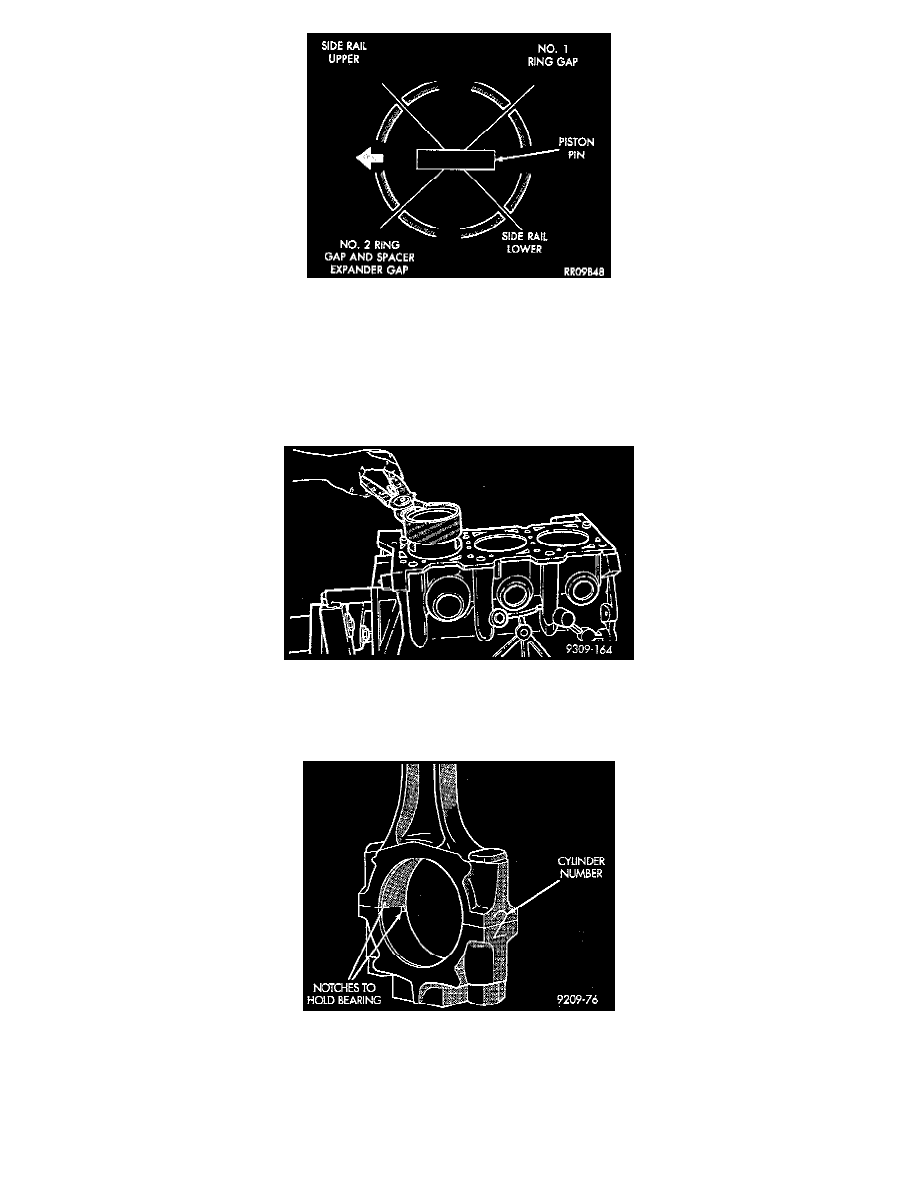
2. Before installing the ring compressor, make sure the oil ring expander ends are butted and the rail gaps located as shown.
3. Immerse the piston head and rings in clean engine oil, slide the ring compressor, over the piston and tighten. Be sure position of rings does not
change during this operation.
4. Install connecting rod bolt protectors on rod bolts.
5. Rotate crankshaft so that the connecting rod journal is on the center of the cylinder bore. Insert rod and piston into cylinder bore and guide rod
over the crankshaft journal.
6. Install the piston and connecting rod assembly with the directional letter is located on the top of the piston with the arrow facing toward the
camshaft sprocket.
7. Tap the piston down in cylinder bore, using a hammer handle. At the same time, guide connecting rod into position on connecting rod journal.
8. Install rod caps. Install nuts on cleaned and oiled rod bolts and tighten nuts to 51 Nm (37 ft. lb.).
CAUTION: Piston assemblies are not to be interchanged from bank to bank.
9. Check alignment marks made during disassembly and that bearing position notches new or used are on the same side as shown.