
Sebring Convertible V6-2.7L (2009)
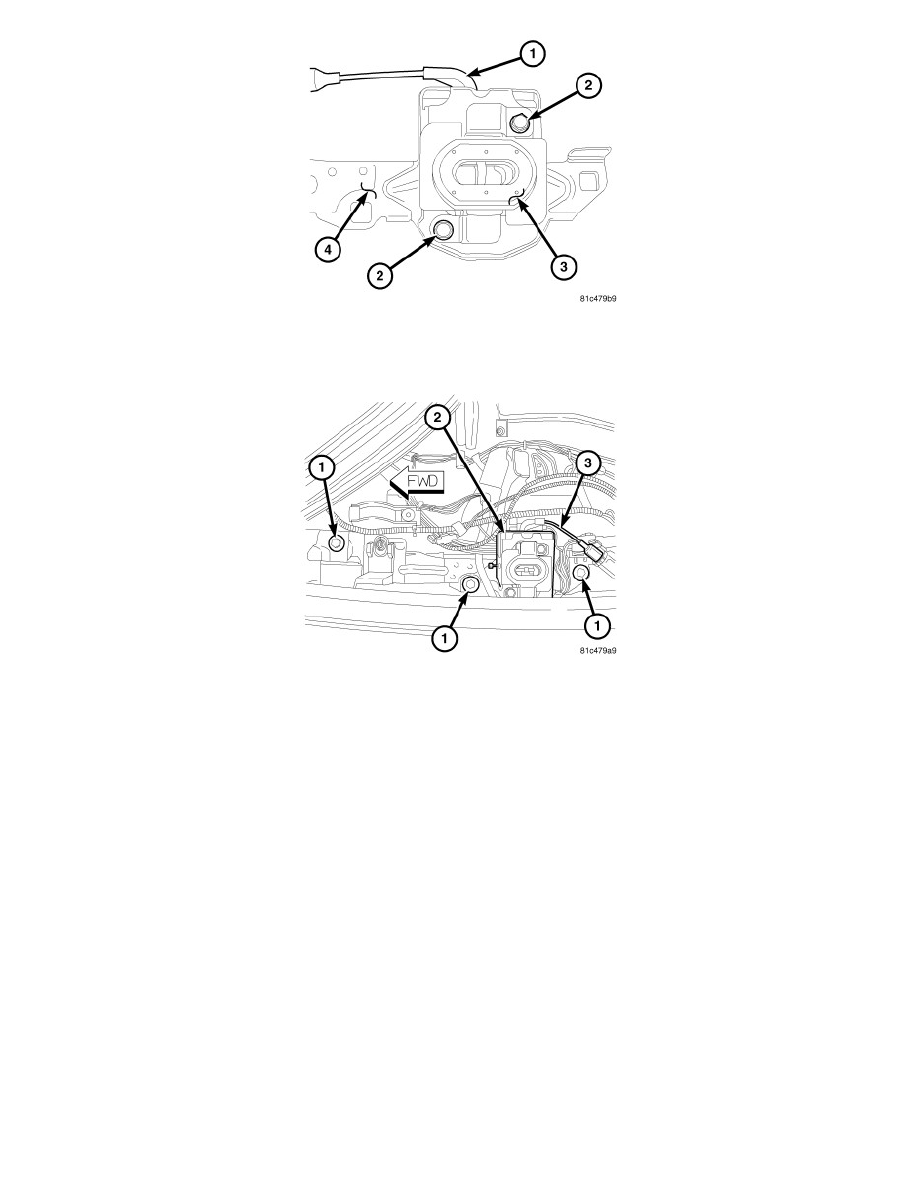
3. Position the decklid forward latch assembly and the latch striker pad (3) onto the latch bracket (4). The striker pad (3) and the decklid forward
latch sandwich the bracket (4) so that the pad is on top and the latch is on the bottom of the bracket.
4. Install the two latch retaining screws (2).
5. Position the decklid forward latch and bracket assembly into the vehicle trunk area. With the latch and bracket assembly upside down, install the
cable end into the latch.
6. Position the assembly onto the left inner quarter panel using the marks made during removal. Install the bracket retaining bolts (1) and tighten to
10 Nm (88 in. lbs.).
7. Connect the latch switch electrical connector.
8. Connect the battery negative cable.
9. Cycle the power folding top and ensure proper alignment of the decklid assembly. Make adjustments as necessary.
10. Install the left and right trunk trim panels.
11. Install the rear trunk trim panel.
12. Close the rear decklid.
Luggage Protector Position
INSTALLATION