
Sebring Convertible V6-2.7L (2009)
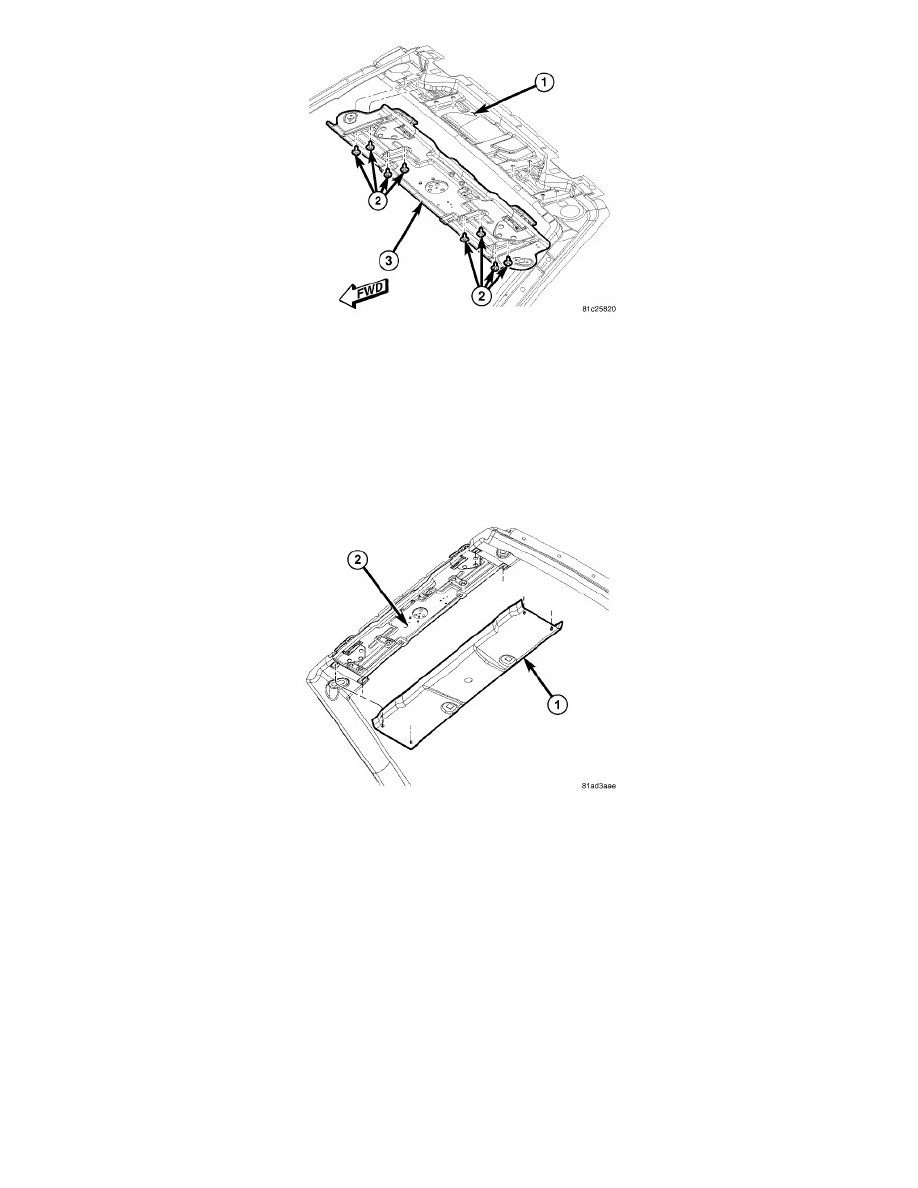
6. Observing the location marks made during removal, position the folding top presenter plate assembly (3) onto the bottom side of the windshield
header (1).
7. Install the presenter plate retaining bolts (2) finger tight.
8. Connect the presenter plate electrical connector located on the right A-pillar.
9. Connect the battery negative cable.
10. Close the folding top completely so that the header latches are fully latched.
11. Tighten the presenter plate retaining bolts (2) to 10 Nm (88 in. lbs.).
12. Cycle folding top open then closed to ensure proper presenter plate alignment.
13. Disconnect the battery negative cable.
14. Install the left and right A-pillar trim panels, See: Interior Moulding / Trim/Trim Panel/Service and Repair/Pillar Trim/A-Pillar Trim
Panel-Installation.
15. Install the windshield header lower trim panel (1) by pushing the panel upwards until the retaining clips are fully secured to the slots in the power
folding top presenter plate assembly (2).