
Sebring Convertible V6-2.7L (2009)
Spoiler: Service and Repair
Spoiler - Installation
INSTALLATION
1. Prime the spoiler with 3M(TM) adhesion promoter (Part No. 06396) in the areas the tape will be applied inboard and adjacent to the "hider lip" at
the top and bottom edge of the spoiler attaching surface.
NOTE: Keep all contaminants (fingers, gloves, cloths, etc.) off the adhesive surface of the tape while applying it.
2. Cut 2 pieces of 3M(TM) acrylic plus attachment tape, 3M p/n 06384, 1330mm (52.4 in.)
3. Remove one side of the backing paper from a piece of the attachment tape and apply it to the spoiler so it is adjacent to the "hider lip" at the top of
the spoiler, being careful not to entrap air between the spoiler and tape.
4. Remove one side of the backing paper from a piece of the attachment tape and apply it to the spoiler so it is adjacent to the "hider lip" at the
bottom of the spoiler, being careful not to entrap air between the spoiler and tape.
5. Use a hard rubber roller or firm hand pressure to securely bond the tape pieces to the spoiler.
NOTE: Important Installation Precautions and Recommendations:
-
Application temperatures below 60ºF (16°C) should be avoided. If necessary, warm the vehicle surface with a heat gun to obtain the
recommended vehicle surface application temperature of 60ºF to 110ºF (16°C to 43°C).
-
It is important that the vehicle not have any condensation on it (i.e., a cold vehicle moved into a warm shop).
-
DO NOT touch or contaminate the exposed adhesive surface of the tape.
-
DO NOT apply the new tape over the old tape or tape residue.
-
DO NOT let the tape sit around with the adhesive surface exposed.
-
DO NOT use an adhesion promoter on the painted surface of the deck lid.
6. Peel a portion of the backing paper from both pieces of attachment tape on the drivers side of the spoiler.
7. Starting on the drivers side, locate the end of spoiler 5mm (3/16 in.) from edge of deck lid, immediately below the corner radius.
HOLD THE
OPPOSITE END OF THE SPOILER AWAY FROM THE VEHICLE. Making sure the spoiler remains level with the upper character line of
the deck lid, slowly apply the tape on the spoiler to the deck lid, working from the drivers side to the passenger side of the vehicle while pulling off
the remaining backing paper as the spoiler installation progresses.
8. Apply heavy hand pressure all along the spoiler to establish good tape adhesion between the spoiler and deck lid.
9. Check the edges of the spoiler to verify good tape adhesion. Apply more pressure if necessary.
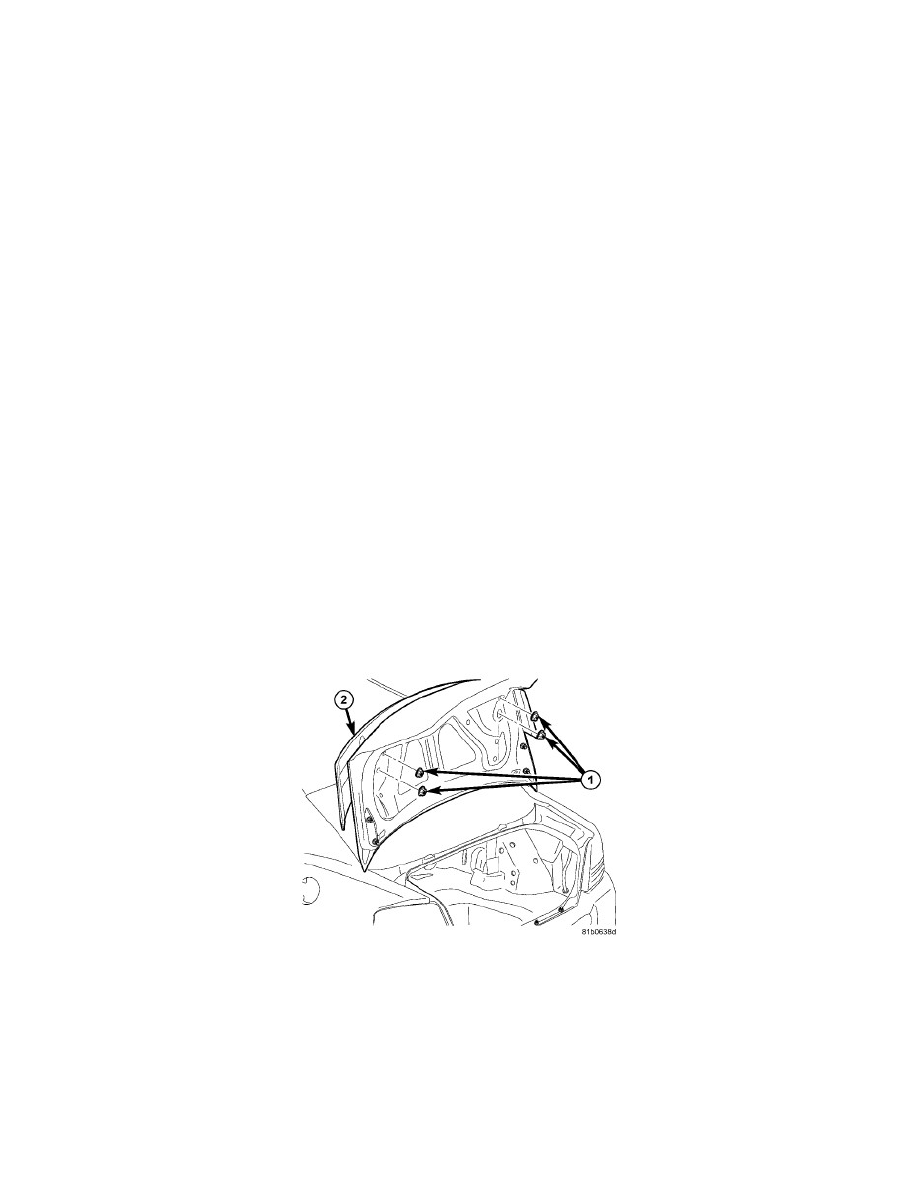
10. Install nuts. Tighten to 5 Nm (44 inch lbs.)