
Sebring Convertible V6-2.7L (2009)
5. Reach behind the engine and remove the two bottom nuts the that secure the heat shield to the studs located on the dash panel and remove the heat
shield. Rotate and tilt the heat shield as required.
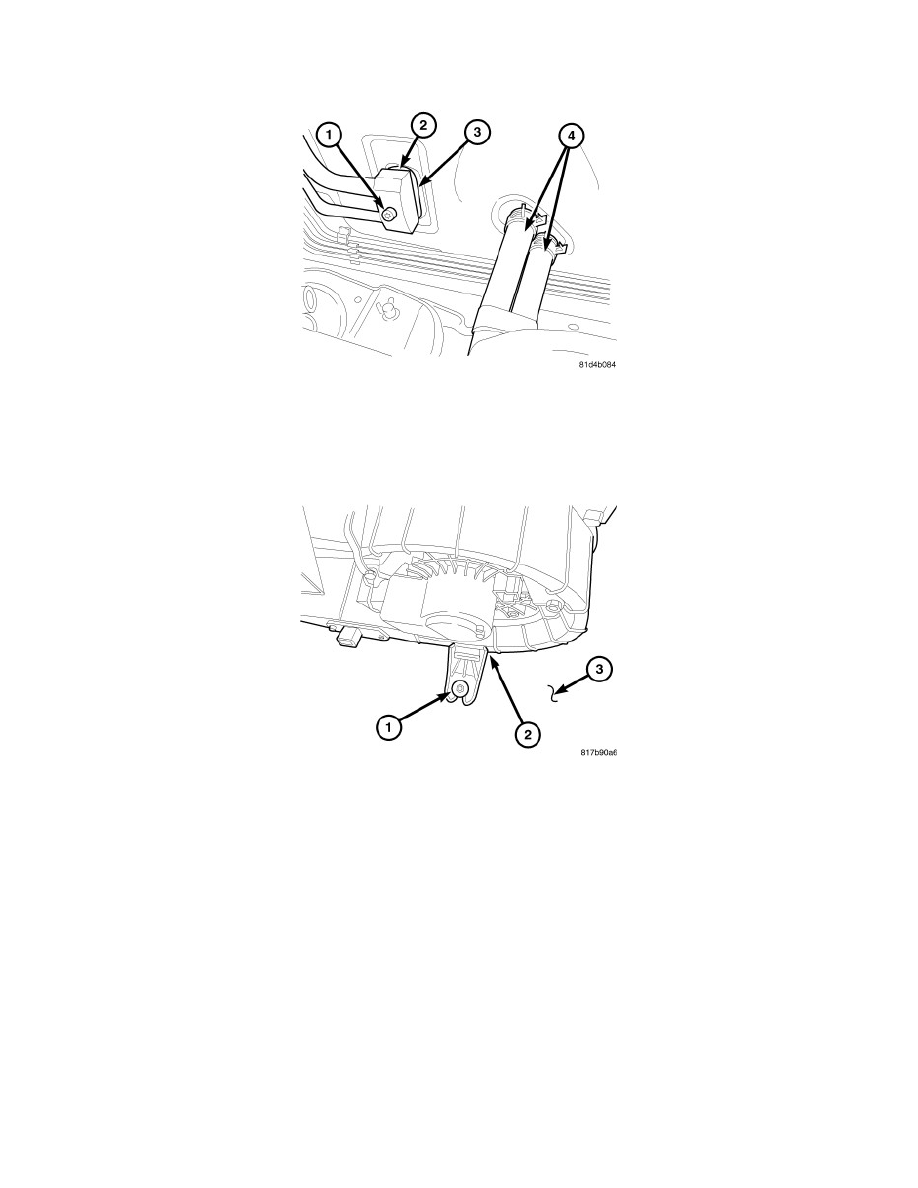
6. Remove the bolt (1) that secures the A/C liquid and suction line assembly (2) to the A/C evaporator (3).
7. Disconnect the A/C liquid and suction line assembly from the A/C evaporator and remove and discard the dual-plane seals.
8. Install plugs in, or tape over the opened refrigerant line fittings and the evaporator ports.
9. Disconnect the heater hoses (4) from the heater core tubes. Install plugs in, or tape over the opened heater core tubes to prevent coolant spillage
during housing removal.
NOTE: Make sure to remove the five bolts that secure the HVAC housing to the instrument panel support prior to removing the instrument
panel from the vehicle.
10. Remove the instrument panel See: Body and Frame/Interior Moulding / Trim/Dashboard / Instrument Panel/Service and Repair/Instrument Panel -
Removal.
11. Remove the rear floor ducts See: Air Duct/Service and Repair/Floor Distribution Duct - Removal.
12. Remove the condensation drain tube See: Evaporator Drain Tube/Service and Repair/Condensation Drain Tube - Removal.
13. Remove the nut (1) that secures the passenger side of the HVAC housing (2) to the dash panel (3).
NOTE: Use care to ensure that the interior is covered in case of loss of residual fluids from the heater and evaporator cores.
14. Pull the HVAC housing rearward and remove the HVAC housing assembly from the passenger compartment.
HVAC Housing - Installation
HOUSING-HVAC
NOTE: LHD model shown in illustrations. RHD model similar.