
Sebring Convertible V6-2.7L (2009)
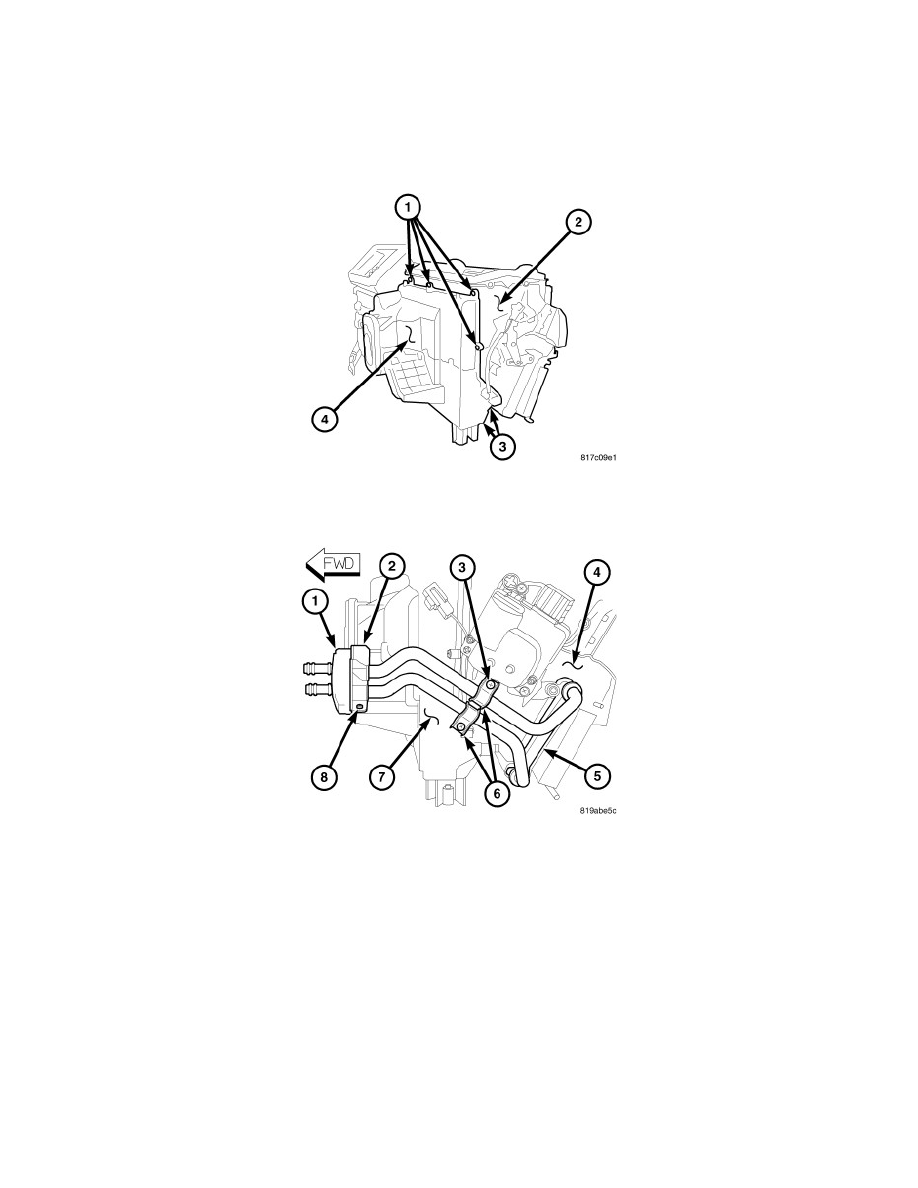
11. If required, remove the seal (4) from around the evaporator tube tapping block (5).
Rear HVAC Housing
HOUSING-AIR DISTRIBUTION
NOTE: LHD model shown in illustrations. RHD model similar.
1. Position the air distribution housing (2) onto the rear of the HVAC housing (4).
2. Install the two metal retaining clips (3) that secure the bottom of the air distribution housing to the HVAC housing.
3. Install the seven screws (1) that secure the air distribution housing to the HVAC housing. Tighten the screws to 1.2 Nm (10 in. lbs.).
4. Carefully install the heater core (5) into the side of the air distribution housing (4).
5. On RHD models, install the air distribution housing onto the HVAC housing (7) See: Removal and Replacement/HVAC Housing - Installation.
6. Install the heater core tube brackets (6) and retaining screws (3). Tighten the screws to 1.2 Nm (10 in. lbs.)
7. Install the flange (2) that secures the heater core tubes to the front of the HVAC housing.
8. Install the screw (8) that secures the flange to the HVAC housing. Tighten the screw to 1.2 Nm (10 in. lbs.).
NOTE: If the foam seal for the flange is deformed or damaged, it must be replaced.
9. Install the foam seal (1) onto the flange.
10. Install all of the floor distribution ducts onto the air distribution housing See: Air Duct/Service and Repair/Floor Distribution Duct - Installation.
NOTE: If the heater core is being replaced, flush the cooling system See: Engine, Cooling and Exhaust/Cooling System/Service and Repair .
11. Install the HVAC housing assembly See: Removal and Replacement/HVAC Housing - Installation.
Air Distribution Housing
HOUSING-AIR DISTRIBUTION