
Sebring LX Convertible L4-2.4L VIN X (2002)
Console: Procedures
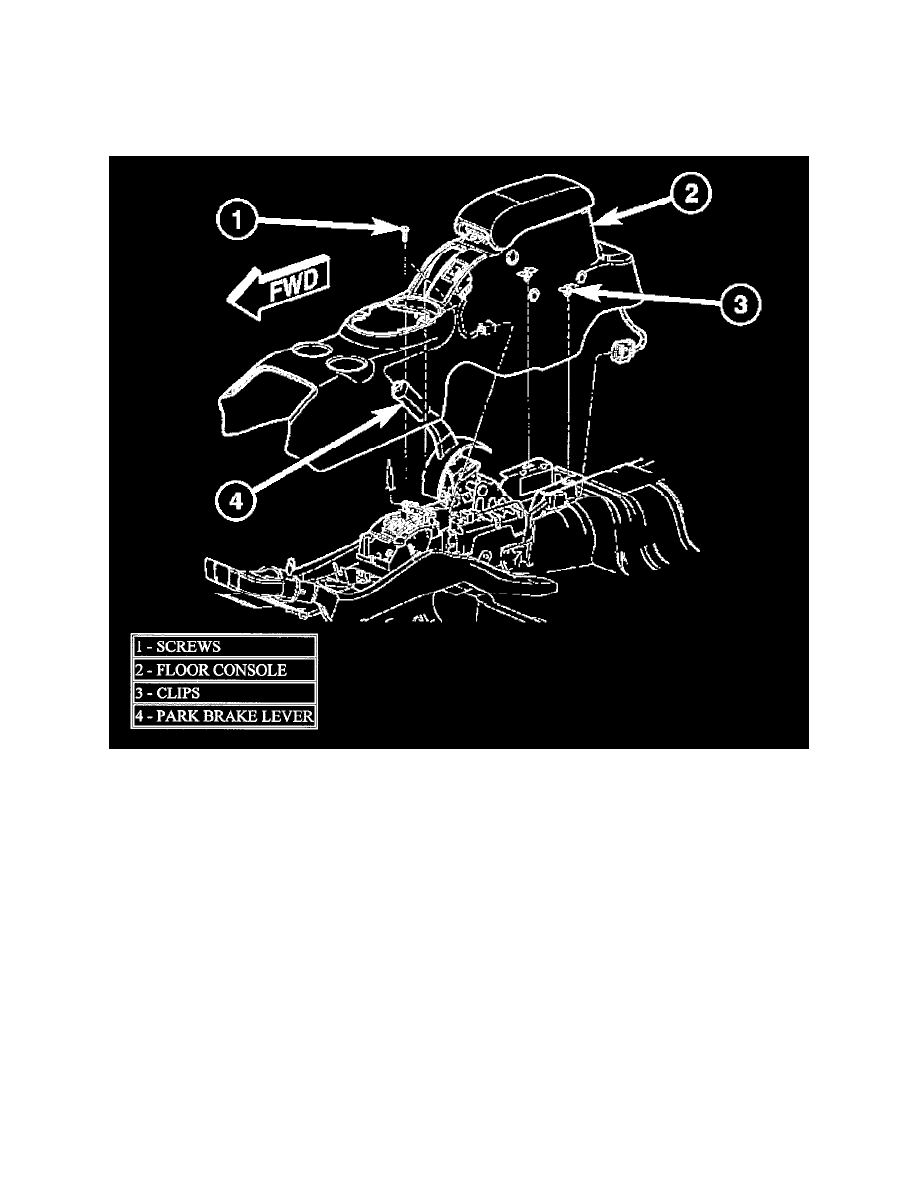
Floor Console
REMOVAL
1. Raise parking brake lever as high as possible.
2. Move transmission shifter to neutral position.
3. Loosen set screw on front of shifter knob and remove shift lever knob.
NOTE: Do not use a trim stick or tool to remove transmission range indicator.
4. Remove transmission range indicator bezel by squeezing the sides slightly and lifting up until the locking tabs are free of the floor console.
5. Disconnect transmission range indicator bezel wire connector on the underside of bezel.
6. Remove screws, next to floor shifter and in console storage compartment, attaching floor console to brackets on floor pan.
7. Disconnect wire connector for floor console accessories at floor pan.
8. Remove console from vehicle.
NOTE: The grip portion of the parking brake lever will only fit through the wider lower portion of the slot in the floor console.
INSTALLATION
1. Position console in vehicle.
2. Connect wire connector for floor console accessories at floor pan.
3. Verify that the rear locator pin on the bottom of the storage bin is engaged to the slot in the body bracket and the front pin is engaged to the shift
mechanism.
4. Install screws, next to floor shifter and in console storage compartment, holding floor console to brackets on floor pan.
5. Connect transmission range indicator bezel wire connector on shifter mechanism.
6. Install lighted transmission range indicator letter bezel.