
Sebring LXI Convertible V6-2.7L VIN R (2002)
Hood Latch Release Cable: Service and Repair
LATCH RELEASE CABLE
REMOVAL
1. Remove hood latch.
2. Remove left front cowl trim panel.
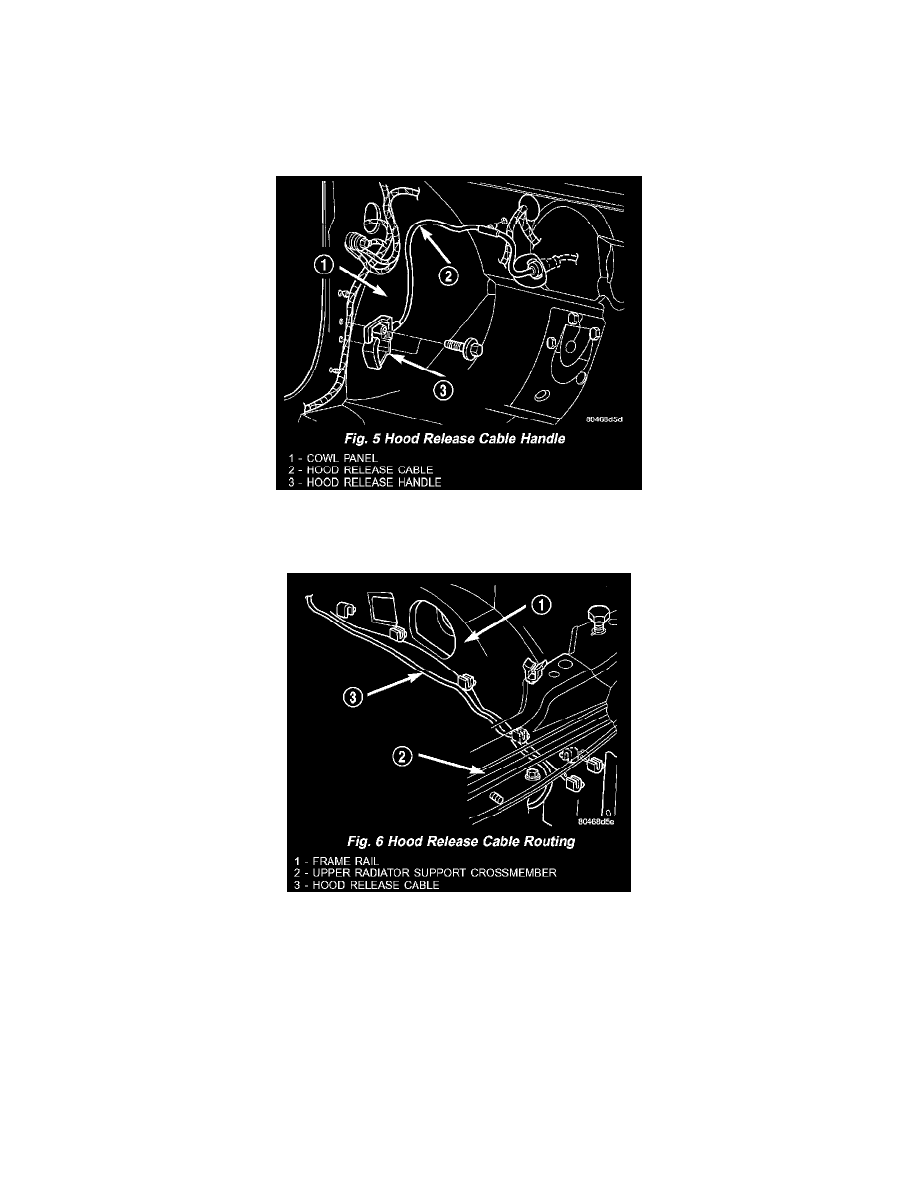
Fig. 5
3. Remove screws attaching hood release handle to inner cowl panel (Fig. 5).
Fig. 6
4. Release clips attaching hood release cable to left inner frame rail (Fig. 6).
5. Disengage rubber grommet at lower dash panel.
6. Disengage push-in fastener attaching hood release cable to dash panel.
7. Remove hood release cable from vehicle.
INSTALLATION
1. Route hood release cable through hole in lower dash panel and along inner frame rail.
2. Engage rubber grommet to lower dash panel.
3. Engage push-in fastener attaching hood release cable to lower dash panel.
4. Install screws attaching hood release cable handle to inner cowl panel.
5. Tighten screws to 1.8 N.m (16 in.lbs.) torque.