
Sebring LXI Convertible V6-2.7L VIN R (2002)
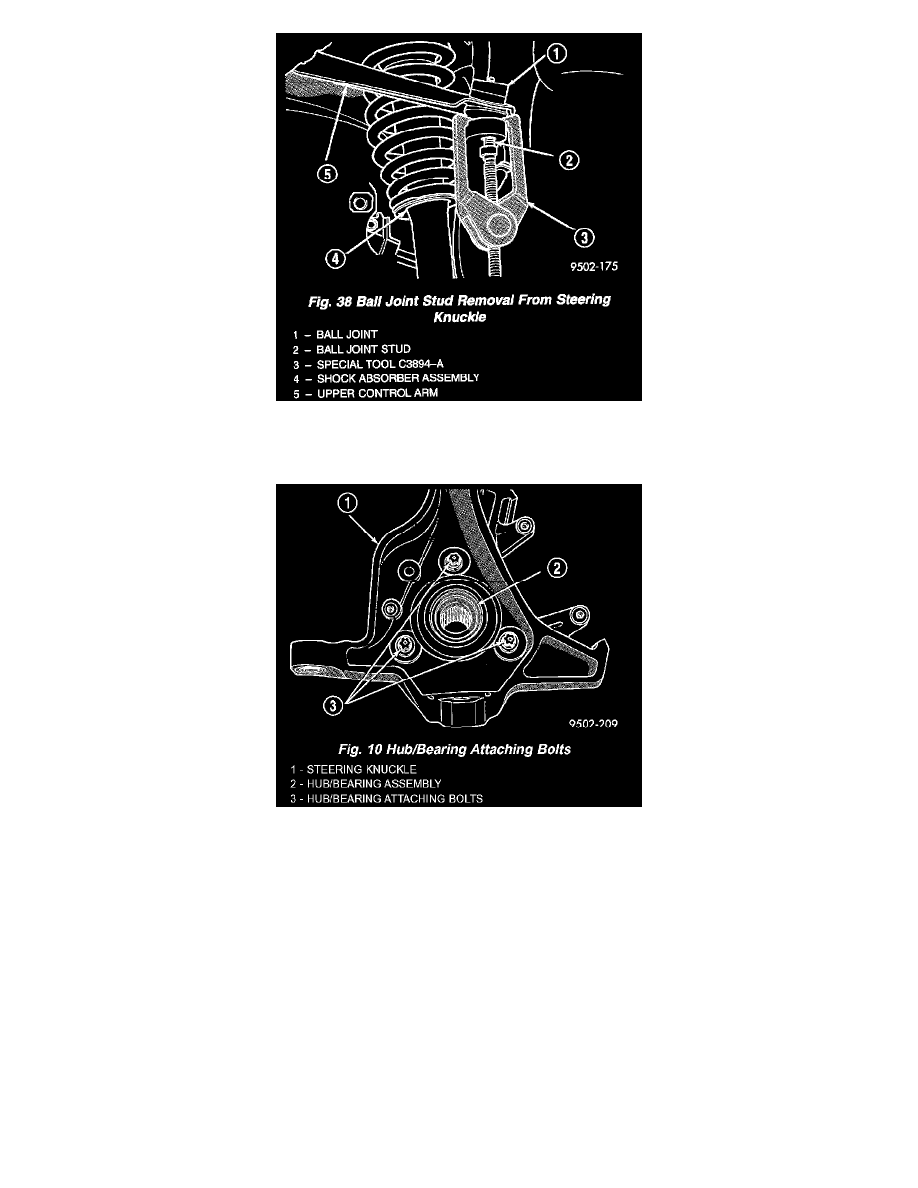
13. Remove the upper ball joint stud from the steering knuckle using Puller, Special Tool, C3894-A.
14. Remove steering knuckle from vehicle.
15. Mount steering knuckle securely in a vise.
16. Remove the 3 bolts attaching the hub/bearing assembly to the steering knuckle.
17. Remove the hub and bearing assembly from the front of the steering knuckle.
NOTE: If bearing will not come out of steering knuckle, it can be tapped out using a soft faced hammer.
INSTALLATION
1. Thoroughly clean all hub and bearing assembly mounting surfaces on steering knuckle.
2. Install the replacement hub and bearing assembly in steering knuckle aligning bolt boles in bearing flange with holes in steering knuckle.
3. Install the 3 mounting bolts and tighten evenly to ensure bearing is square to face of steering knuckle. Tighten the 3 mounting bolts to a torque of
110 Nm (80 ft. lbs.).
4. Slide drive shaft back into front hub and bearing assembly.
5. Install the steering knuckle on the lower control arm ball joint.
6. Install the steering knuckle to lower ball joint castle nut.
7. Install the steering knuckle onto upper ball joint stud and install nut.
8. Using a crow foot and torque wrench, tighten the upper and lower ball joint nuts to the following torque specifications.
^
Lower ball joint castle nut 74 Nm (55 ft. lbs.).
^
Upper ball joint nut 27 Nm (20 ft. lbs.).
9. Install cotter pin in lower ball joint stud and castle nut.