
Sebring LXI Convertible V6-2.7L VIN R (2002)
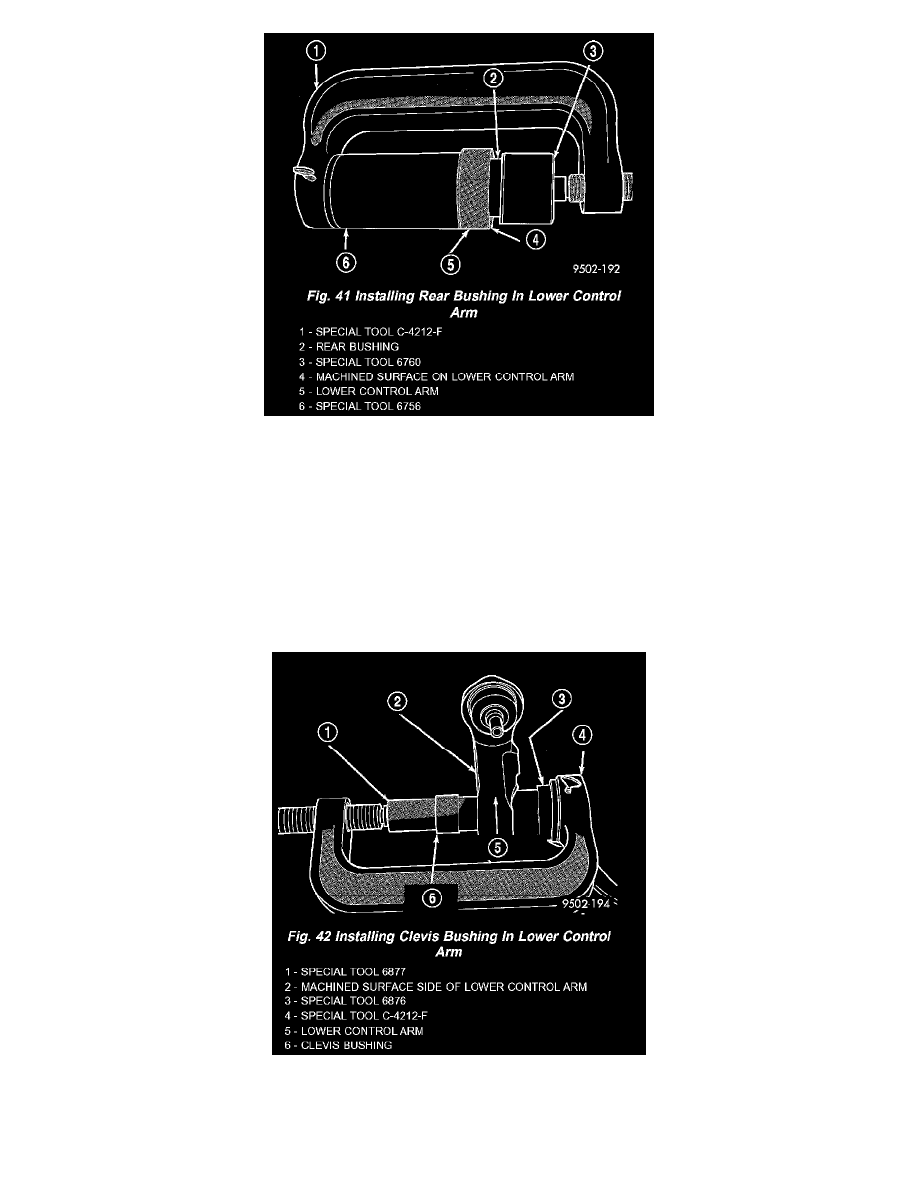
2. Mount Bushing Installer, Special Tool 6760 on screw portion of Remover/Installer Special Tool C-4212-F.
3. Install Special Tools assembled for installation of rear isolator bushing into lower control arm on the lower control arm. Be sure Special Tool 6756
is square on lower control arm and Special Tool 6760 is positioned correctly on isolator bushing.
4. Tighten screw on Remover/Installer Special Tool C-4212-F pressing rear bushing into lower control arm. Continue pressing rear bushing into
lower control arm until bushing is sitting flush on the machined surface of the lower control arm. This will correctly position rear bushing in lower
control arm.
5. Install lower control arm assembly back on vehicle.
ASSEMBLY - CLEVIS BUSHING
To perform removal and replacement of the lower control arm clevis bushing, the lower control arm must be removed from the vehicle.
1. Start clevis bushing into lower control arm by hand, making sure it is square with its mounting hole in the lower control arm. Bushing is to be
installed in lower control arm from the machined surface side of lower control arm bushing hole.
2. Mount Bushing Installer, Special Tool 6877 on screw portion of Remover/Installer Special Tool C-4212-F as shown in the image.
3. Install the assembled special tools for installing the clevis bushing into the lower control arm, on the lower control arm and clevis bushing. Be sure
Special Tool 6876 is square on lower control arm and Special Tool 6877 is positioned correctly on clevis bushing.
4. Tighten screw on Remover/Installer Special Tool C-4212-F pressing clevis bushing into lower control arm. Continue pressing clevis bushing into