
Sebring LXI Convertible V6-2.7L VIN R (2002)
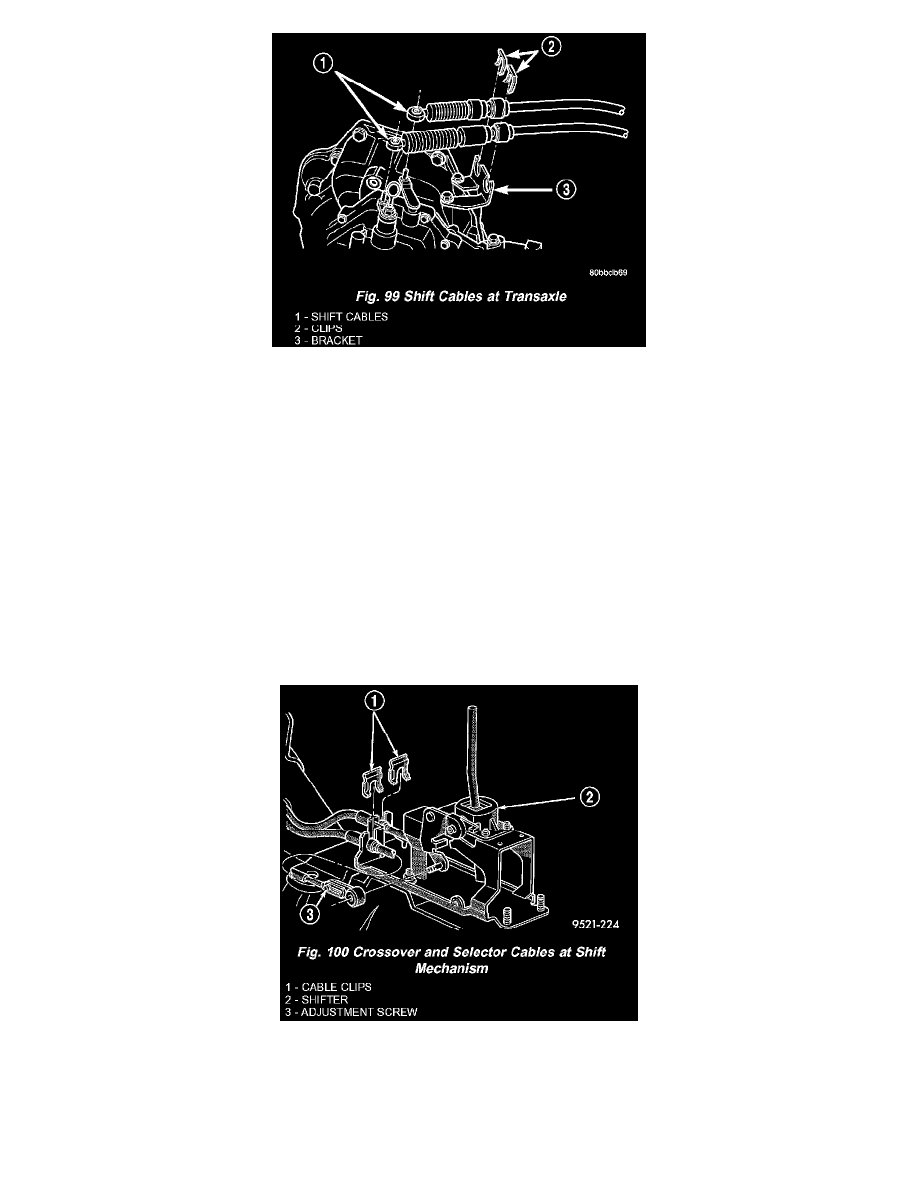
7. Disconnect crossover and selector cables from transaxle (Fig. 99).
8. Remove retainer clips and disengage cables from bracket (Fig. 99).
9. Raise vehicle on hoist.
10. Remove cable grommet from floor pan.
11. Pull cables forward and remove from under vehicle.
INSTALLATION
1. Install gearshift cable assembly into engine compartment from under vehicle.
2. Feed cable assembly through hole in floor pan and secure grommet to floor pan.
3. Lower vehicle.
4. Install gearshift cables to mounting bracket (Fig. 99). Secure with new clips.
5. Connect gearshift cables to transaxle crossover and selector levers (Fig. 99).
6. Install air cleaner assembly.
7. Connect crossover and selector cables to mechanism and secure with clips (Fig. 98).
NOTE: Only the crossover cable is adjustable. The selector cable does not have any adjustment capabilities.
8. Adjust crossover cable as follows:
a. Loosen adjusting screw on crossover cable at shifter (Fig. 100).
b. The gearshift mechanism and transaxle crossover lever are spring-loaded and self-centering. Alignment pins used in the past are not required
anymore. Allow gearshift mechanism and transaxle crossover lever to relax in their neutral positions. To ensure the gearshift lever is in the
proper position, place the shifter in 3rd or 4th gear if necessary. Torque adjustment screw to 8 Nm (70 inch lbs.). Care must be taken to avoid
moving the shift mechanism off-center during screw tightening.
c. Perform functional check by shifting transaxle into all gears.