
Sebring LXI Sedan V6-2.7L VIN R (2002)
Oil Pan: Service and Repair
OIL PAN
REMOVAL
1. Disconnect negative battery cable.
2. Remove engine oil dipstick and tube.
3. Raise vehicle on hoist.
4. Drain engine oil and remove oil filter.
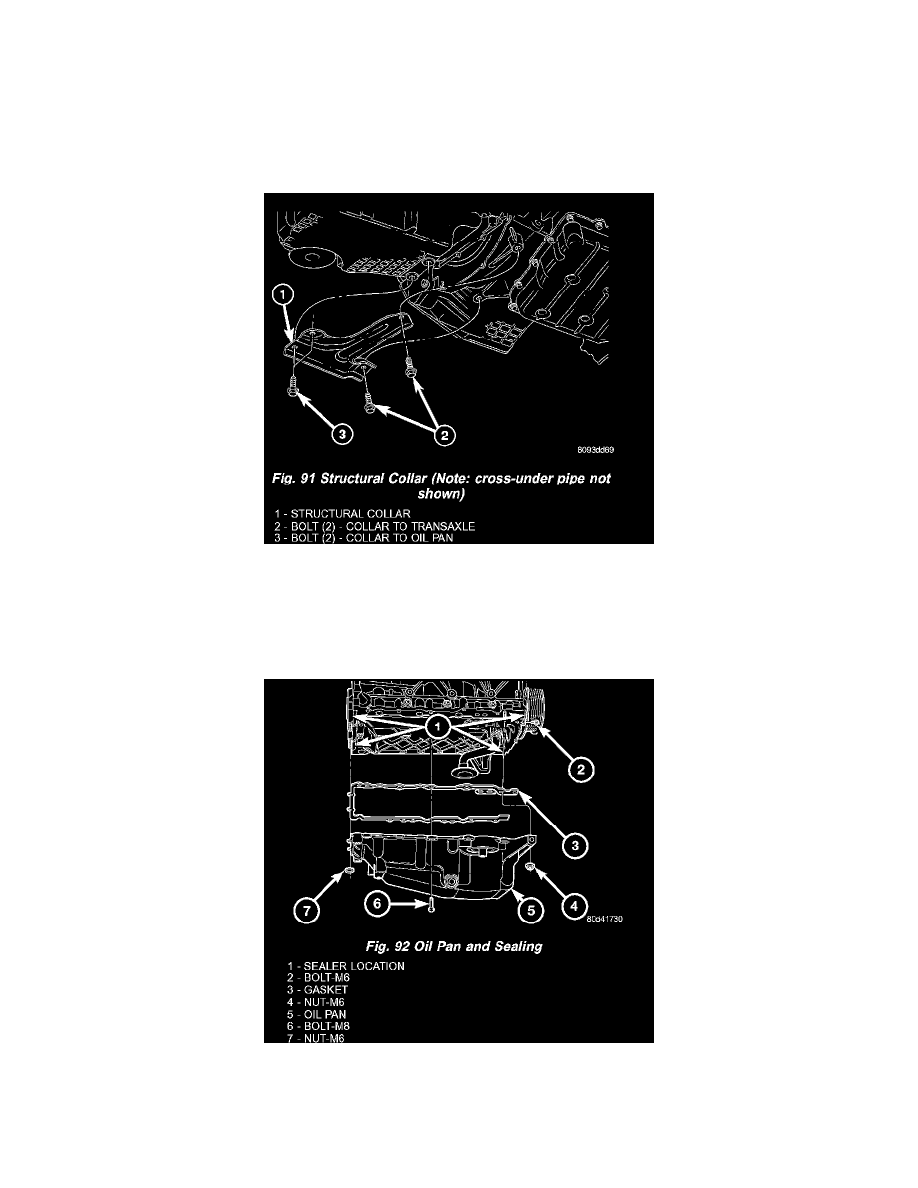
5. Remove structural collar (Fig. 91).
6. Remove exhaust cross-under pipe.
7. Remove torque converter housing cover.
8. Remove lower bolt attaching the A/C compressor to oil pan.
CAUTION: Assure removal of the two bolts attaching the timing cover to the oil pan, as damage to the timing cover and/or oil pan may occur.
9. Remove oil pan attaching fasteners. Remove oil pan and gasket (Fig. 92).
INSTALLATION
1. Clean oil pan and sealing surfaces. Inspect oil pan and timing chain cover gaskets. Replace as necessary.
2. Apply an 1/8 inch bead of Mopar Engine RTV GEN II to the front Joints (oil pan gasket to timing cover gasket interface) and the rear Joints (oil