
Sebring Sedan L4-2.4L (2007)
3.
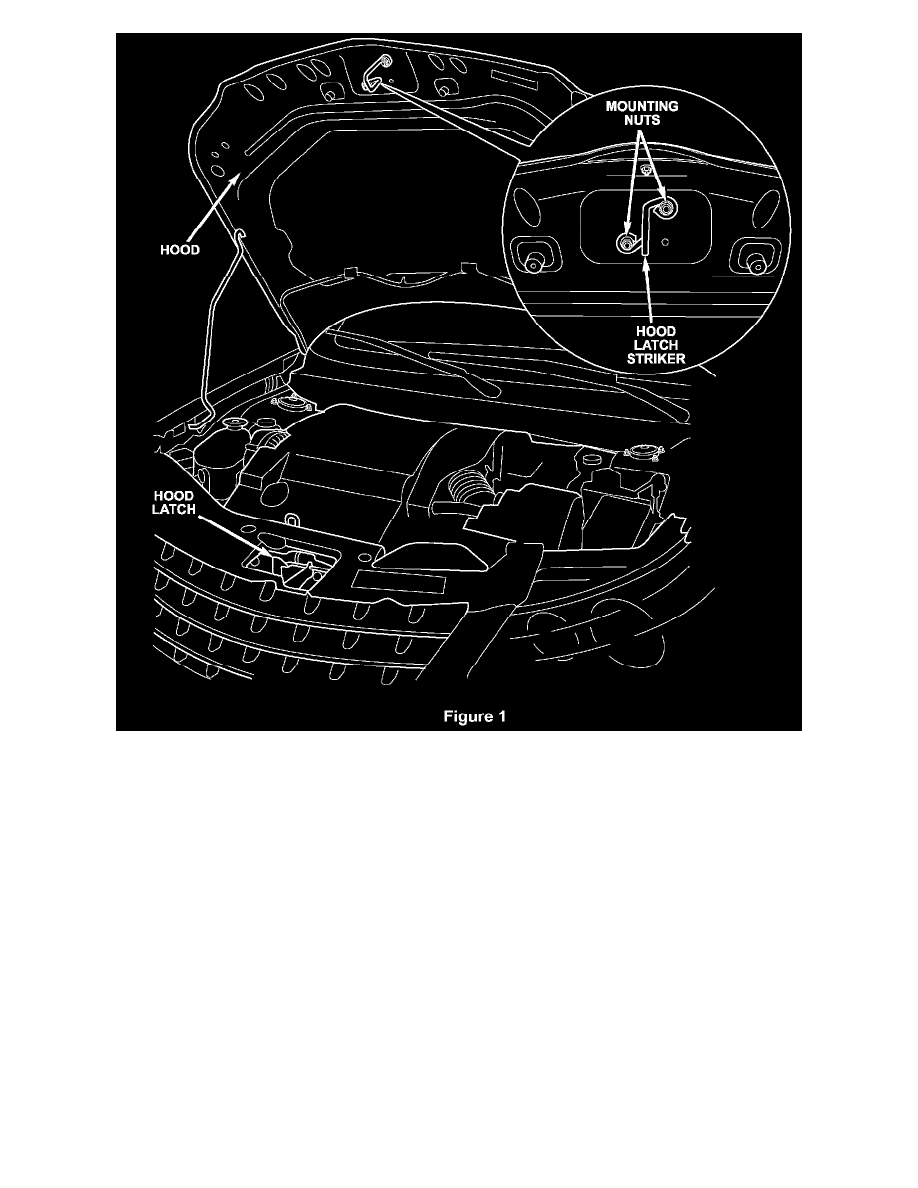
Remove the two hood latch striker mounting nuts (Figure 1).
4.
Remove and discard the original hood latch striker.
5.
Place the new hood latch striker into position and loosely install the two hood latch striker mounting nuts.
6.
Line up the striker to the reference marks made in Step 2 and tighten the mounting nuts to 80 in. lbs. (9 N.m).
CAUTION:
The hood latch striker must be installed in the correct orientation. If installed backwards, the secondary hood latch will not engage when the primary
hood latch is released.
7.
Close the hood and verify hood adjustment. Adjust the hood latch if required.
8.
Check the secondary hood latch function using the following procedure:
a.
Close the hood completely.
b.
Pull the inside hood release lever.
c.
Attempt to open the hood without touching the secondary hood release lever.
d.
The secondary latch should engage and prevent the hood from opening.