
Sebring Sedan L4-2.4L (2007)
NOTE: Illustration shown with front fascia removed for clarity.
8. Raise and support the vehicle.
NOTE: On gasoline engine equipped models, reach up through the opening in the bottom of the front fascia located in the right front corner of the
vehicle to gain access to the A/C liquid line.
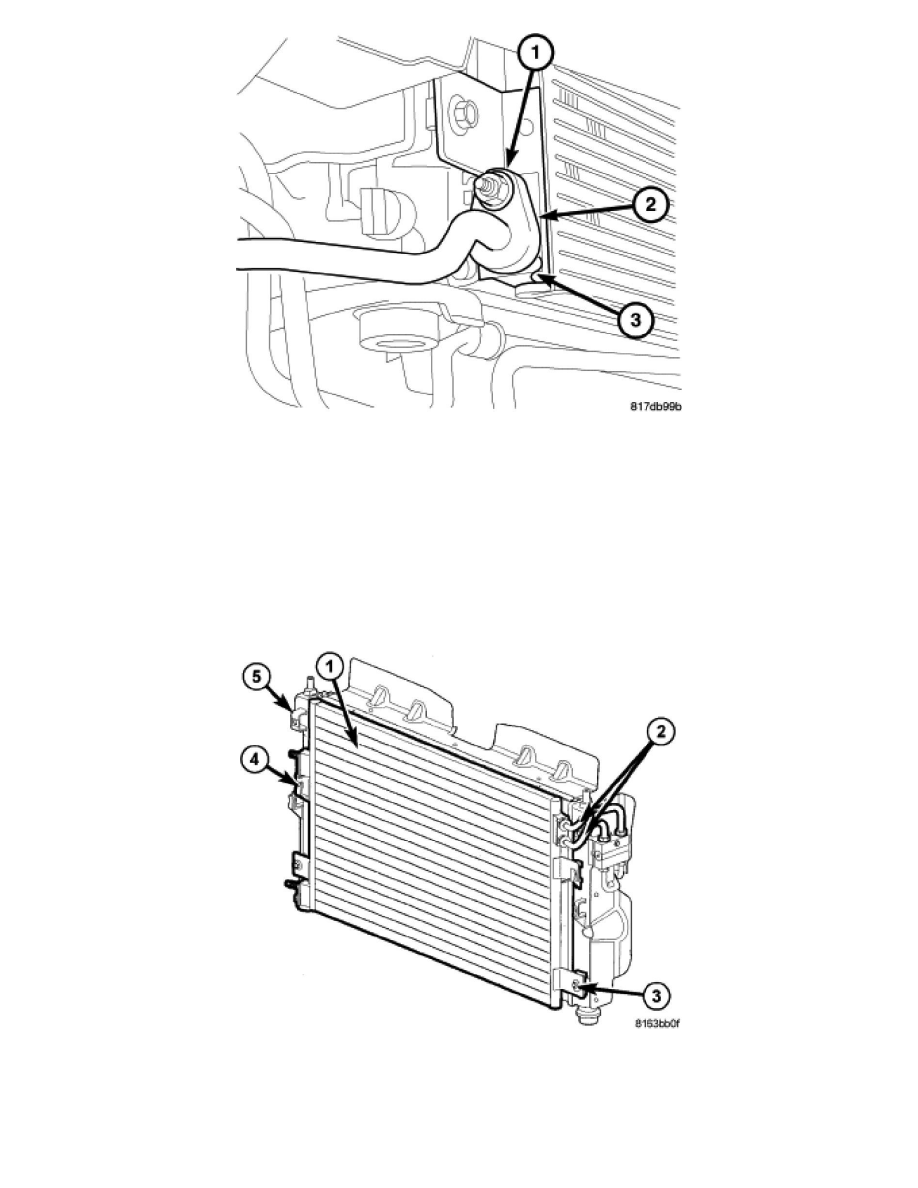
9. Remove the nut (1) that secures the A/C liquid line (2) to the right side of the A/C condenser (3).
10. Disconnect the A/C liquid line from the A/C condenser and remove and discard the O-ring seal and gasket.
11. Install plugs in, or tape over the opened liquid line fitting and the condenser outlet port.
NOTE: Illustration shown with front fascia removed for clarity.
12. Remove the two bolts (3) that secure the lower condenser brackets to the radiator (5).
13. Lower the vehicle.