
Sebring Sedan L4-2.4L (2007)
Brake Light Switch: Testing and Inspection
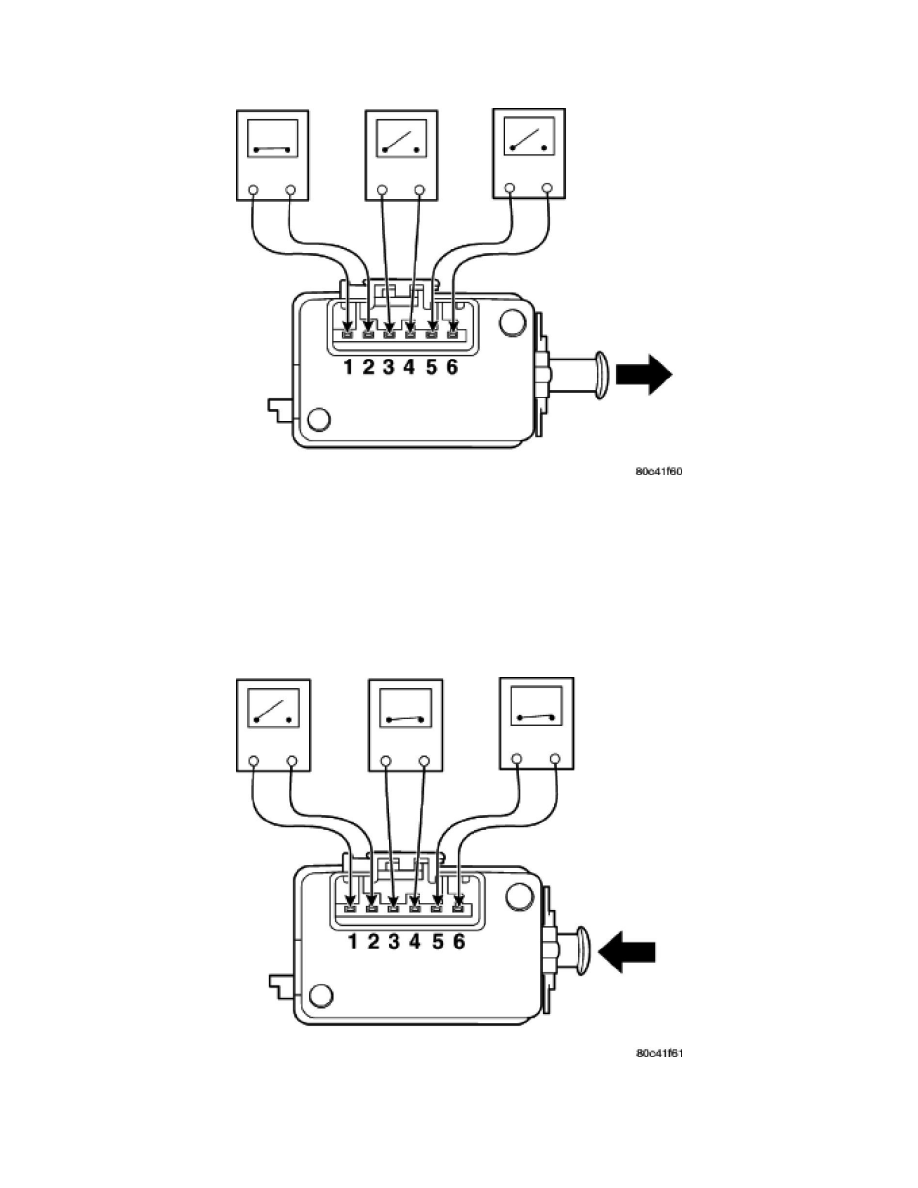
STOP LAMP SWITCH
NOTE: Before proceeding with this diagnostic test, verify the adjustment lever on the back of the switch is in the adjusted position. If the lever is in the
non-adjusted (diagonal) position it may have never been adjusted.
If the electrical circuit has been tested and the stop lamp switch is suspected of being damaged or inoperative, it can be tested using the following
method.
1. Remove the switch from the vehicle.
2. With the switch in the released position (plunger extended), use an ohmmeter to test each of the three internal switches as shown. You should
achieve the results as listed in the figure.
3. Gently push the plunger on the stop lamp switch in until it stops.
4. With the switch in this depressed position (plunger pushed in), use an ohmmeter to test each of the three internal switches as shown. You should
achieve the results as listed in the figure.