
Sebring Sedan L4-2.4L (2007)
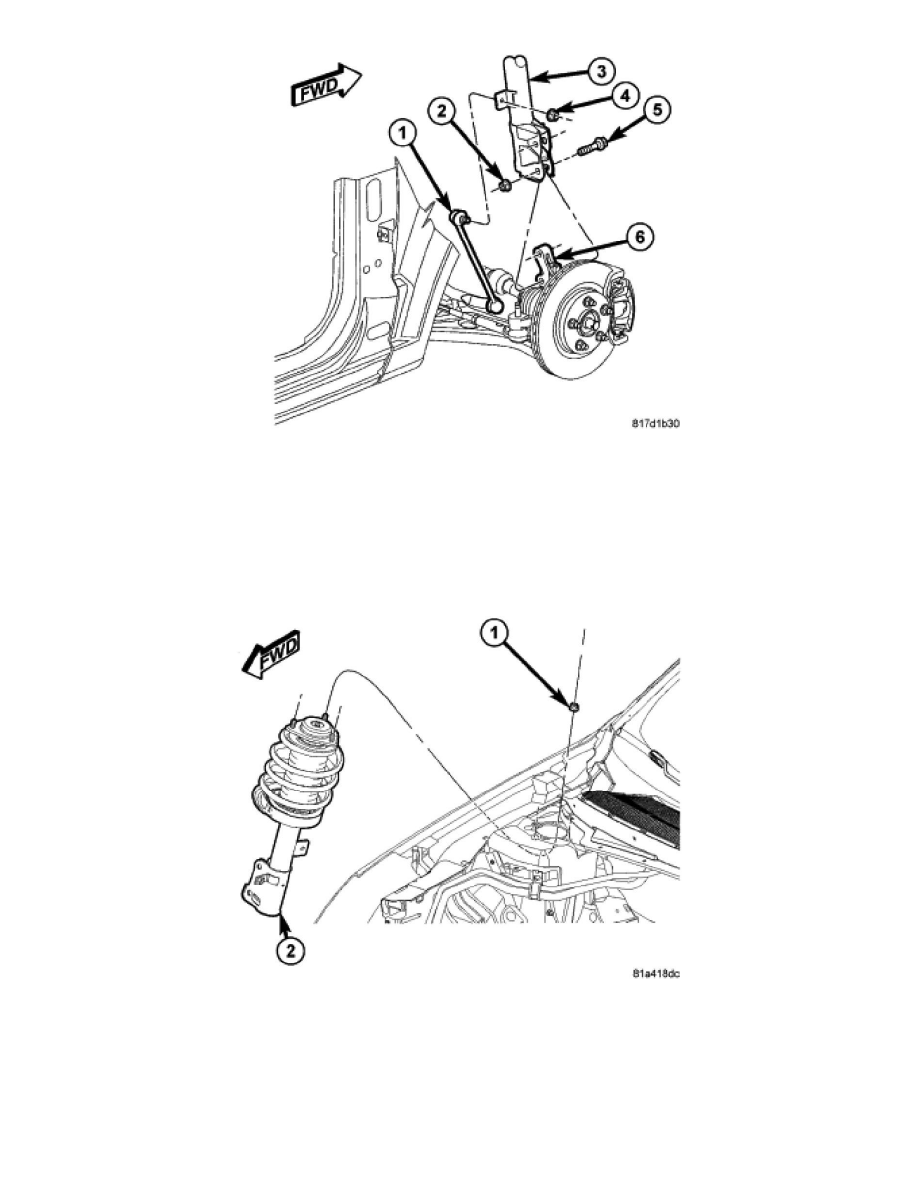
4. While holding the stabilizer bar link (1) stud stationary, remove the nut (4) securing the link to the strut (3).
CAUTION: The strut assembly-to-knuckle attaching bolts (5) are serrated and must not be turned during removal. Hold the bolts
stationary in the knuckle while removing the nuts, then tap the bolts out using a pin punch.
5. While holding the bolt heads stationary, remove the two nuts (2) from the bolts (5) attaching the strut (3) to the knuckle (6).
6. Remove the two bolts (5) attaching the strut (3) to the knuckle (6) using a pin punch.
7. Lower the vehicle just enough to open the hood without allowing the tires to touch the floor.
8. Remove the three nuts (1) attaching the strut assembly (2) upper mount to the strut tower.
9. Remove the strut assembly (2) from the vehicle.
10. For disassembly, Refer to FRONT SUSPENSION STRUT DISASSEMBLY.
Installation
INSTALLATION