
Sebring Sedan L4-2.4L (2007)
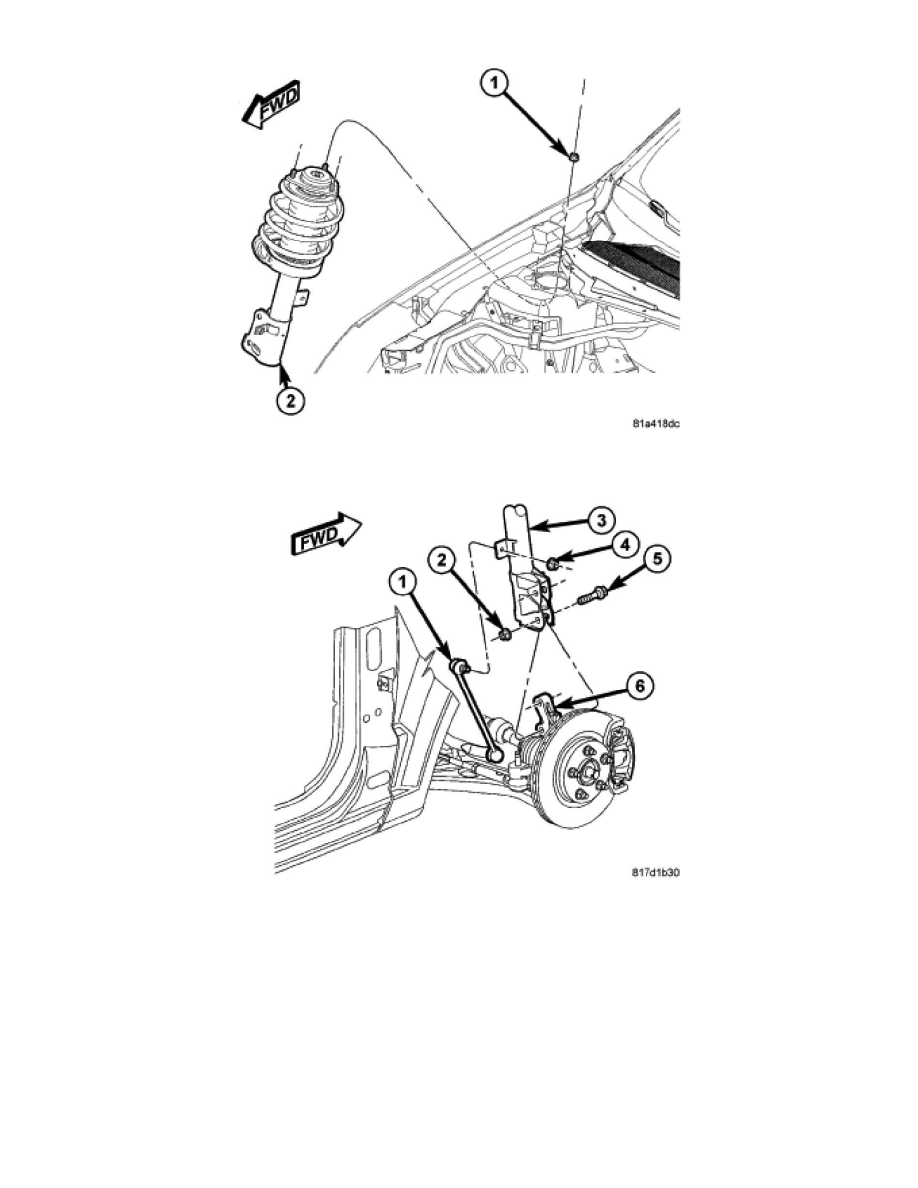
1. Raise the strut assembly (2) into the strut tower, aligning the three studs on the strut assembly upper mount with the holes in strut tower. Install the
three mounting nuts (1) on the studs. Tighten the three nuts to 48 Nm (35 ft. lbs.).
CAUTION: The strut clevis-to-knuckle bolts (5) are serrated and must not be turned during installation. Install the nuts while holding
the bolts stationary in the knuckle.
2. Position the lower end of the strut assembly (3) in line with the upper end of the knuckle (6), aligning the mounting holes. Install the two attaching
bolts (5). Install the nuts (2). While holding the bolts in place, tighten the nuts to 140 Nm (103 ft. lbs.).
3. Attach the stabilizer bar link (1) to the strut (3). Install and tighten the nut (4) while holding the stabilizer bar link stud stationary. Tighten the nut
to 58 Nm (43 ft. lbs.).