
Sebring Sedan L4-2.4L (2007)
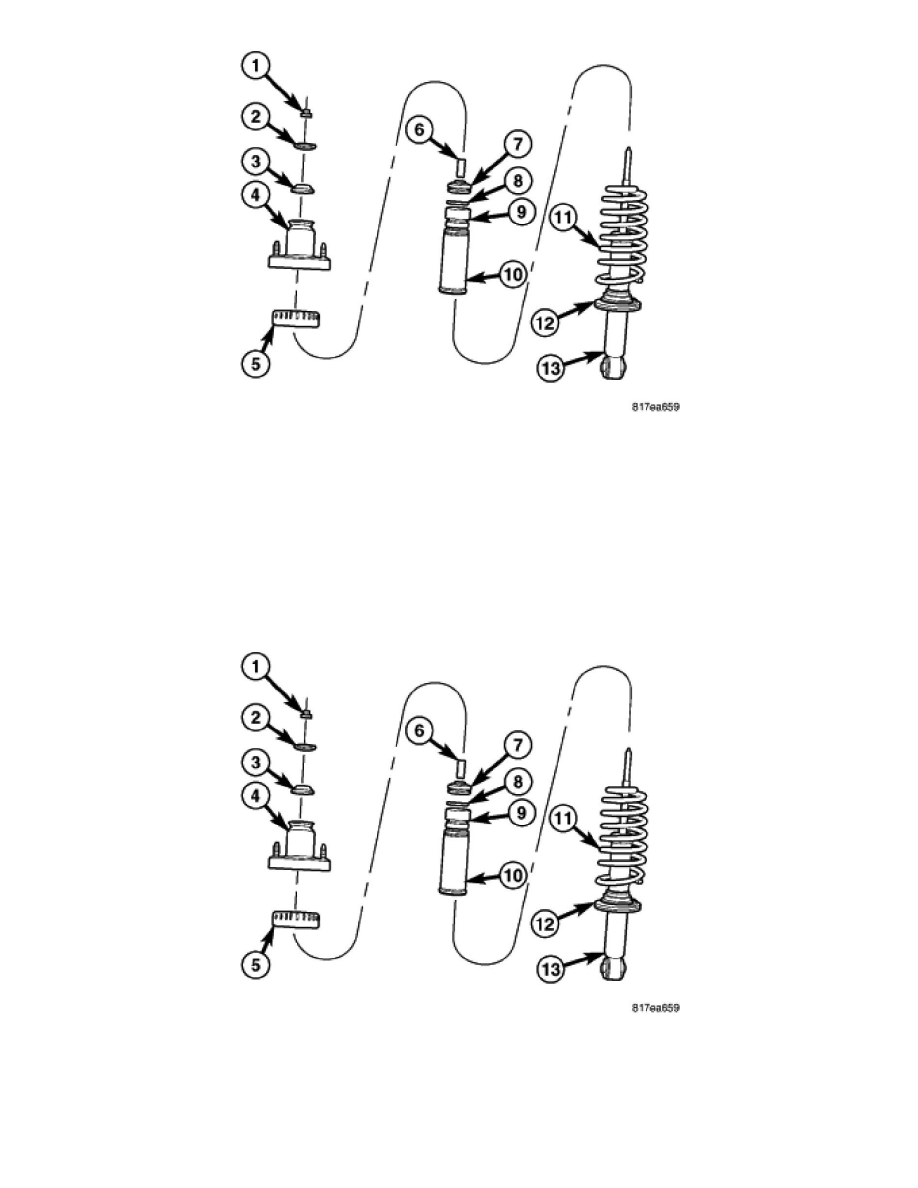
5. Remove the shock absorber (13) out through the bottom of the coil spring (11). The washer (8), jounce bumper (9), dust shield (10) and lower
spring isolator (12) will come out with the shock.
6. Slide the washer (8), jounce bumper (9), dust shield (10) from the shock rod.
7. Remove the lower spring isolator (12) from the shock spring seat.
8. Remove the upper mounting bracket (4), bushings (3, 7), sleeve (6) and upper spring isolator (5) from the top of the spring.
9. Remove the bushings (3, 7), sleeve (6) and upper spring isolator (5) from the upper mounting bracket (4).
NOTE: If the coil spring needs to be serviced, proceed with the next step, otherwise, proceed with STEP 11.
10. Release the tension from the coil spring by backing off the compressor drive completely. Push back the compressor hooks and remove the coil
spring.
11. Inspect the shock assembly components for the following and replace as necessary:
-
Inspect the shock (13) for shaft binding over the full stroke of the shaft.
-
Inspect the jounce bumper (9) for cracks and signs of deterioration.
-
Inspect the dust shield (10) for cracks and tears.
-
Check the upper mounting bracket (4) for cracks and distortion and its retaining studs for any sign of damage.
-
Inspect the upper (3) and lower (7) bushings, for material deterioration and signs of deterioration. Inspect the sleeve (6) for wear and