
Sebring Sedan L4-2.4L VIN J (2004)
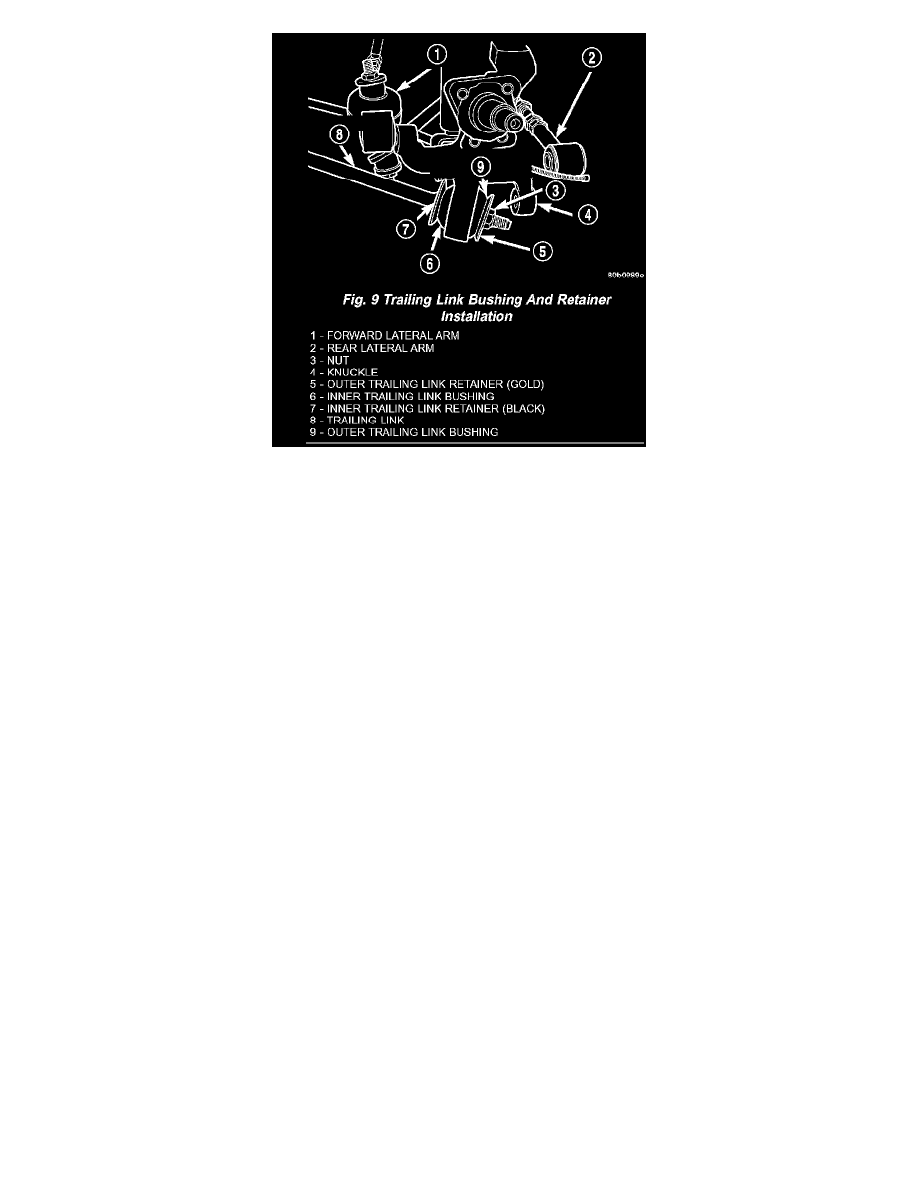
CAUTION: When installing trailing link bushing retainers, retainers must be installed with cupped side of retainer facing away from bushing and
knuckle (Fig. 9).
2. Install knuckle on trailing link. Install trailing link outer bushing, gold bushing retainer and retaining nut on trailing link (Fig. 9). Using a large
adjustable wrench, to keep trailing link from rotating, tighten trailing link retaining nut to 99 Nm (73 ft. lbs.) torque.
3. Install upper ball joint stud into knuckle. Install and tighten the ball joint stud nut to 27 Nm (20 ft. lbs.) torque.
4. Install front and rear lateral links and attaching nuts and bolts onto knuckle (Fig. 5). Tighten lateral links-to-knuckle attaching bolts and nuts to 108
Nm (80 ft. lbs.) torque.
5. Install rear drum brake assembly/disc brake adapter onto knuckle. Install four mounting bolts (Fig. 3) Tighten mounting bolts to 61 Nm (45 ft.
lbs.) torque.
6. If equipped with rear drum brakes, install parking brake cable into support plate and attach to parking brake actuating lever.
7. Install rear hub and bearing assembly on knuckle and install hub retaining nut. Tighten retaining nut to a torque of 250 Nm (185 ft. lbs.).
8. If equipped with rear disc brakes, install rotor and caliper.
9. If equipped with rear drum brakes, install brake drum and adjust brake shoes as necessary.
10. If equipped with ABS, install wheel speed sensor head (Fig. 10). Tighten speed sensor head mounting bolt to 7 Nm (60 inch lbs.) torque.
11. If equipped with ABS, attach routing bracket for wheel speed sensor cable to brake flex hose bracket and securely tighten attaching bolt (Fig. 1).
12. Install wheel and tire assembly on vehicle. Install wheel mounting (lug) nuts and progressively tighten nuts in crisscross sequence to 135 Nm (100
ft. lbs.) torque.
13. Lower vehicle.
14. Check and reset rear wheel alignment to specifications as required.