
Sebring Sedan L4-2.4L VIN X (2001)
Crankshaft: Removal and Replacement
REMOVAL
NOTE: Crankshaft can not be removed when engine is in vehicle.
1. Remove engine assembly from vehicle.
2. Separate engine from transaxle.
3. Remove flex plate and crankshaft rear oil seal.
4. Mount engine on a repair stand.
5. Drain engine oil and remove oil filter.
6. Remove the oil pan.
7. Remove the timing belt covers.
8. Remove the timing belt.
9. Remove the oil pump.
10. Remove balance shafts and housing assembly.
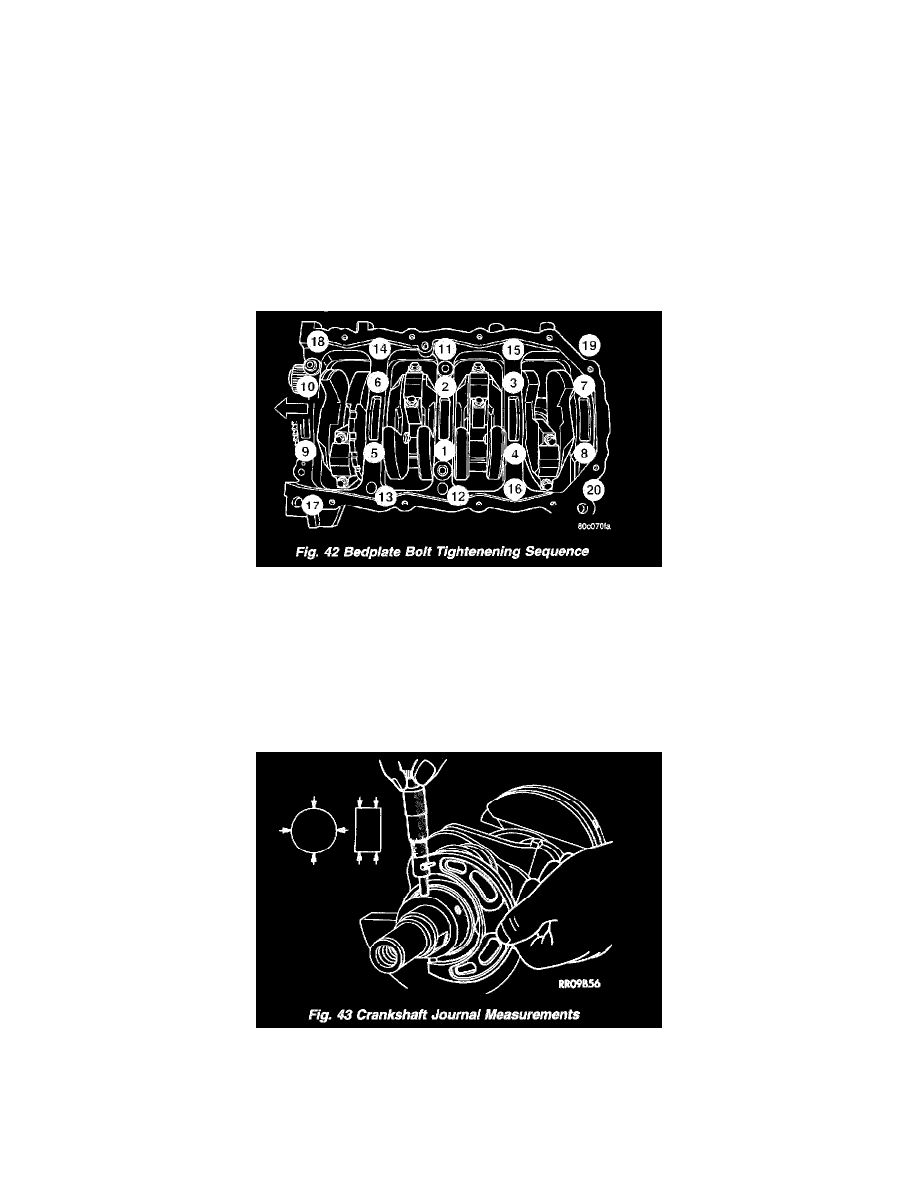
11. Remove all bedplate bolts from the engine block (Fig. 42).
12. Using a mallet gently tap the bedplate loose from the engine block dowel pins.
CAUTION: Do not pry up on one side of the bedplate. Damage may occur to cylinder block to bedplate alignment and thrust bearing.
13. Bedplate should be removed evenly from the cylinder block dowel pins to prevent damage to the dowel pins and thrust bearing.
14. Lift out crankshaft from cylinder block. Do not damage the main bearings or journals when removing the crankshaft.
INSPECTION
The crankshaft journals should be checked for excessive wear, taper and scoring (Fig. 43). Limits of taper or out of round on any crankshaft journals
should be held to 0.025 mm (0.001 inch). Journal grinding should not exceed 0.305 mm (0.012 inch) under the standard journal diameter. DO
NOT grind thrust faces of No. 3 main bearing. DO NOT nick crank pin or bearing fillets. After grinding, remove rough edges from crankshaft oil
holes and clean out all passages.
CAUTION: With the nodular cast iron crankshafts, it is important that the final paper or cloth polish be in the same direction as normal rotation in