
Sebring Sedan L4-2.4L VIN X (2001)
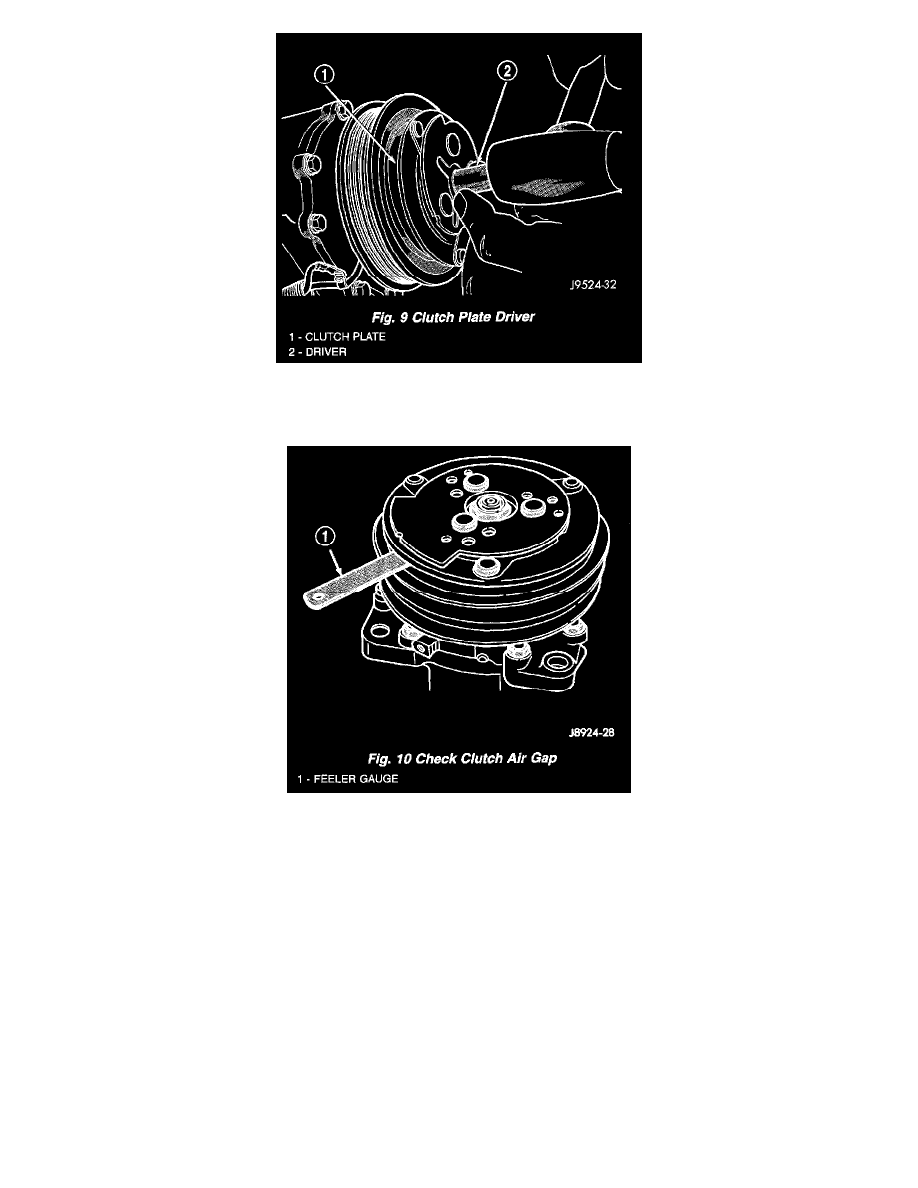
Fig.9 Clutch Plate Driver
7. Install clutch plate with Driver C-6463. Install the shaft nut and tighten to 14.4 Nm (10.5 ft. lbs.).
Fig.10 Check Clutch Air Gap
8. Check clutch air gap with a feeler gauge. If air gap does not meet specification 0.41 - 0.79 mm (0.016 - 0.031 in.) add or subtract shims as
required.
NOTE:
-
If air gap is not consistent around the clutch, lightly pry up at the minimum variations and lightly tap down at the maximum variation point.
-
When installing a new clutch onto a compressor that previously did not have a clutch, use the shims 1.0, 0.50, and 0.13 mm (0.040, 0.020,
and 0.005 in.) provided with the new clutch.
9. Position compressor on the mounting bracket and install bolts. Tighten bolts to 41 Nm (30 ft. lbs.).
10. Plug in compressor clutch harness.
11. Install serpintine drive belt.
12. Install Negative battery cable.
13. Start engine, set system to A/C mode, run engine at 1500-2000 rpm, and blower speed on high. Cycle the new A/C clutch 20 times (5 seconds ON
and 5 seconds OFF).
NOTE: This procedure will seat (burnishing) friction surfaces and provide a higher clutch torque capability. This is only necessary on a NEW
clutch.