
Sebring Sedan L4-2.4L VIN X (2001)
Brake Light Switch: Adjustments
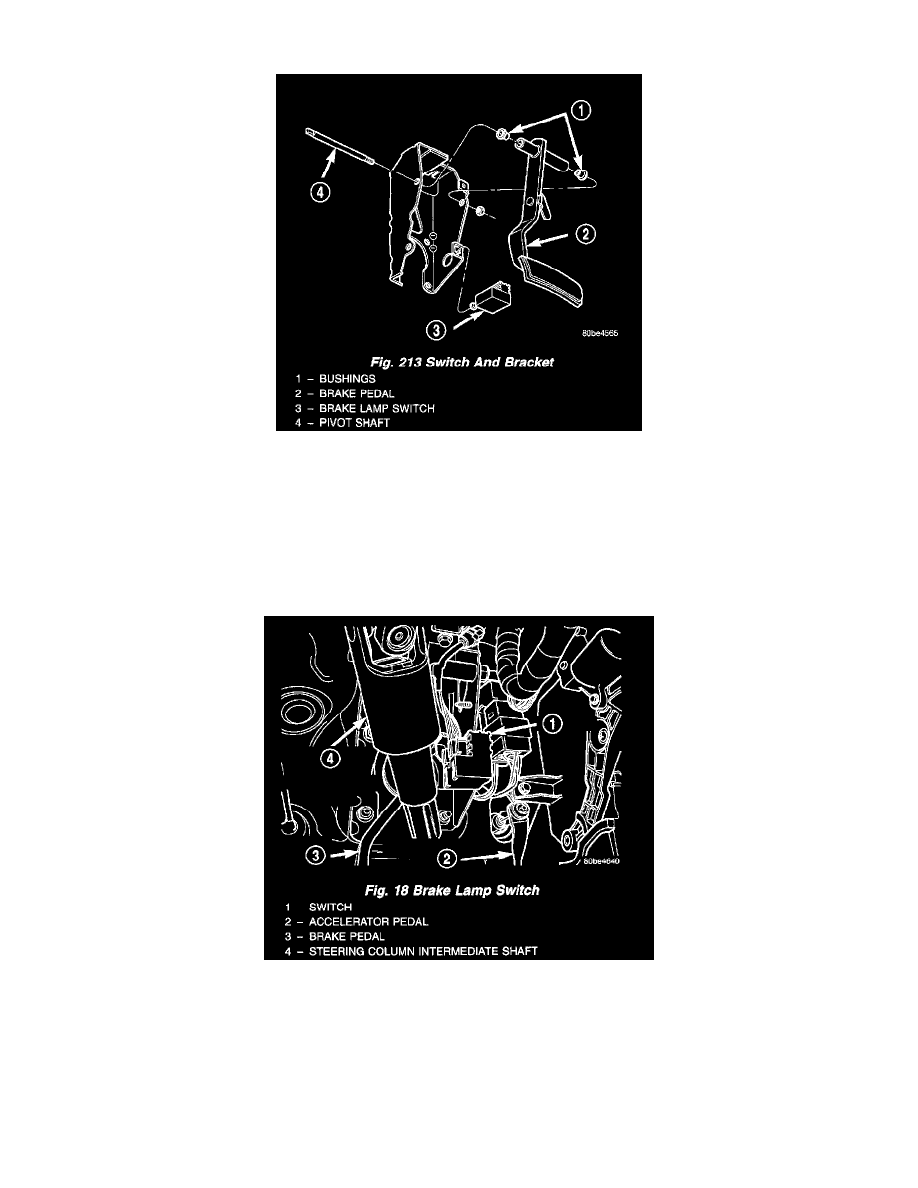
1. Remove the brake lamp switch from its bracket. The brake lamp switch is removed by depressing and holding the brake pedal while rotating brake
lamp switch in a counter-clockwise direction approximately 30 degrees. Pull the switch rearward and remove it from its mounting bracket.
2. Disconnect the wiring harness connector from the switch if necessary.
3. Hold the brake lamp switch firmly in one hand. Using the other hand, pull outward on the plunger of the switch until it has ratcheted out to its fully
extended position.
4. Connect the wiring harness connector to the brake lamp switch if previously disconnected.
5. Install the brake lamp switch in the brake pedal bracket. Install it using the following procedure:
-
Depress the brake pedal as far down as possible.
-
Install the switch in its bracket by aligning the index tab on the switch with the slot in the mounting bracket.
-
When the switch is fully seated in its bracket, rotate the switch clockwise approximately 30 ° to lock the switch into place. It should be aligned
straight up and down.
CAUTION: Do not use excessive force when pulling back on the brake pedal to adjust the brake lamp switch. If too much force is used, the
switch or striker can be damaged.
6. Gently release/pull back on the brake pedal until the pedal stops moving. This will ratchet the switch plunger backward to the correct adjustment
position.
7. Check the brake lamps to verify they are operating properly and not staying on when the pedal is in the released position.