Sebring Sedan L4-2.4L VIN X (2001)

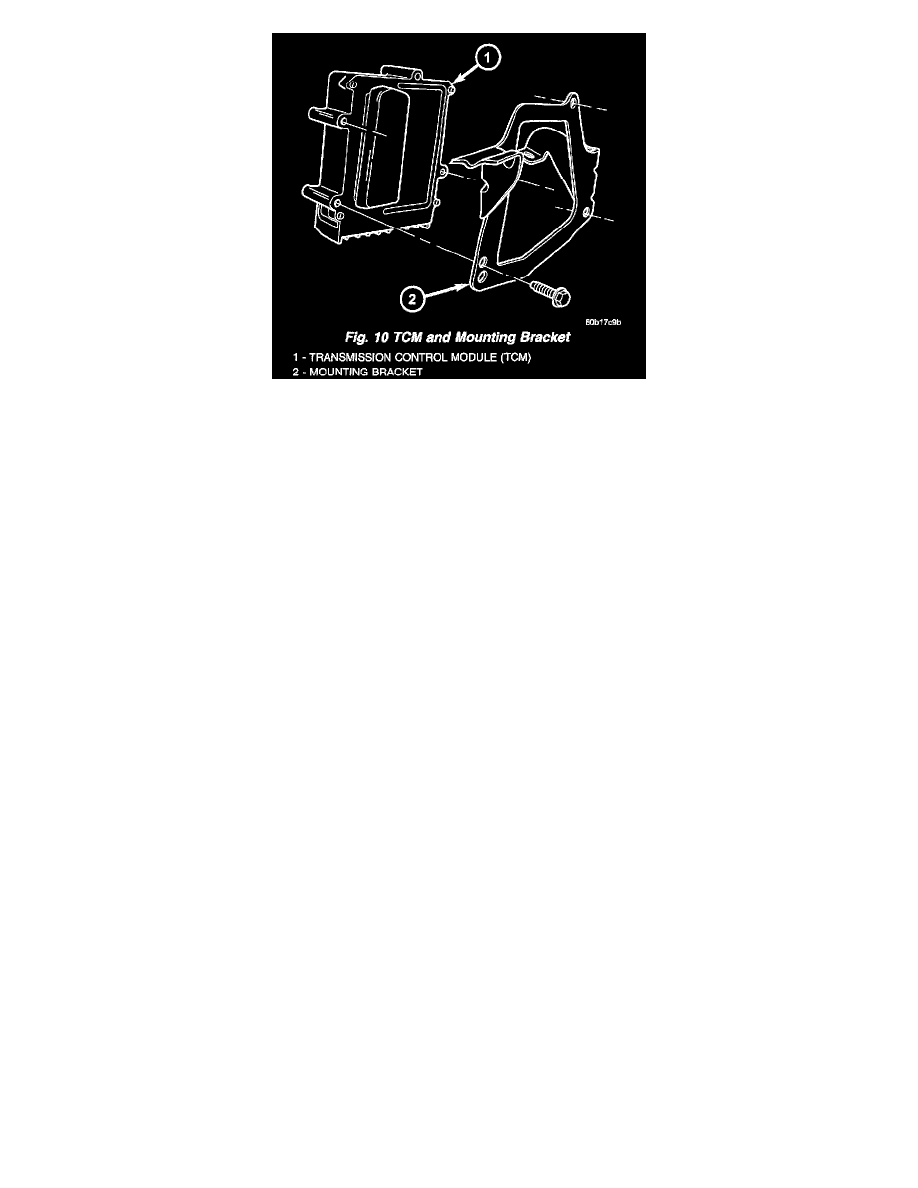
Fig.10 TCM And Mounting Bracket
7. Remove TCM mounting bracket from TCM (Fig. 10).
INSTALLATION
NOTE:
-
If transmission control module is being replaced with a new or replacement unit, the Pinion Factor and Quick Learn procedures must be
performed. (Refer to ELECTRONIC CONTROL MODULES/TRANSMISSION CONTROL MODULE - STANDARD PROCEDURE) (Refer to
ELECTRONIC CONTROL MODULES/TRANSMISSION CONTROL MODULE - STANDARD PROCEDURE)
-
If the TCM is being replaced and has recorded less than six hours of PEMCC operation, AND the vehicle has less than 6,035 km (3750 miles),
the Torque Converter Clutch (TCC) Break-In cycle must be restarted (Refer to ELECTRONIC CONTROL MODULES/TRANSMISSION
CONTROL MODULE - STANDARD PROCEDURE)
1. Install TCM mounting bracket to TCM (Fig. 10) and torque screws to 11 Nm (72 in. lbs.).
2. Install TCM 60-way connector and torque to 4 Nm (35 in. lbs.).
3. Install TCM(bracket into position (Fig. 9).
4. Install and torque TCM bracket-to-PDC bracket mounting screw to 5 Nm (40 in. lbs.).
5. Install air cleaner assembly into position.
6. Install and torque air cleaner-to-PCM stud nut to 5 Nm (40 in. lbs.).
7. Connect battery negative cable.
