Sebring Sedan L4-2.4L VIN X (2001)

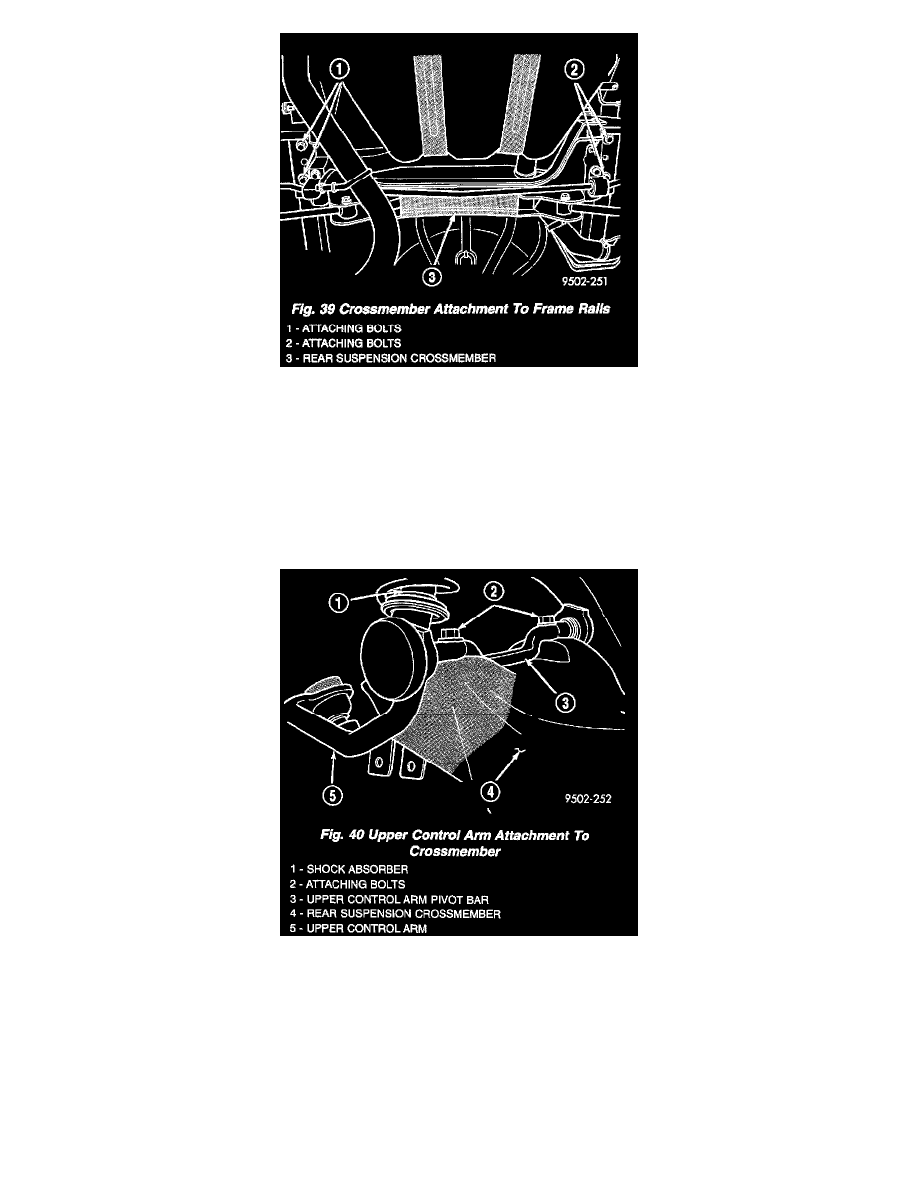
Fig. 39
9. Remove the 4 bolts attaching rear suspension crossmember to rear frame rails.
CAUTION: When lowering rear suspension crossmember do not put a strain on the rear brake flex hoses.
10. Lower the rear suspension crossmember far enough to access the upper control arm pivot bar to crossmember attaching bolts.
NOTE: One flat washer is used at each upper control arm pivot bar attaching bolt. The flat washer is located between the pivot bar and the rear
suspension crossmember. Be sure the washers are not lost when removing the pivot bar attaching bolts from the rear suspension crossmember.
Fig. 40
11. Remove the 2 bolts attaching the upper control arm to the rear suspension crossmember.
12. Remove the flat washers and the upper control arm from the rear suspension crossmember.
13. Transfer any required components to the replacement control arm.
DISASSEMBLY - UPPER BALL JOINT
The rear upper control arm must be removed from the vehicle for replacement of the ball joint.
