
Sebring Sedan V6-2.7L VIN R (2004)
in the ball joint.
CAUTION: Excessive wear in the ball joint can lead to a separation of the ball joint from the lower control arm.
CAUTION: The procedure must be carefully followed when replacing the ball joint seal in the event it is damaged while servicing a vehicle.
CAUTION: The ball joint used in the lower control arm of this vehicle is a lubricated for life ball joint. This ball joint does not required any
additional lubrication for the life of the vehicle. Do not alter the lower control arm or ball joint in an attempt to lubricate the lower control arm ball
joint. If it is determined that the ball joint is lacking proper lubrication, the lower control arm will need to be replaced.
CAUTION: When replacing ball joint seal, do not use any other type of grease to lubricate ball joint other than the lubricant provided in the Mopar
Ball Joint Seal service kit.
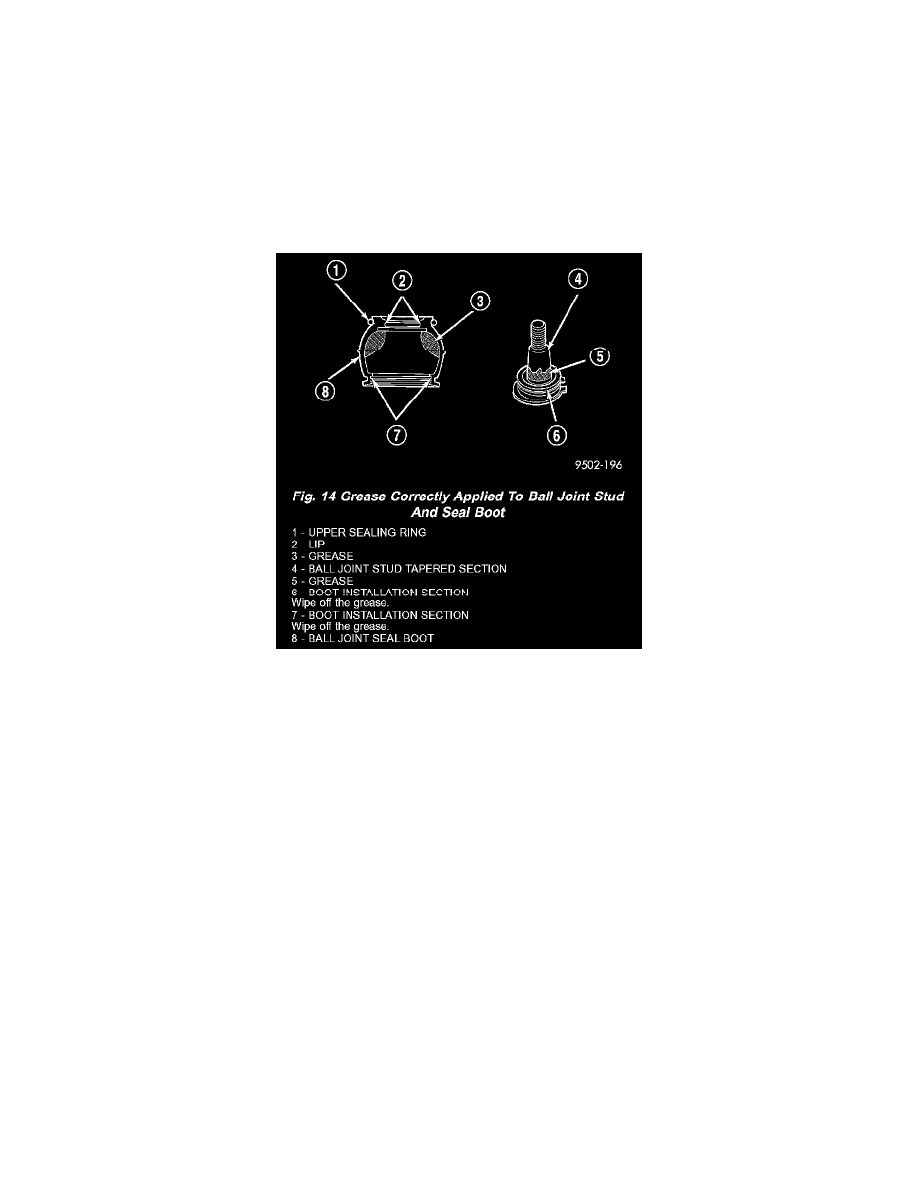
1. Apply grease from the ball joint seal kit, to the specified areas of the ball joint stud and seal (Fig. 14). Be sure no grease is present on the seal boot
installation section of the seal boot or lower control arm (Fig. 14).
2. Slide ball joint seal boot with upper seal ring installed, (Fig. 14) down tapered section of ball joint stud (Fig. 14). Seal boot is to be installed on
stud of ball joint until seal boot is sitting on seal groove in lower control arm.
3. Carefully position ball joint seal boot in seal retaining groove on lower control arm. After installing seal boot in retaining groove, carefully bleed
air out of sealing boot without getting grease pushed into seal boot retaining groove in lower control arm.